79
Repair instructions
3
Clean and check the bearing seat, bearing cap,
bearing journal and bearing shells for damage. If
the bearing shells have seized, the reason must be
investigated before new bearing shells are installed.
If wear is heavy, or if you suspect that ovality could
be excessive, the crankshaft must be removed for
measurement if you do not have access to crank-
shaft measuring equipment.
4
Check that you have obtained the correct bearing di-
mension when you replace the bearing shells.
NOTE!
If you are at all uncertain, check “Specifica-
tions” in the workshop manual to see the overdimen-
sions which can occur.
5
Oil the bearing journals and the new bearing shells.
7
Change the other main bearing shells, one at a time,
in the same way as the first one. After you have
changed each main bearing, check that the crank-
shaft turns easily, by cranking the shaft.
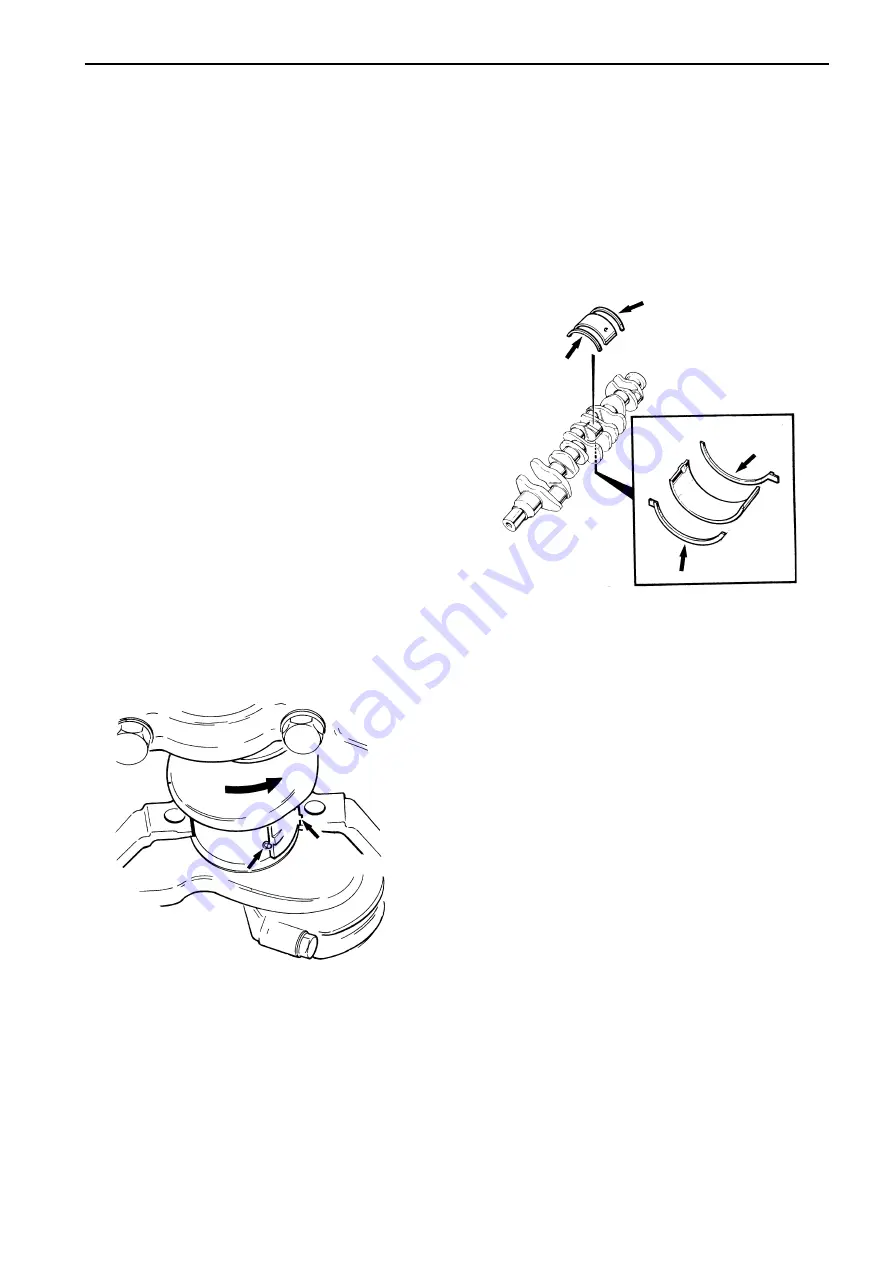
The upper bearing shell is installed by turning the
crankcase the
opposite way to the normal direc-
tion of rotation
, with the pin in the hole. Check that
the pressed out heel in the bearing shell engages
correctly in the cutout in the bearing seat. Remove
the pin from the oil hole and install the cap with a
new bearing shell.
Torque the screws to
150 ± 10 Nm (15 ± 1.0 kpm)
.
6
The thrust bearing for the crankshaft is located in
milled grooves in the centre main bearing position.
Check the end float of the crankshaft and replace the
thrust washers if the end float is excessive or if the
washers are damaged. Thrust washers are available
in a large number of overdimensions, please refer to
“Technical data” in the workshop manual.
The end float must not exceed 0.40 mm.
NOTE!
When selecting thrust washers, make sure
that the
end float is at least 0.16 mm
.
8
Содержание TAMD61A
Страница 2: ......
Страница 86: ...84 References to Service Bulletins Group No Date Concerning ...
Страница 88: ...7735718 4 English 08 1996 ...


