55
MP-L201
| Version 1
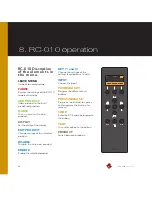
8. RC-010 operation
8 .
RC-010
operation
Layout 1
Layout 2
Screen layout for sub-menu: EDIT
PRODUCT .
1
.
The device that you are
editing now .
2
.
Disable or enable the
product . When you disable a
product it will not be available
when you scroll through the list
of devices with button 2, item
1 on the screen
3
.
Set the input in the
predefined list under button 1,
item 5, to the right number .
4
.
Set the input in the
predefined list under button 3,
item 7, to the right number .
1
2
DISABLE
KEY 1 : INPUT 1
KEY 3 : INPUT 2
PRODUCT
MP-T201
INPUT 2
1
2
8
3
4
5
6
7
Screen layout for sub-menus: LEAVE,
FABRIK, ADD PRODUCT and DISPLAY .
1
.
The product that you are
editing now
2
.
The sub-menu item that you
can enter by pressing button 6 .
The screen layout for the
sub-menu: EDIT PRODUCT .
5
.
Set hotkey 1 (button 1) to a
product that you can choose
from in the predefined list . The
predefined list of products is
installed standard on the RC-
010 . Scroll through this list with
button 1 . Change the product
that you want to edit . Scroll
through the list of products
with button 2 .
7
.
Set hotkey 2 (button 3) to a
product that you can choose
from in the predefined list . The
predefined list of products is
installed standard on the RC-
010 . Scroll through this list with
button 3 .
8
.
Selection indicator .
Indicates which item on the
display you have selected .
Содержание MP-L201
Страница 1: ...MP L201 Owner s Manual ...
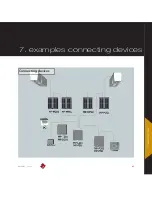
Страница 47: ...47 MP L201 Version 1 7 examples connecting devices 7 examples Connecting devices ...
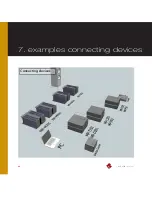
Страница 48: ...48 MP L201 Version 1 7 examples connecting devices Connecting devices ...
Страница 76: ...76 MP L201 Version 1 9 pictures MP L201 Inside view MP L201 Inside view ...
Страница 77: ...77 MP L201 Version 1 9 pictures MP PSU Inside view MP PSU Inside view 9 pictures ...
Страница 78: ...78 MP L201 Version 1 9 pictures MP L201 Front MP L201 Front view ...
Страница 79: ...79 MP L201 Version 1 9 pictures 9 pictures RC 010 Front RC 010 Front view ...


