43
MP-L201
| Version 1
7. examples operation
7 .
examples
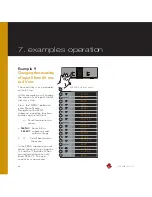
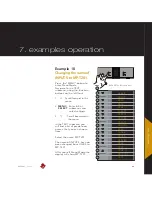
Example 10
Changing the name of
INPUT 5 to MP-T201.
Press the“MENU”button to
enter Menu Mode .
Navigate to the TEXT
submenu, using the function
buttons on the left front
1 .
Scroll forward in the
menu .
2 .
MENU/
Enter & Exit
SELECT
submenus and
selectsettings .
3 .
Scroll backward in
the menu .
In the TEXT submenu you
will find a list of predefined
names, that you can choose
from .
Select the name MP-T201 .
The name of INPUT 5 has now
been changed from LINE 5 to
MP-T201 .
After you left Menu Mode the
display will show MP-T201 .
MP-L201 Left front panel .
INPUT
MENU
SELECT
MUTE
M P - L
+
INPUT
+
STANDBY
POWER
Figure 12 Example 6 RP-101
LEAVE
SETUP
BACK
DATA
RESET
V.INIT
BRIGHT
FILTER
INPUTS
INPUT
BACK
PHASE
FIXED
OFFSET
SENS
TEXT
LINE
MP-T O
TEXT
SELECT
SELECT
SELECT
SELECT
MENU
Содержание MP-L201
Страница 1: ...MP L201 Owner s Manual ...
Страница 47: ...47 MP L201 Version 1 7 examples connecting devices 7 examples Connecting devices ...
Страница 48: ...48 MP L201 Version 1 7 examples connecting devices Connecting devices ...
Страница 76: ...76 MP L201 Version 1 9 pictures MP L201 Inside view MP L201 Inside view ...
Страница 77: ...77 MP L201 Version 1 9 pictures MP PSU Inside view MP PSU Inside view 9 pictures ...
Страница 78: ...78 MP L201 Version 1 9 pictures MP L201 Front MP L201 Front view ...
Страница 79: ...79 MP L201 Version 1 9 pictures 9 pictures RC 010 Front RC 010 Front view ...


