VTouch-Plus Configuration Tool
User Guide
VITREA Smart Home Technologies | T: +972.3.5474746 | F: +972.3.5474738 | vitrea-sh.com |
Page
6
of
27
Floating or Flush Mount Installation
VTouch Plus keypad installation can be either flush-mount or floating. In both installations, a
background blue light further enhances the aesthetic design of the product as well as serving a
functional purpose of illuminating the keypad in the dark.
For a floating installation, do the following:
1.
Place the keypad into the wall mounting box.
2.
Use two screws to fasten the keypad in place.
3.
Attach the glass panel to the keypad.
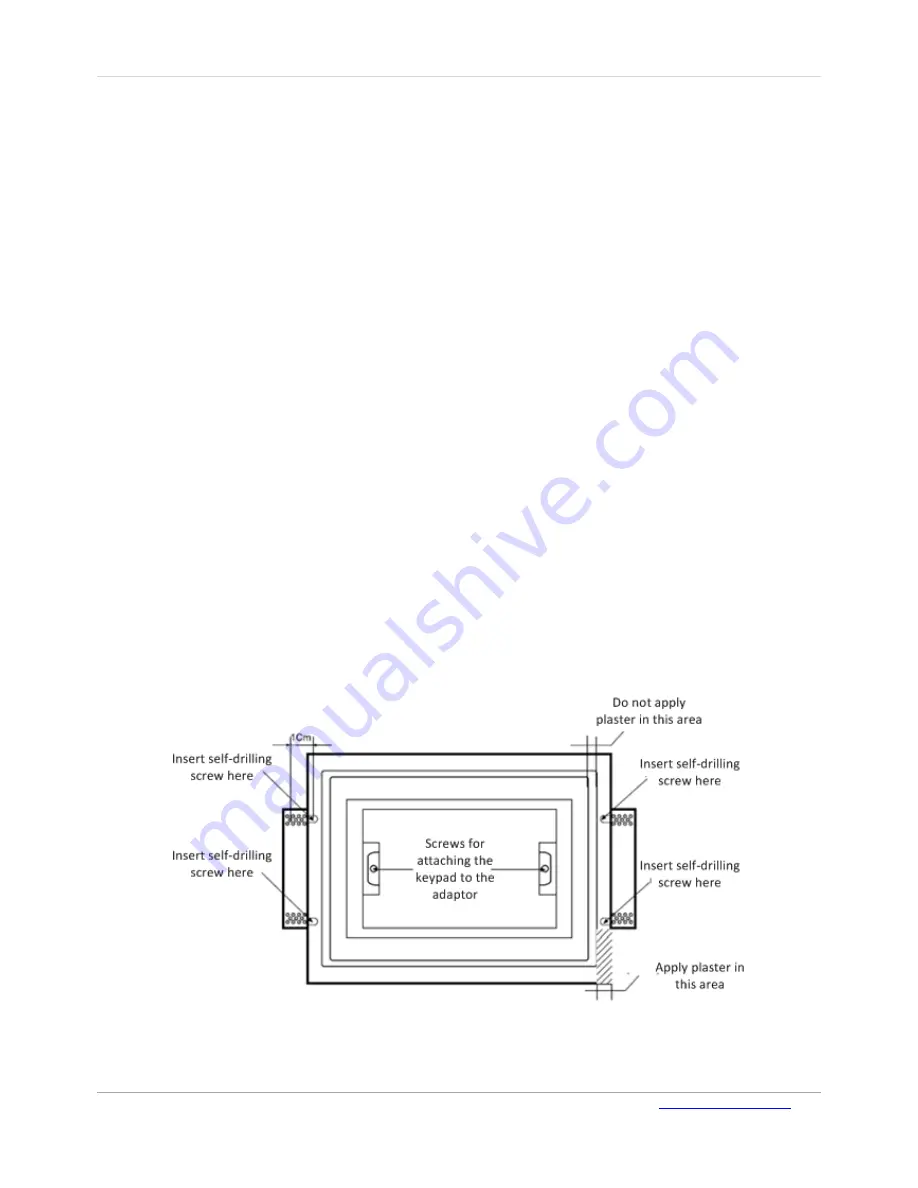
For a flush-mount installation of the keypad that creates a single smooth unit with the wall, use the
Vitrea adaptor for an easy plug & play installation. The glass panel is installed flush with the wall,
with a 1 mm line between the wall and the glass.
Caution
: The adaptor is made from strong, quality Gypsum material. Handle it carefully to prevent
chips to its corners and sides. Read the safety instructions carefully before installing.
To install the adaptor for a drywall installation:
1.
Turn off the electricity from the main fuse panel.
2.
Determine precisely where you want to install the VTouch keypad on the drywall.
3.
Use the attached diagram to mark the cutting lines of the rectangular area where the adaptor
will be inserted. Use a level to ensure that your lines are completely horizontal.
4.
Using a utility knife (x-Acto blade) and a metal ruler, cut the drywall according to your reference
marks.
5.
Insert the drywall adaptor into the opening in the wall and fasten it using the four included self-
drilling screws (two on each side). Use a level to position the adaptor as horizontally as possible.
Complete the installation process by plastering and painting the area around the adaptor.


