


ENVI Series: VTD-13FN / VTD-13VN / VTD-20VN
44
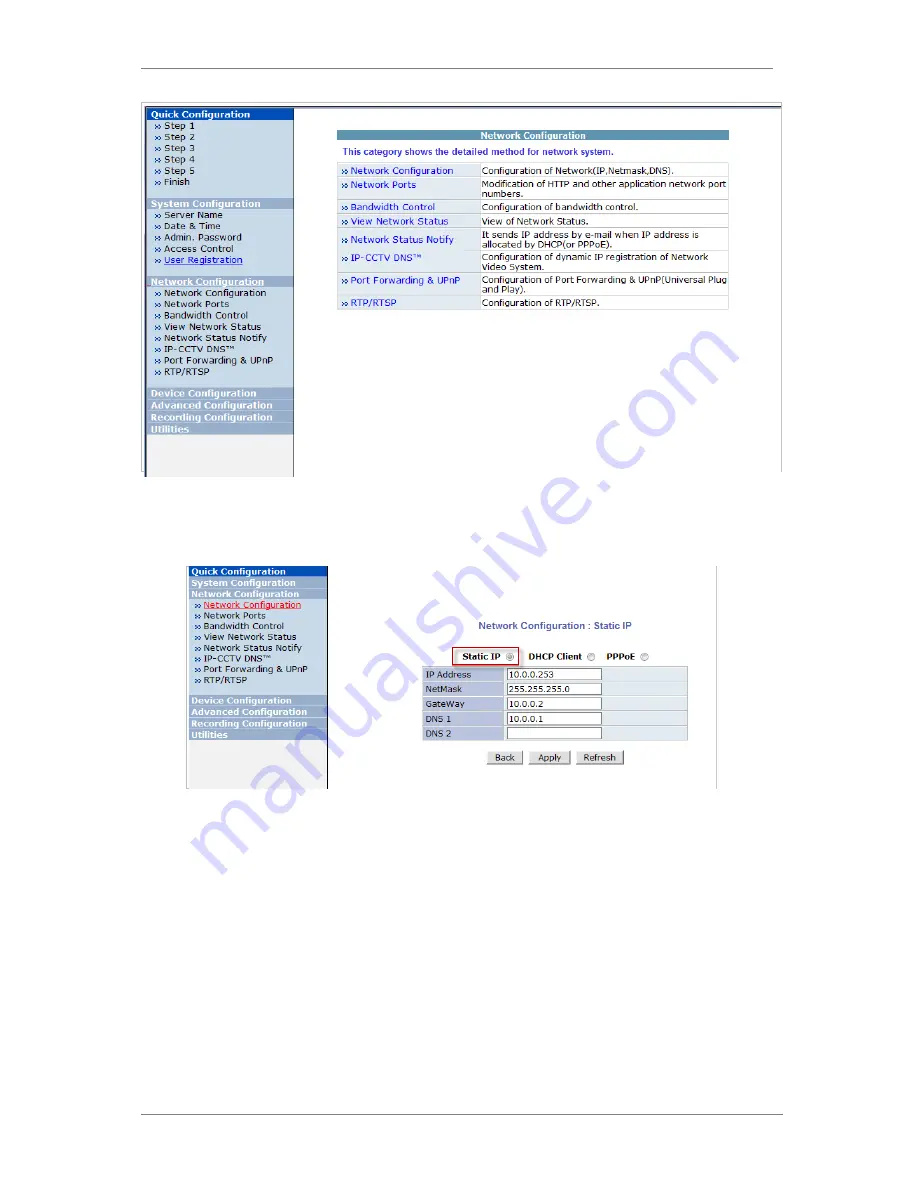
14.1.
Static IP Configuration
Select Network Configuration under Network configuration
For static IP, select Static IP and input IP address, NetMask, Gateway, DNS1, DNS2 and click
apply to save settings. After apply, program will ask to close web browser for updates, which will
take 20~30 seconds. If Back button is clicked all values will be discarded. If Refresh button is
clicked, the program will load previous values.
14.2.
DHCP ClientConfiguration
To use DHCP a DHCP server must exist in the network environment.Select DHCP Clientfrom
NetworkConfiguration, click Apply. And all information needed will be filled in automatically
Содержание VTD-13FN
Страница 23: ...ENVI Series VTD 13FN VTD 13VN VTD 20VN 22 Click on the Finish button to close the window...
Страница 123: ...ENVI Series VTD 13FN VTD 13VN VTD 20VN 122 Group Circulation Start sequencing between groups...
Страница 126: ...ENVI Series VTD 13FN VTD 13VN VTD 20VN 125 Enhanced Draw Mode On Off Enhance image for a better reproduction...
Страница 139: ...ENVI Series VTD 13FN VTD 13VN VTD 20VN 138...


