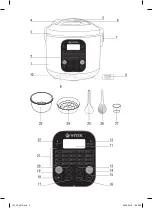
background image

6

 ENGLISH

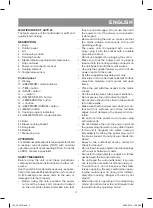
1. Unit connection (standby mode)

After  connecting  the  multicooker  to  the  mains 
you will hear a short sound signal and the sym-
bols «

8888

» will appear on the display (11).

The unit is switched to the 

standby mode

 and is 

ready for use. 

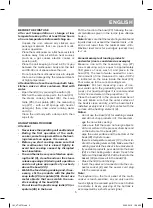
2. Selecting and starting the cooking 
program 

  In  the  standby  mode  press  the  «MENU»  button 
(20) and then use the «-» (15) and «+» (18) but-
tons  to  select  one  of  24  cooking  programs,  the 
cooking program indicators (21) will be lighting up 
alternately on the control panel (2), and the sym-
bols indicating default cooking time will appear on 
the display (11). After selecting the desired cook-

ing program press the «START» button (14), and 
the cooking process will start; the indicator of the 
corresponding  cooking  program  will  light  up  on 
the control panel (2) and the other cooking pro-
gram indicators will not; the countdown of the time 
remaining to the end of selected cooking program 
will be shown on the display (11). 

Note:


To select the cooking program quicker, press 
and hold the «-» (15) and «+» (18) buttons.


If  no  button  is  pressed  after  selecting  the 
required program, after some time (~2 min-
utes)  you  will  hear  a  short  sound  signal  and 
the unit will switch back to 

the standby mode


and will be ready for selecting a new cooking 
program.

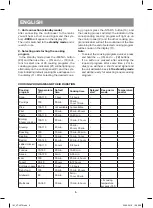
COOKING PROGRAMS AND THEIR DURATION

Cooking 
program

Temperature 
(°С)

Default 
time

Cooking time

Delayed 
start

Keep warm 
mode

Temperature 
control

Soup

100-110

1 hour

1-4 hours

+

+

-

Porridge

100

20 min.

20 min.-  
1 hour 10 min.

+

+

-

Rice

105-110 

not available  not available

+

+

-

Pilaf

110

30 min.

20 min-2 hours

+

+

-

Pasta

105-110 

20 min.

15-40 min.

+

+

-

Boiling/ 
Steam cooking

100-110 

20 min.

10 min.-2 hours

+

+

-

Stewing

100-110 

40 min.

30 min.-  
2 hours 30 min.

+

+

-

Roasting

150

10 min.

10 min.-45 min.

-

-

-

Heating

110

30 min.

15 min. 1 hour

+

-

-

Baking

130-140 

45 min.

40 min.-2 hours

-

+

-

Jellied minced 
meat

100-110 

4 hours

2-8 hours

-

-

-

Fondue

70-150

20 min.

15-40 min.

-

+

+

Sauce

118-120

5 min.

5-30 min.

-

+

-

Jam

100

30 min.

20 min.-4 hours

-

-

-

Yogurt

39-40

8 hours

6-12 hours

-

-

-

Cottage cheese 65-70

1 hour

1-5 hours

-

-

-

Baby food

105

30 min.

15 min. 2 hours

-

+

-

Gluhwein

90

50 min.

5 min.-  
1 hour 30 min.

-

+

-

Multicook

30-160 

30 min.

10 min.-6 hours

+

+ if cooking 
temperature 
e75°C

+

IM_VT-4270.indd   6

20.05.2016   15:06:38

Содержание VT-4270 W

Страница 1: ...1 VT 4270 W 3 10 18 26 34 Multicooker IM_VT 4270 indd 1 20 05 2016 15 06 38...

Страница 2: ...IM_VT 4270 indd 2 20 05 2016 15 06 38...

Страница 3: ...the socket with a reliable grounding contact Do not use adapters for plugging the unit in Make sure that the power cord is properly inserted into the corresponding connector on the unit body and into...

Страница 4: ...bled persons including children or by persons lacking experience or knowledge if they are not under supervision of a person who is responsible for their safety or if they are not instructed by this pe...

Страница 5: ...ng the rec ommendations given in the recipe see Recipe book Note Make sure that the level of ingredients and liquids does not exceed the maximal mark 1 8 and is not lower than the minimal mark 0 6 Max...

Страница 6: ...and hold the 15 and 18 buttons If no button is pressed after selecting the required program after some time 2 min utes you will hear a short sound signal and the unit will switch back to the standby...

Страница 7: ...r on the display 11 and after that the unit will be switched to the standby mode To switch the keep warm mode on press and hold the KEEP WARM CANCEL button 19 for more than 2 seconds the keep warm mod...

Страница 8: ...eep warm mode after the cooking is finished FONDUE PROGRAM The unit is intended to cook cheese fondue and fondue with broth or vegetable oil This program allows selecting heating temperature within th...

Страница 9: ...it and accessories STORAGE Unplug the unit and clean it Keep the unit away from children in a dry cool place DELIVERY SET Multicooker 1 pc Bowl 1 pc Steam cooking basket 1 pc Soup ladle 1 pc Spatula 1...

Страница 10: ...nicht gestattet das Ger t zu benutzen wenn das Netzkabel oder die Anschlussstelle des Netzkabels besch digt sind Vor dem Einschalten des Ger ts verge wissern Sie sich dass die Netzspannung und die Ge...

Страница 11: ...h lter gie en Sie Wasser in den Beh lter nach Bedarf zu Lassen Sie das Ger t nie unbeaufsichtigt Es ist nicht gestattet den Multikocher w h rend des Betriebs zu tragen Benutzen Sie den Tragegriff inde...

Страница 12: ...rtiert oder aufbewahrt wurde lassen Sie es bei der Raumlufttemperatur nicht weni ger als drei Stunden bleiben Nehmen Sie das Ger t aus der Verpackung heraus und entfernen Sie alle Verpackungsmateriali...

Страница 13: ...rs 23 vor der Nutzung tro cken im Zentrum des Heizelements 9 befin det sich der Temperatursensor 10 Achten Sie darauf dass die freie Bewegung des Temperatursensors nicht verhindert ist beim Dampfkoche...

Страница 14: ...5 C bersteigt 3 Abbrechen der gew hlten Funktion des Kochprogramms Dr cken Sie die TEMPERATURHALTUNG ABBRECHEN Taste 19 um die gew hlte Funktion abzubrechen und um das gew hlte Kochprogramm abzubreche...

Страница 15: ...T Taste 13 die Zeitangaben auf dem Bildschirm 11 beginnen dabei zu blinken Mittels der Tasten 15 und 18 k nnen Sie die Zubereitungszeit entsprechend den Angaben der Tabelle oben erh hen oder verringer...

Страница 16: ...um wenn die Zubereitungstemperatur niedriger als 75 C ist schaltet sich das Ger t nach der Beendigung der Zubereitung in den Betrieb der Temperaturhaltung nicht um FONDUE PROGRAMM Das Ger t ist f r d...

Страница 17: ...it einem weichen trockenen Tuch ab lassen Sie Wasser auf kei nen Fall ins Ger tegeh use gelangen Tauchen Sie nie das Ger tegeh use das Netzkabel und den Netzstecker ins Wasser oder andere Fl ssigkeite...

Страница 18: ...18 VT 4270 W 1 2 3 4 5 6 7 8 9 10 11 12 13 14 15 16 17 18 19 20 21 22 23 24 25 26 27 30 IM_VT 4270 indd 18 20 05 2016 15 06 40...

Страница 19: ...19 4 IM_VT 4270 indd 19 20 05 2016 15 06 40...

Страница 20: ...20 www vitek ru 23 9 23 25 26 23 23 23 20 30 40 3 4 23 24 25 26 27 3 6 23 IM_VT 4270 indd 20 20 05 2016 15 06 40...

Страница 21: ...21 25 26 23 25 26 23 1 8 0 6 1 4 27 160 23 CUP 23 4 CUP 1 3 23 9 23 23 23 9 10 23 24 24 23 3 8 1 11 8888 2 20 15 18 24 2 21 11 14 2 11 15 18 2 IM_VT 4270 indd 21 20 05 2016 15 06 40...

Страница 22: ...10 2 100 110 40 30 2 30 150 10 10 45 110 30 15 1 130 140 45 40 2 100 110 4 2 8 70 150 20 15 40 118 120 5 5 30 100 30 20 4 39 40 8 6 12 65 70 1 1 5 105 30 15 2 90 50 5 1 30 30 160 30 10 6 75 C 3 19 19...

Страница 23: ...23 5 12 11 0 00 24 75 C 24 19 2 12 11 8888 19 2 2 12 11 0 00 6 2 11 13 11 15 18 14 11 15 18 7 16 2 22 11 2 00 15 18 14 11 24 11 19 2 11 8888 8 25 26 IM_VT 4270 indd 23 20 05 2016 15 06 40...

Страница 24: ...24 30 C 160 C 10 6 20 15 18 11 100 17 13 2 17 11 15 18 13 11 0 30 15 18 17 13 14 75 C 75 C 70 150 70 80 1 10 23 23 IM_VT 4270 indd 24 20 05 2016 15 06 40...

Страница 25: ...25 7 3 6 3 1 3 23 1 1 1 1 1 1 1 220 240 50 60 900 5 3 38 7 1070 email anderproduct gmail com www vitek ru 7 495 921 01 70 IM_VT 4270 indd 25 20 05 2016 15 06 40...

Страница 26: ...26 VT 4270 W 1 2 3 4 5 6 7 8 9 10 11 12 13 14 15 16 17 18 19 20 21 22 23 24 25 26 27 30 IM_VT 4270 indd 26 20 05 2016 15 06 40...

Страница 27: ...27 4 www vitek ru IM_VT 4270 indd 27 20 05 2016 15 06 40...

Страница 28: ...28 23 9 23 25 26 23 23 23 20 30 40 4 3 23 24 25 26 27 3 6 23 25 26 IM_VT 4270 indd 28 20 05 2016 15 06 40...

Страница 29: ...29 23 25 26 23 1 8 0 6 1 4 27 160 23 CUP 23 4 CUP 1 3 23 9 23 23 23 9 10 24 23 24 23 3 8 1 11 8888 2 20 15 18 24 2 21 11 14 2 11 15 18 2 IM_VT 4270 indd 29 20 05 2016 15 06 41...

Страница 30: ...0 2 100 110 40 30 2 30 150 10 10 45 110 30 15 1 130 140 45 40 2 100 110 4 2 8 70 150 20 15 40 118 120 5 5 30 100 30 20 4 39 40 8 6 12 65 70 1 1 5 105 30 15 2 90 50 5 1 30 30 160 30 10 6 75 3 19 19 2 1...

Страница 31: ...31 11 0 00 24 75 C 24 19 2 12 11 8888 19 2 2 12 11 0 00 6 2 11 13 11 15 18 14 11 15 18 7 16 2 22 11 2 00 15 18 14 11 24 11 19 2 11 8888 8 25 26 30 C 160 C 10 6 IM_VT 4270 indd 31 20 05 2016 15 06 41...

Страница 32: ...32 20 15 18 11 100 17 13 2 17 11 15 18 13 11 0 30 15 18 17 13 14 75 C 75 C 70 150 70 80 1 10 23 23 IM_VT 4270 indd 32 20 05 2016 15 06 41...

Страница 33: ...33 7 3 6 3 1 3 23 1 1 1 1 1 1 1 220 240 50 60 900 5 3 i i i i i i i i i i i i IM_VT 4270 indd 33 20 05 2016 15 06 41...

Страница 34: ...34 VT 4270 W 1 2 3 4 5 6 7 8 9 10 11 12 13 14 15 16 17 18 19 20 21 22 23 24 25 26 27 30 IM_VT 4270 indd 34 20 05 2016 15 06 41...

Страница 35: ...35 4 i IM_VT 4270 indd 35 20 05 2016 15 06 41...

Страница 36: ...36 www vitek ru 23 9 23 25 26 23 23 23 20 30 40 3 4 23 24 25 26 27 3 6 23 IM_VT 4270 indd 36 20 05 2016 15 06 41...

Страница 37: ...37 25 26 23 25 26 23 1 8 0 6 1 4 27 160 23 CUP 23 4 CUP 1 3 23 9 23 23 23 9 10 23 24 24 23 3 8 1 11 8888 2 20 15 18 24 2 21 11 14 2 11 15 18 2 IM_VT 4270 indd 37 20 05 2016 15 06 41...

Страница 38: ...10 2 100 110 40 30 2 30 150 10 10 45 110 30 15 1 130 140 45 40 2 100 110 4 2 8 70 150 20 15 40 118 120 5 5 30 100 30 20 4 39 40 8 6 12 65 70 1 1 5 105 30 15 2 90 50 5 1 30 30 160 30 10 6 75 C 3 19 19...

Страница 39: ...39 5 12 11 00 00 24 75 C 24 19 2 12 11 8888 19 2 2 12 11 00 00 6 2 11 13 11 15 18 14 11 15 18 7 16 2 22 11 2 00 15 18 14 11 24 11 19 2 11 8888 8 25 26 IM_VT 4270 indd 39 20 05 2016 15 06 41...

Страница 40: ...40 30 C 160 C 10 6 20 15 18 11 100 17 13 2 17 11 15 18 13 11 0 30 15 18 17 13 14 2 75 C 75 C 70 150 70 80 1 10 23 23 IM_VT 4270 indd 40 20 05 2016 15 06 41...

Страница 41: ...41 7 3 6 3 1 3 23 1 1 1 1 1 1 1 220 240 50 60 900 5 3 2004 108 2006 95 IM_VT 4270 indd 41 20 05 2016 15 06 42...

Страница 42: ...manufactured in June the sixth month 2006 de Das Produktionsdatum ist in der Seriennummer auf dem Schild mit technischen Eigenschaften dargestellt Die Seriennummer stellt eine elfstellige Zahl dar di...

Отзывы: