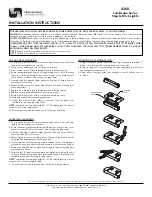
LAMP INSTALLATION/REPLACEMENT
1625 Surveyor Avenue • Simi Valley, CA 93063 • (805) 527-0987 • (800) 766-VISTA (8478)
FAX: (888) 670-VISTA (8478) • [email protected] • www.vistapro.com
Vista Professional Outdoor Lighting reserves the right to modify the design and/or construction of the fixture shown without further notification.
Step & Brick Lights
Landscape Series
4260
4260 03.13
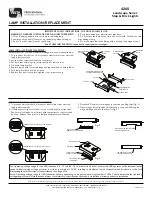
LAMP INSTALLATION/REPLACEMENT:
CAUTION:
Do not exceed maximum wattage marked on luminaire label.
1. To prevent electrical shock, disconnect transformer from electrical
supply before service.
2. Loosen cover screws and remove cover plate.
3. Pull back lens retaining clip just far enough to remove lens.
4. Tilt down lamp bracket.
5. Replace lamps with correct wattage and type marked on fixture label.
6. Push lamp bracket back into position.
4. Replace lens and cover plate; tighten cover screws evenly.
The operating voltage range for this LED luminaire is 6 - 15 volt AC. The Vista electronic driver ensures the LED operates at the intended lumen
output while receiving voltage as low as 6 volts, and as high as 15 VAC, resulting in a balanced lumen output from the first fixture to the last.
Eliminating the dimness issues often attributed to voltage drop.
Note: Operating voltage range for LED luminaries will vary depending on model, style and total number of LEDs. To help determine the operating
voltage range for each Vista luminaire, always consult factory’s specification sheet and/or installation instructions before installation.
LED ENGINE INSTALLATION/REPLACEMENT:
1. To prevent electrical shock, disconnect transformer from electrical
supply before service.
2. If tamper-proof clips are locked, loosen screws and slide clips open.
The fixture is shipped from factory with tamper-proof clips in locked
position. Release clips prior to installation/replacement if desired.
3. Detach LED engine from magnet in chassis by pulling tabs (Fig. 1).
4. Observing correct alignment & orientation, snap new LED engine
magnetically back in to the chassis (Fig. 2).
WARNING: TO REDUCE THE RISK OF FIRE, OR INJURY TO PERSONS:
1. Turn off/unplug and allow to cool before replacing lamp.
2. Lamps get hot quickly! Contact only switch/plug when turning on.
3. Do not touch hot lens, guard or enclosure.
4. Keep lamp away from material that may burn.
5. Do not touch the lamp at any time. Use a soft cloth. Oil from the skin
may damage lamp.
6. Do not operate luminaire fitting with a missing or damaged cover.
IMPORTANT SAFETY INSTRUCTIONS - THE LIGHTED LAMP IS HOT!
SAVE THESE INSTRUCTIONS (Leave with property owner/manager)
FRONT COVER
TUFFAK® LENS
LENS RETAINING
FLEXIBLE CLIP
BACK COVER
TILT-DOWN LAMP BRACKET
FOR EASY LAMP REMOVAL
SS CHASIS
MOUNTING
PLATE
WEATHER-TIGHT
GASKET
WEATHER-TIGHT
GASKET
MOUNTING
PLATE
MISALIGNED LED ENGINE VISIBLE
WRONG INSTALLATION
LED ENGINE NOT VISIBLE
CORRECT INSTALLATION
TAMPER-PROOF CLIPS IN LOCKED POSITION
TAMPER-PROOF CLIPS IN UNLOCKED POSITION
FIELD REPLACEABLE
LED ENGINE
GUIDE TO ENSURE
CORRECT ORIENTATION
MOUNTING PLATE
FIXTURE BODY
TABS FOR EASY
REMOVAL OF LED ENGINE
Fig. 1
Fig. 2


