


4. PROGRAMMING
16
D-305735 PowerMaster 360 Installer's Guide
To change your Master Installer or Installer Codes proceed as follows:
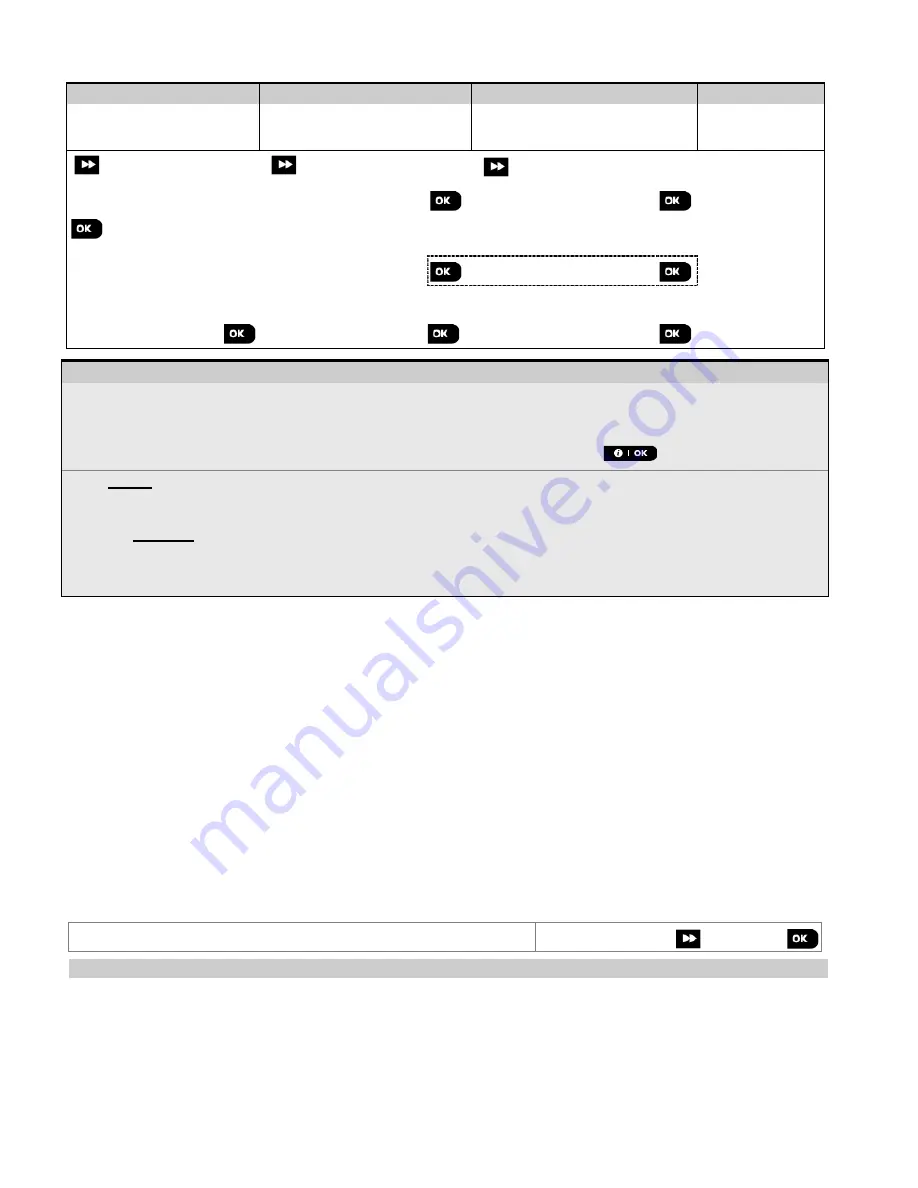
Step 1
Step 2
Step 3
Step 4
Select "01:INSTALL
CODES" Option
[1]
Select
Master
Installer,
Installer
code or
Guard
code
[2]
Enter NEW
Master
Installer,
Installer
code or
Guard
code
[3]
INSTALLER MODE
NEW MASTER CODE
MASTER CODE
999
to step 2
to step 2
ENTER CODE:
or
or
NEW INST. CODE
INST. CODE
888
or
or
01:INSTALL CODES
NEW GUARD CODE
GUARD CODE
000
to step 2
– Setting Installer Codes
[1]
Enter the
Installer Mode menu
and select the "
01:INSTALL CODES
" option (see section 4.2).
[2]
Select the
"NEW MASTER CODE"
,
"NEW INST. CODE"
or
"NEW GUARD CODE"
. Some panels may have
only the Installer Code and New Guard Code option.
[3]
Enter the new 4-digit Code at the position of the blinking cursor and then press
.
Notes:
1.
Code "0000" is not valid for Master Installer or installer.
2.
Inserting “0000” for the Installer will delete the Installer Code.
3.
Warning! Always use different codes for the Master Installer, for the Installer and for the Users
.
If the Master Installer Code is identical to the Installer code, the panel will not be able to recognize the
Master Installer. In such a case, you must change the Installer code to a different code. This will re-validate
the Master Installer code.
4.3.1
Identical Installer and Master Installer Codes
In a 2-installer code system, the non-master installer may inadvertently change his Installer Code to that of the Master
Installer Code. In this case, the panel will allow the change in order to prevent the non-master installer from realizing
the discovery of the Master Installer's Code. The next time the Master Installer enters the Installer Mode the Master
Installer will be considered as an Installer and not as a Master Installer. In such a case the Master Installer should use
one of the following solutions:
(a) Access the panel using the Remote Programmer PC software application and change the Master Installer Code to
a different code than the one programmed by the Installer.
(b) 1. Change the Installer Code to a temporary code, 2. exit the Installer Mode, 3. enter the Installer Mode again using
the Master Installer code (the Master Installer Code will now be accepted), 4. change the Master Installer code to a
different code, 5. and change the NON-Master Installer Code back again (in other words, undo the change to the
temporary code) so that the NON-Master Installer can still enter the system.
4.4 Zones / Devices
4.4.1 General Guidance & Zones/Devices Menu Options
The ZONES/DEVICES menu enables you to add new devices to the system, to configure them and to delete them, if
required.
To select an option follow the instructions below. Additional details and guidance are provided in section 4.2.
INSTALLER MODE
02:ZONES/DEVICES
MENU you wish
indicates scroll
and select
Option
Use
Section
ADD NEW DEVICES
Use to
enroll
and
configure
the device's operation according to your preference
and in case of sensors to also define their zone name (location), zone type and
chime operation.
4.4.2
DELETE DEVICES
Use to
delete
devices from the system and to reset their configuration.
4.4.3
MODIFY DEVICES
Use to
review
and/or
change
the device's configuration.
4.4.4
REPLACE DEVICES
Use to
replace
faulty devices with automatic configuration of the new device.
4.4.5
ADD TO SOAK TEST
Use to
enable
the Soak Test for device zones.
4.4.6
DEFINE DEFAULTS
Use to
customize
the defaults of the device's parameters according to your
personal preferences for each new device enrolled in the system.
4.4.7
Содержание PowerMaster 360
Страница 13: ...4 PROGRAMMING D 305735 PowerMaster 360 Installer s Guide 13 you want...
Страница 88: ......


