


User Manual CopyBox Standard CD-DVD Duplicator -
Installation
Page 5 van 29
Installation
Contents of the package
The CopyBox package comes with:
•
CopyBox duplicator
•
Power cord
•
Printed User Manual
•
USB cable (PC-Connected version)
•
Software CD (PC-Connected version).
Before installation check the package and supplied parts for physical damage. Also check the warranty seal on the CopyBox is
not damaged or missing. If the product is damaged, please contact your dealer immediately.
CopyBox Installation
•
Placement
Take the CopyBox duplicator from the packaging and place it on a dry, dust-free and stable
surface. To avoid dangerous situations, do not place any objects which cover the CopyBox
(rug), are full of liquid (vase) or producer heat (lamp).
•
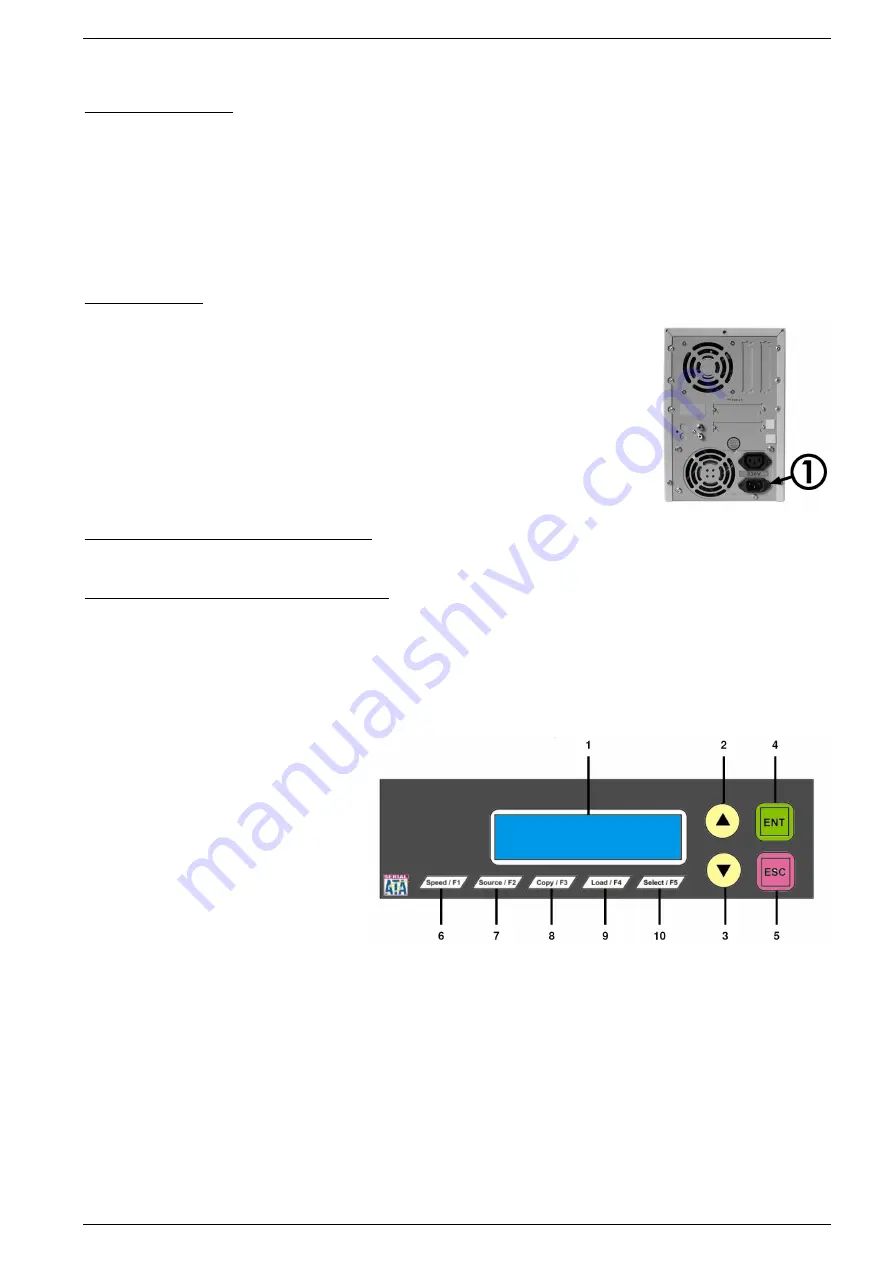
Connection
Plug the power cord into the power cord socket on the back of the CopyBox. (1) Connect the
power cord into an electrical outlet. Push the power switch on the front side of the CopyBox to
turn on the power.
The CopyBox is now ready for use.
Installation of the CopyBox 1 with USB connection
For installation of the CopyBox 1 with USB connector please see page 26 of this manual.
Installation of CopyBox 3, 5, 7 and 9 "PC-connected"
For installation of the CopyBox PC connected duplicators please see page 24 of this manual.
Instructions
The CopyBox duplicator offers a control panel on the front. Using this control panel, the various functions can be set. The control
panel consists of the following components:
1.
LCD Display
2.
Selector button “Up”
3.
Selector button “Down”
4.
Selector button “Enter”
5.
Selector button “Escape”
6.
Function button F1 (Speed)
7.
Function button F2 (Source)
8.
Function button F3 (Copy)
9.
Function button F4 (Load)
10.
Function button F5 (Select)
Function buttons F1 to F5 are pre-
programmed to use a number of frequently
used features. It is possible to assign functions
yourself to the F1 and F2 buttons from the
Advanced Setup menu. (13 -18 and 13-19)
Using the control panel the following twelve main menu functions can be selected:
1.
Copy
2.
Test
3.
Test & Copy
4.
Verify
5.
Compare
6.
Prescan
7.
Disc Info
8.
Select Source
9.
Image
10.
Edit Track
11.
Setup
12.
USB Mode
(PC-Connected models)