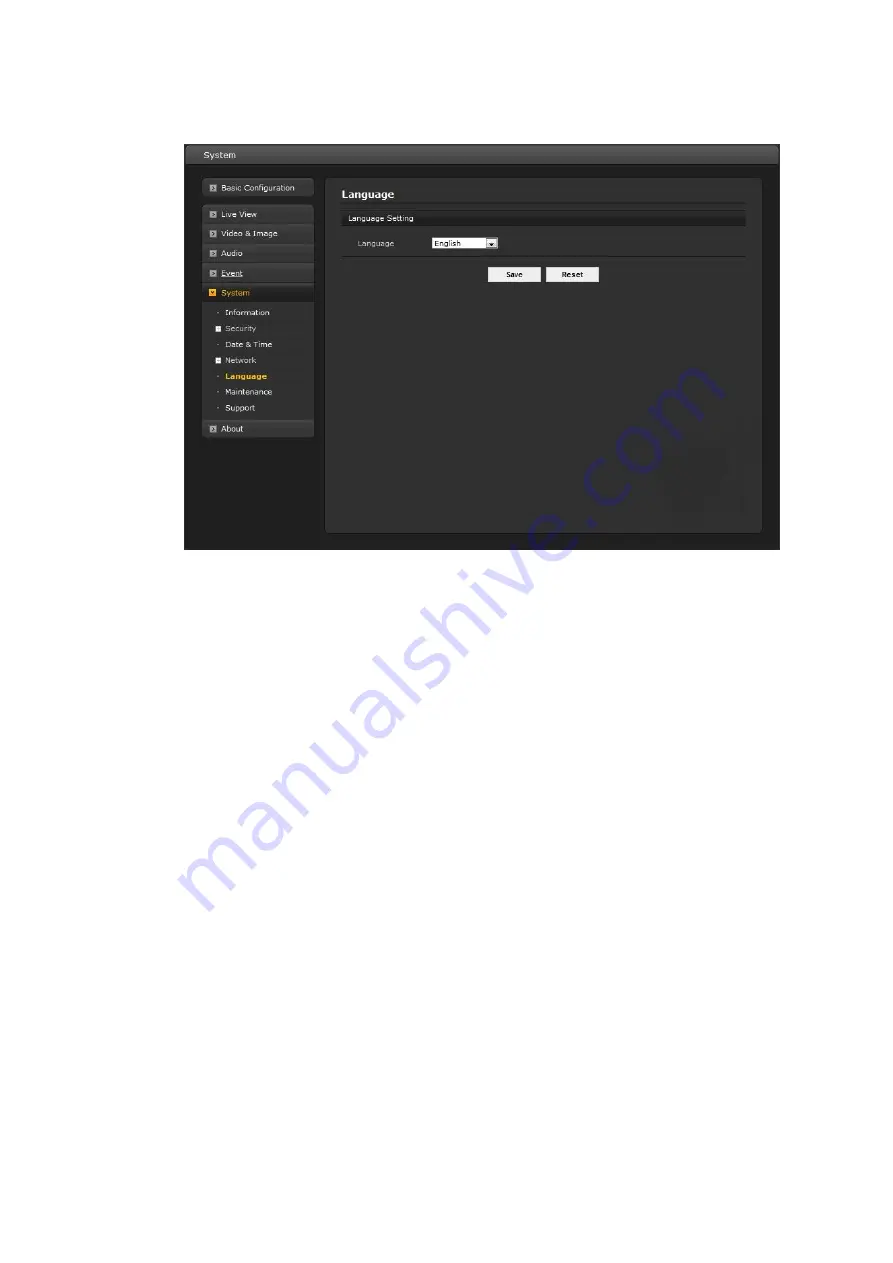
Vicon V8360W Series Скачать руководство пользователя страница 84

84 


5) Language


Select a user language. The language choices are English, Korean, French, German, Russian and 
Chinese. 


When the settings are complete, click 

Save 

button to save the settings, or click 

Reset 

button to clear 

all of the information you entered without saving it. 

Содержание V8360W Series

Страница 1: ...he documentation This system has not been designed to be used in life critical situations and must not be used for this purpose Document Number 8009 8314 00 01 Product specifications subject to change without notice Issued 7 2020 Copyright 2020 Vicon Industries Inc All rights reserved Vicon Industries Inc Tel 631 952 2288 Fax 631 951 2288 Toll Free 800 645 9116 24 Hour Technical Support 800 34 VIC...

Страница 2: ...o the presence of dangerous voltage within the products enclosure that may be of sufficient magnitude to constitute a risk of electric shock to persons The exclamation point within an equilateral triangle is intended to alert the user to the presence of important operating and maintenance servicing instructions in the literature accompanying the product CAUTION RISK OF ELECTRIC SHOCK DO NOT OPEN W...

Страница 3: ...if not installed and used in accordance with the in struction manual may cause harmful interference to radio communications Operation of this equipment in a residential area is likely to cause harmful in terference in which case the user will be required to correct the interference at his own expense CAUTION Changes or modifications not expressly approved by the party responsible for compliance co...

Страница 4: ...us combination to avoid injury from tip over 13 Unplug this apparatus during lightning storms or when unused for long periods of time 14 Refer all servicing to qualified service personnel Servicing is required when the apparatus has been damaged in any way such as power supply cord or plug is damaged liquid has been spilled or objects have fallen into the apparatus the apparatus has been exposed t...

Страница 5: ... from the internet 18 3 3 Setting the admin password over a secure connection 18 3 4 Live View Page 19 3 5 Playback 22 3 6 Network Camera Setup 24 3 6 1 Basic Configuration 24 3 6 2 Video Image 29 3 6 3 Audio 38 3 6 4 Event 39 3 6 5 System 68 3 7 Help 88 A Appendix 89 A 1 Troubleshooting 89 A 2 Alarm Connection 90 A 3 Preventive Maintenance 90 A 4 System Requirement for Web Browser 91 A 5 General ...

Страница 6: ...s blind spots and improves long term reliability Onboard image processing of the sensor image provides crisp distortion free images An integral fisheye lens provides an extremely wide angle of view for a panoramic image capturing a complete 360 view delivered as two 180 images The camera provides both server based and edge based dewarping A 6 MP and 12 MP 4K model are offered 1 1 Components This s...

Страница 7: ...nabling the system to react to alarms and activate lights or open close doors Improved security The network camera logs all user access and lists currently connected users Also its full frame rate video can be provided over HTTPS PoE Power over Ethernet This network camera can be powered through PoE IEEE802 3af which simplifies installation since only one cable is needed for carrying power as well...

Страница 8: ...k camera it is necessary to connect a network cable for data transmission power connection from power adapter Depending on operation methods it is possible to connect an alarm cable additionally 2 1 Overview Dimension Dimensions Unit in mm Connectors ...

Страница 9: ... port compatible with 10 100Mbps PoE Modular Jack 3 CVBS Analog test video out 2 pin connector 4 NC No Connection ALO Alarm Out Alarm input and output 3 pin terminal ALI Alarm In GND Ground NC No Connection NC No Connection NC No Connection GND Ground Audio in out terminal AI Audio In AO Audio Out ...

Страница 10: ...rubber grommet and insert a UTP Ethernet cable through it 3 Assemble the RJ 45 connector and UTP cable using a crimping tool 4 Feed the UTP cable from the bottom of the camera and through the hole and plug in the RJ 45 connector to Ethernet port Pin Color 1 Orange White 2 Orange 3 Green White 4 Blue 5 Blue White 6 Green 7 Brown White 8 Brown ...

Страница 11: ...ion 7 Install the side cap provided in the accessory kit to close the cut out to retain waterproof integrity if not using the side hole for cable installation When mounting on the wall make sure that the side cap covering the hole is at the bottom facing the ground If there are any gaps in the surface around the camera base apply RTV sealant to fill in any gaps to assure a watertight installation ...

Страница 12: ...it box to the ceiling using anchor screw Be sure to use the supplied rubber O ring on the screws on the inside of the base plate to ensure the base is waterproofed Assemble the gasket and then attach the dome housing using the supplied 4 mm machine screws V932EZ BOX 2 ...

Страница 13: ... type conduit box of V670 PMB 1 Fix the conduit box to the ceiling using pipe Note Pipe thread specification Female PF 1 Assemble the gasket and then attach the dome housing using the supplied 4 mm machine screws V670 PMB 1 ...

Страница 14: ...ut and or alarm output to the GND Ground connector ALO Alarm Out The network camera can activate external devices such as buzzers or lights Connect the device to the ALO Alarm Out and GND Ground connectors Connecting the Power Connect the power of 12 VDC for the network camera Connect the positive pole to the position and the negative pole to the position for the DC power Be careful not to reverse...

Страница 15: ...ory default settings using the Reset button 1 Switch off the network camera by disconnecting the power adapter 2 Open the top cover 3 Press and hold the Reset button with a straightened paperclip while reconnecting the power 4 Keep the Reset button pressed about 5 or more seconds 5 Release the Reset button 6 The network camera resets to factory defaults and restarts after completing the factory re...

Страница 16: ... IP address to your products or reset the product to the factory default settings and then perform the installation again The utility can be found on the Vicon website www vicon security com on the Software Downloads page for Vicon cameras 1 Connect the network camera device to the network and power up 2 Start SmartManager utility Start All programs SmartManager SmartManager The main window will d...

Страница 17: ...eb interface functionality To view streaming video in Microsoft Internet Explorer set your browser to allow ActiveX controls 3 1 Access from a browser Start a browser ex Internet Explorer Enter the IP address or host name of the network camera in the Location Address field of your browser A starting page displays Click Live View Playback or Setup to enter web page The network camera s Live View pa...

Страница 18: ...displayed when the network camera is accessed for the setup at the first time Enter your admin name and password set by the administrator NOTE The default administrator name is ADMIN and password 1234 If the password is lost the network camera must be reset to the factory default settings See Resetting to the factory default settings To prevent network eavesdropping when setting the admin password...

Страница 19: ...ork 2 Control toolbar The live viewer toolbar is available in the web browser page only It displays the following buttons The Stop button stops the video stream being played Pressing the key again toggles the play and stop The Play button connects to the network camera or starts playing a video stream The Pause button temporarily stops pauses the video stream being played The Snapshot button takes...

Страница 20: ...e list of available video streams Other applications and clients can also access these video streams images directly without going via the Live View page Click the right mouse button on the image a pop up window will appear with the functions listed below Freeze Pause the video stream being played Shown OSD A toggle switch to show or hide current frame rate date and time on the video image Snapsho...

Страница 21: ...ns image Panorama Wall Single dewarped image for wall mount Fisheye 3 PTZ Ceiling Quad dewarped images for ceiling mount User can change FoV of each window by dragging mouse or scrolling mouse wheel on the image which pans tilts or zoom image Fisheye 3 PTZ Wall Quad dewarped images for wall mount User can change FoV of each window by dragging mouse or scrolling mouse wheel on the image which pans ...

Страница 22: ...the SD local storage select it from the list and click the Playbackbuttons Go to the first go to the beginning of the video clip Fast backward play fast play backward rewind the video clip Backward play play backward rewind the videoclip Step backward play go back one frame in the video clip Pause pause playback of the videoclip Step forward play go forward one frame of the video clip Forward Play...

Страница 23: ...splayed monthly If there is recorded data for a particular date a blue square on the date will be displayed If you select a particular date in the calendar a yellow square on the date will be displayed 6 Play Time Displays time of the videoplaying 7 Event Search Window Select a search option in the drop down list and click GO button You can also enter the time period for searching If you click Sta...

Страница 24: ...ge Accessing the network camera from a computer for the first time opens the Admin Password dialog box Enter your administrator or operator id and password to get into setuppage The default administrator user name and password is ADMIN and the password is 1234 NOTE If the password is lost the network camera must be reset to the factory default settings Refer to Resetting to the Factory DefaultSett...

Страница 25: ...vides the lowest level of access which only allows access to the Live View page Operator An operator can view the Live View page create and modify events and adjust certain other settings Operators have no access to System Options Administrator An administrator has unrestricted access to the Setup tools and can determine the registration of all other users Enable anonymous viewer login Check the b...

Страница 26: ...a static known IP address for a particular MACaddress Use the following IP address Touse a static IP address for the network camera check the radio button and then make the following settings IP address Specify a unique IP address for your network camera Subnet mask Specify the mask for the subnet the network camera is located on Default router Specify the IP address of the default router gateway ...

Страница 27: ...27 3 Video Image User can setup and change settings of individual video stream in thispage Please refer to Video Image Basic for more details about Video Image setup ...

Страница 28: ... by attaching a speaker User can setup and change setting of Audio in thispage Please refer to Audio for more details about Audio setup 5 Date Time User can set time directly or assign time server to get the current time as well as determine Date Time format in this page Please refer to System Date Time for more details about Date Time setup ...

Страница 29: ... drop down list H 264 High Profile Primary profile for broadcast and disk storage applications particularly for high definition television applications for example this is the profile adopted by the Blu ray Disc storage format and the DVB HDTV broadcastservice H 264 H 265 Main Profile Primary profile for low cost applications that require additional error robustness this profile is used rarely in ...

Страница 30: ...will become smooth On the other hand if the rate is low the image will not be natural but it can reduce a network load GOP size Select the GOP Group of Picture size If users want to have a high quality of fast image one by one please decrease the value For the purpose of general monitoring please do not change a basic value Such act may cause a problem to the system performance Vicon recommends th...

Страница 31: ...ag mouse to designate a mask window area It is also possible to resize or delete or move the window by selecting the appropriate window at the mouse menu on the videoscreen To create a mask window follow steps 1 Click the right button of mouse to see the mousemenu 2 Select New Privacy Mask in the mousemenu 3 Click and drag mouse to designate a mask window area When the settings are complete click ...

Страница 32: ... to CVBR Create region Click the right button of mouse and select New ROI Area Click the left button of mouse and drag to make window Delete Region Click the right button of mouse and select the region Click Delete or click X from the region table ROI Quality Set quality of the selected area Non ROI Quality Set quality of the non selected area Non ROI fps Set frame rate of the non selected area ...

Страница 33: ...33 5 Camera Setup In this page user can setup Fisheye Capture Mode Exposure Control White Balance Mode Image Appearance Enhance Control Day Night Control and IR Control ...

Страница 34: ... Users can use Automatic mode with full shutter speed or Flicker free mode with a limited range of shutter due to an anti flicker function Max gain Sets maximum gain threshold Shutter Sets shutter speed of the sensor If users set Automatic Max shutter and Min shutter can be selected For example if the object is a fast car change the Max shutter to a faster value e g 1 10 1 120 If user selects Fixe...

Страница 35: ...0 The value distinguishes color such as red yellow green or violet Sharpness Set the amount of sharpening applied to the image A sharper image might increase image noise especially in low light conditions A lower setting reduces image noise but the image would be lesssharp White Balance Mode Select white balance mode that fits camera installation environment If Manual mode is selected user can set...

Страница 36: ...l of light at which the camera automatically switches between color and black white image Smart Focus sync with Day Night Focus control automatically adjusts upon Day Night change This menu appears for motorized lens model only IR Control User can enable disable built in IR LED and setup related controls IR Type Static IR When switching to Night IR is ON with the set value Max Strength Users can s...

Страница 37: ...D by slide bar or type in number OSD title User can show or hide OSD title by checking unchecking the Enable box OSD title can be changed by typing the name in the field The default is the model name of the camera OSD subtitle User can show or hide OSD subtitle by checking unchecking the Enable box OSD subtitle can be changed by typing the name in the field The default is the Subtitle 1 Date Time ...

Страница 38: ... encoding set the desired audio quality bit rate The settings affect the available bandwidth and the required audio quality Default is 64Kbps Audio Input Audio from an external line source can be connected to the STEREO Jack I O of the network camera Input volume If there are problems with the sound input being too low or high it is possible to adjust the input gain for the microphone attached to ...

Страница 39: ...ave the settings or click Reset button to clear all of the information you entered without savingit 3 6 4 Event 1 Event In On Boot This is used to trigger an event every time the network camera is started Select Enable on boot to activate the On Boot event Enter the Dwell time the event lasts from the point of detection 1 180seconds When the settings are complete click Save button to save the sett...

Страница 40: ...the alarm port first check the Enable alarm port 1 Type Choose the type of alarm to use from the drop down list NO Normally Open or NC Normally Closed Dwell Time Set the dwell time an event lasts from the point of detection of an alarm input When the settings are complete click Save button to save the settings or click Reset button to clear all of the information you entered without savingit ...

Страница 41: ...he event can be triggered via the product s API Application Programming Interface Select Enable manual trigger to activate the manual trigger for up to 4 manual triggers Set the dwell time the trigger lasts 1 18 seconds When the settings are complete click Save button to save the settings or click Reset button to clear all of the information you entered without savingit ...

Страница 42: ... right mouse button on the preview window shows selection pop up of New Motion New Mask Select Delete and Freeze Select New Motion and click and drag the mouse to generate an Include box of green color Select New Mask and click and drag the mouse to generate an Exclude box of orange color Dragging a corner or line resizes and dragging from inside moves thebox Select Enable video motion detection t...

Страница 43: ...int of detection of a motion hold time Show Histogram This camera provides live histogram for easy setup of threshold level in motion window The pop up window shows activity strength and threshold level and user can determine threshold level for triggering motion event by slide bar or type in number User can select any box by clicking name on the preview window or on the list User can delete selec...

Страница 44: ...k box to Enable Museum Sensitivity Sets up the sensitivity for the museum search detection Sensitivity measures the level of change in each region Select from 1 to 100 1 being the least sensitive to detection Threshold Sets up the threshold for the museum search detection Threshold judges the amount of change in the area Select from 1 to 100 a lower number increases frequency of detections The Thr...

Страница 45: ...lect Enable network loss to activate the Network Loss event Select a dwell time for how long the event will last from the point of detection When the settings are complete click Save button to save the settings or click Reset button to clear all of the information you entered without savingit ...

Страница 46: ... with AHIM by Event Map AIHM Setting Select Enable AIHM to activate the AIHM function Enable record status check Trigger event if the record status is modified Enable format event Trigger event if the micro SD card is formatted AIHM Server Setting Select Enable AIHM Server to activate the function to send the AIHM event to the AIHM server When the settings are complete click Save button to save th...

Страница 47: ...unction Enable specific time User can select a date in the calendar or type in date and specify time for event trigger Enable every day Trigger event every day at specified time Enable day of week Trigger event at the day of every week at specifiedtime Enable month Trigger event at the date of every month at specified time When the settings are complete click Save button to save the settings or cl...

Страница 48: ...ect logical events of specified conditions from the camera s video input Click the Enable video content analysis check box NOTE The VA function is limited to the events that can be used depending on the camera type Both the 6 MP and 12 MP models of the V8360W offer Advanced Type analytics ...

Страница 49: ...idth size 2 Min height size 4 Max width size 60 Max height size 50 Situation Default set image Recommended settings Modified set image Two objects are detected as one In this scene two objects are detected as one This is usually due to the maximum size of the object that is not set correctly Reduce the maximum size of the object Generally when setting the minimum and maximum sizes the average size...

Страница 50: ...ive Area Changes in a dynamic fountain as the water may go up and down An environment where reflections occur such as rivers lakes glass windows mirrors etc If possible install the camera in a location where there are no reflective objects when impossible specify the area as Exclusive Area If the object size is less than 5 or more than 40 on the screen When the brightness changes due to AGC or IRI...

Страница 51: ...nu 3 In the Light Change menu users can include lighting on off as a tampering event Users can adjust the sensitivity of Light Change in the Light Sensitivity menu Intelligent Motion Analyzes video in real time and detects valid motion in a scene Normal scene noise is filtered out improving reliability and reducing false alarms 1 Click the Detection Rule default None menu to change to Intelligent ...

Страница 52: ...n Provides analysis of the number of people in a designated area 1 Click the Detection Rule default None menu to change to Crowd Detection 2 Enter the Rule Name Crowd Detection generates an event if a certain amount of people inside a designated area for a certain amount of time is detected It is necessary to set the minimum number of people objects and minimum duration of the event as well as the...

Страница 53: ... on off toggle switch to On and set the Exclusive Area in Video Preview window The Exclusive Area is displayed as red cells Video Control Users can make settings for optimal image analysis Click the Relearn Background button to remember the current image as background Use the Scene type menu to select the place where the camera is installed Outdoor or Indoor Use the View mode menu to select the an...

Страница 54: ...rusion Loitering Line Detector Classification Object Left Removed Wrong Direction Crowd Detection Select the FG Extractor Mode from the drop down list Standard is the fastest mode but is not robust in conditions such as illumination changes or noise Advanced is the optimal mode for handling illumination changes with regards to true detections vs false alarms Ultimate is the slowest mode but is cap...

Страница 55: ...f emails sent within each interval Use Mail Server Check the box if you are using a mail server to receive event notification and image email Mail Server Enter the host names or IP addresses for your mailserver Port Enter the port number for your mailserver Connection security Select a connection security type in the drop down list None StartTLS SSL User name Password Enter the User name and Passw...

Страница 56: ... the server s IP address or host name Note that a DNS server must be specified in the TCP IP network settings if using a hostname Port Enter the port number used by the FTP server The default is 21 Passive mode Under normal circumstances the network camera simply re quests the target FTP server to open the data connection Checking this box issues a PASV command to the FTP server and establishes a ...

Страница 57: ...er described above and contains images from the time immediately after the trigger Configure as forpre event Prefix file name This name will be used for all the image files saved If suffixes are also used the file name will take the form prefix suffix extension Additional suffix Add either a date time suffix or a sequence number with or without a maximum value When the settings are complete click ...

Страница 58: ...se button to locate it Then click the Upload button Up to 3 audio files are available The total file size must be less than 512KB Audio Alert Test When the setup is complete the audio output can be tested by clicking the Test button To remove an audio file select the file and click the Remove button NOTE For a proper operation of Audio Alert full duplex must be enabled in the Audio settings page W...

Страница 59: ...Stream 1 Stream 3 or Stream 4 Stream1 3 4 H 264 data Note Stream2 MJPEG data cannot be recorded Pre event Enter pre event time value for the storage device pre recording Post event Enter post event time value for the storage device pre recording Audio Record Check the box if you want to record audio with video Record Schedule You can set the weekly recording schedule for each day Drag or click are...

Страница 60: ... is accessed NFS like many other protocols builds on the Open Network Computing Remote Procedure Call ONC RPC system The CIFS screen displays as below Address Enter IP address for NAS device Remote Directory Enter directory or folder location to be recorded in the NAS device Capacity Enter the capacity of storage to be used This must be less than the total storage capacity ID Password Enter ID and...

Страница 61: ...o enable the service XML Notification Setting Notification server URL The network address to the server and the script that will handle the request Notification server port The port number of the notification server When the settings are complete click Save button to save the settings or click Reset button to clear all of the information you entered without savingit ...

Страница 62: ...twork address to the server and the script that will handle the request For example http 192 168 12 244 cgi bin upload cgi Port The port number of the server User name Password Provide your log ininformation Notification Server Test When the setup is complete the connection can be tested by clicking the Test button using the contents in Send message box When the settings are complete click Save bu...

Страница 63: ...the status enable or disable of Hi Link Hi Link List Setting To add a new camera click the Add button To modify a camera select a camera from the Camera List and click the Modify button To remove a camera select a camera from the Camera List and click the Remove button Add Modify Camera When the Add and Modify buttons are selected the following pop up window appears ...

Страница 64: ... Port The port number of the PTZ camera for example 80 ID Provide login information of the PTZ camera PW Provide login information of the PTZ camera Type Select the appropriate type from the drop down list HTTP HTTPS Protocol Select the appropriate type from the drop down list Hi Pro Protocol When the settings are complete click Save button to save the settings or click Reset button to clear all o...

Страница 65: ...amera up to a max 15 events can be registered Click the Add button to make a new event map a popup window displays as below To change an existing event select that event and click the Modify button this same window will display and the information can be changed as required Selecting an event and clicking Remove deletes the event ...

Страница 66: ...pe in the drop down list Event Out E mail Select the email addresses you want to notify via email that an event has occurred FTP Select checkbox beside FTP to record and save images to an FTP server when an event has occurred Alarm out Check this box to enable the alarm out ...

Страница 67: ...has occurred The Record option must first be configured on the Event Out page Note This button disappears if you select AIHM as event in Hi Link Control the PTZ preset Onvif Mapping It sends event notification via Onvif Notification Server It sends notification messages to the notification server that listens for these The destination server must first be configured on the Event In page Enter a me...

Страница 68: ...nformation after installation Device Name Configuration Enter the devicename Location Configuration Enter the location information You can enter up to four locations When the settings are complete click Save button to save the settings or click Reset button to clear all of the information you entered without savingit ...

Страница 69: ...ount When using the user account users have to log in at every access User List Setting This section shows how to register a user account Press the Add button A pop up window displays as below Enter a user name and password to be added Register them by pressing the OK button User information can be changed by clicking the Modify button for the selected user a user can be deleted by clicking the Re...

Страница 70: ...e HTTPS connection set to HTTP by default HTTP HTTPS HTTP HTTPS Private Certificate Touse HTTPS for communication with the network camera an official certificate issued by a CA Certificate Authority must be uploaded from your PC Provide the path to the certificate directly or use the Browse button to locate it Then click the Upload button Please refer to the home page of your preferred CA for info...

Страница 71: ...s allowed or denied addresses All other IP addresses not in this list will then be allowed or denied access accordingly that is if the addresses in the list are allowed then all others are denied access and vice versa NOTE Users from IP addresses that will be allowed must also be registered with the appropriate access rights This is done from Setup System Security Users When the settings are compl...

Страница 72: ...ation setup Protocol type Port number LZO compression usage and Renegotiation time as well as download Server certificate file Choose Protocol type between UDP and TCP UDP is preferred Type in Port number you want to use default is1194 Default Renegotiation time is 3600 seconds 0 means no verification Use LZO compression determines whether to use cypher compression in connection or not CA certific...

Страница 73: ...versetting Default Renegotiation time is 3600 seconds 0 means no verification Upload CA certificate issued by Server 3 Select authentication method between User authentication and Machine authentication For Machine authentication upload client certificate and client key provided by Server For User authentication type in registered ID and Password 4 After finishing setup click Save button and then ...

Страница 74: ...our computer Synchronize with NTP Server The network camera will obtain the time from an NTP server every 60 minutes Set manually Allows you to manually set the time anddate Date Time Format Specify the formats for the date and time 12h or 24h displayed in the video streams Select Date Time format from the drop downlist Date Format Specify the date format YYYY Year MM Month DD Day Time Format Spec...

Страница 75: ... address Toobtain IP address via DHCP check the radio button Use the following IP address Touse a static IP address for the network camera check the radio button and then make the following settings IP address Specify a unique IP address for your network camera Subnet mask Specify the mask for the subnet the network camera is located on Default router Specify the IP address of the default router g...

Страница 76: ...ed Domain Name myserver mycompany com where mycompany com is the Domain name DNS servers Enter the IP addresses of the primary and secondary DNS servers Host Name Configuration Host Name Enter the host name to be used as device information in the client software or SmartManager Services HTTP port Enter a port to receive a service through the HTTP Default port number is 80 HTTPS port Enter a port t...

Страница 77: ...nter an address of the DDNS server Username Enter an ID to access to the DDNS server Password Enter a password to be used for accessing the DDNS server Confirm Enter the password again to confirm it Maximum time interval Set a time interval to synchronize with the DDNS server Select the time interval from the drop down list Register local network IP address Register a Network Video Server IP addre...

Страница 78: ...tain IP addresses and port numbers should be used for multicast streams Port Range Start End port Enter a value between 30000 and 39760 Multicast Stream1 Stream2 Stream3 Audio Meta This function is for sending Video and Meta Data to Multicast group Enable Multicast Check the box to enable multicastoperation Multicast destination IP Enter an IP between 224 0 0 0 and239 255 255 255 RTP port Enter a ...

Страница 79: ...ming without opening an RTSP session When the settings are complete click Save button to save the settings or click Reset button to clear all of the information you entered without savingit UPnP The network camera includes support for UPnP UPnP is enabled by default so the network camera is automatically detected by operating systems and clients that support this protocol Enter a name in the Frien...

Страница 80: ...twork video product enter a DSCP Differentiated Services Code Point value This value is used to mark the traffic s IP header When the marked traffic reaches a network router or switch the DSCP value in the IP header tells the router or switch which type of treatment to apply to this type of traffic for example how much bandwidth to reserve for it Note that DSCP values can be entered in decimal or ...

Страница 81: ...ic setting When selected the network camera automatically searches for NAT routers on your network Manual setting Select this option to manually select a NAT router andenter the external port number for the router in the fieldprovided NOTES If you attempt to manually enter a port that is already in use an alert message will be displayed When the port is selected automatically it is displayed in th...

Страница 82: ...HCP and Domain Name System DNS or configure each computer s network settings manually which may be difficult and time consuming Zeroconf is built on three core technologies Assignment of numeric network addresses for networked devices link local address auto configuration Automatic resolution and distribution of computer hostnames multicast DNS Automatic location of network services such as printi...

Страница 83: ...er a name in the Friendly name field NOTE Also known as zero configuration networking Bonjour enables devices to automatically discover each other on a network without having to enter IP addresses or configure DNS servers Bonjour is a trademark of Apple Computer Inc When the settings are complete click Save button to save the settings or click Reset button to clear all of the information you enter...

Страница 84: ...guage The language choices are English Korean French German Russian and Chinese When the settings are complete click Save button to save the settings or click Reset button to clear all of the information you entered without savingit ...

Страница 85: ...his will return all of the network camera s settings to the factory default values including the IP address Upgrade Upgrade your camera by importing an upgrade file and pressing the Upgrade button During the upgrade do not turn off the power of the network camera Wait at least five minutes and then try to access the cameraagain Backup Save the setting values that users have entered to the network ...

Страница 86: ...tem and event log information Click the Log Search button to search the Access Event Setup or Control log data Reports Server Report Click the Server Report button to get the important information about the server s status this should always be included when requesting support Parameter List Click the Parameter List button to see the unit s parameters and their current settings ...

Страница 87: ...urces The pop up window below displays Media Check Click the Media Check button to get the information about the cameras video and audio stream The pop up window below displays Network Check Click the Network Check button to get the information about the cameras network setting and traffic The pop up window below displays ...

Страница 88: ...dow will be provided as a popup window so that users can open and read it without needing to log in It will offer a description of the setting and Help page so that users can manipulate the network camera without a reference to the manual ...

Страница 89: ...of images If images are very complex try limiting the number of clients accessing the camera Images only shown in black white Check the Video Image setting Blurred images Refocus the camera Poor image quality Increased lighting can often improve image quality Check that there is sufficient lighting at the monitored location Check all image and lighting settings Rolling dark bands or flickering in ...

Страница 90: ...reventive maintenance allows detection and correction of minor that faults before they become serious and cause equipment failure Every three month perform the followingmaintenance 1 Inspect all connection cables for deterioration or otherdamage 2 Clean components with a clean damp cloth 3 Verify that all the mounting hardware is secure ...

Страница 91: ...of bandwidth the bit rate required others can affect the frame rate and some affect both If the load on the CPU reaches its maximum this will also affect the framerate The following factors are among the most important to consider High image resolutions and or lower compression levels or high bitrates result in larger images Frame rate and Bandwidth affected Accessing both Motion JPEG and H 264 vi...

Страница 92: ...160 2048x2048 1280x1280 720x720 640x640 480x480 12 MP 4000x3000 3000x3000 2560x2560 2160x2160 2048x2048 1280x1280 720x720 640x640 480x480 Frame Rate 6 MP 2560x2560 20 fps 2160x2160 25fps 30fps PAL NTSC 12 MP 4000x3000 20fps 3000x3000 25fps 30fps PAL NTSC Streaming Quad Stream H 264 H 265x3 MJPEGx1 Smart Codec Hi Stream Composite Out Yes Audio Compression G 711 Audio Streaming 2 Way SYSTEM Video Co...

Страница 93: ... S W Max User Connection Live 10 Users Playback 3 Users API Support Open API ONVIF Compliance Mobile Support Android i OS EXTERNAL IN OUT Composite video out 2 pin connector Audio 1 Input Mic Terminal Block 1 Output Terminal Block Alarm 1 Input Terminal Block 1 Output Terminal Block Relay Ethernet RJ 45 u SD Card SDHC SDXC ETC Operating Humidity 0 90 RH Non condensing Operating Temperature 4 C 122...

Страница 94: ...Rev A ...

Отзывы: