background image

4

vertilux.com

© 2018. Vertilux, Ltd. All Rights Reserved. Last revised: October 2018.

• 

Modifiying the direction of the panels 

• 

Adding an additional remote control    

• 

Resetting the motor to factory default

Optional functions

This function is convenient when the need arises to change the moving direction of the panels. 

For example, when pressing the 

up button

 on the wall control, the shade closes, or when  

pressing the 

down button

, the shade opens.

Modifiying the direction of the panels 

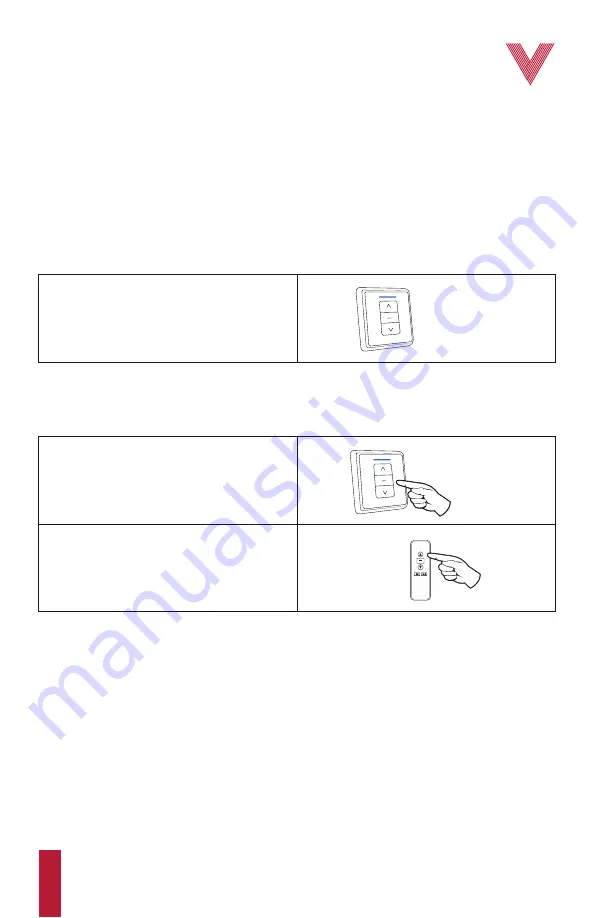
A wall control can also be used in order to add a new remote control.   

Adding an additional remote control   

UP & DOWN

BUTTONS

1.

 Press and hold the 

up and down buttons 

on the  

wall control at the same time until the blue light  

on the wall control flashes. 

1.

 Using the wall control, press and hold the 

stop 

button

 for about 

5 s

 until the blue light on the 

wall control flashes. 

2.

 Then, using the new remote control, select the  

desired channel using the 

channel selector 

button

, and press the 

up button

. The 

Vertilux


Shade is now set on the new remote control. 

STOP

BUTTON

UP

BUTTON

NEW REMOTE

CONTROL

Содержание VTi

Страница 1: ...VTi CELTIC MOTOR FOR SLIDING PANELS MOTOR VTi CELTIC PARA PANELES DESLIZANTES vertilux com PROGRAMMING INSTRUCTIONS MANUAL DE PROGRAMACI N...

Страница 2: ...nts Slim design and almost fully hidden behind the rail and the panel runner Available for 4 and 5 channels Right or left installation One way center open fabrication options Maximum weight capacity 1...

Страница 3: ...of the track To do this remove the track COVER located on the side of the motor remove the GEAR and pull the drive CHAIN until the panels are in the middle of the track Then place the GEAR back fig 2...

Страница 4: ...els to the initial position in the middle of the track where they were The first limit has now been set BLUE BUTTON BLUE BUTTON RED BUTTON STOP BUTTON 5 Press and hold the red button until you reach s...

Страница 5: ...ens Modifiying the direction of the panels A wall control can also be used in order to add a new remote control Adding an additional remote control UP DOWN BUTTONS 1 Press and hold the up and down but...

Страница 6: ...LOCKED STOP BUTTON DIRECTION BUTTON Follow the procedure described in either Case 1 or Case 2 depending on your situation Case 1 Both motor buttons the red and the blue ones do not click when pressed...

Страница 7: ...ON IS UNLOCKED RELEASE RED OR BLUE BUTTON 4 Test the red and blue buttons again At this time both buttons should be able to emit a click sound when pressed Both buttons are now unlocked allowing for n...

Страница 8: ...el Sistema disponible para rieles de cuatro y cinco canales con ubicaci n a la izquierda o a la derecha Apertura en una direcci n izquierda o derecha o apertura central de los paneles Capacidad m xima...

Страница 9: ...en la mitad del recorrido del riel Para esto abra la TAPA del riel ubicada del lado del motor saque el ENGRANAJE y hale la CADENA de transmisi n hasta que los paneles queden en la mitad del riel apro...

Страница 10: ...ared presione el bot n en la direcci n contraria a la seleccionada en el paso 2 Deje mover el motor y presione el bot n de parada cuando los paneles alcancen el segundo l mite deseado 1 Mantenga presi...

Страница 11: ...de desplazamiento de los paneles Se puede utilizar un control de pared para agregar un nuevo control remoto Adicionar un nuevo control remoto 1 Mantenga presionados los botones de subida y bajada en e...

Страница 12: ...rojo y azul nuevamente Uno de ellos emitir un sonido de click lo cual indica que este bot n se encuentra desbloqueado BOT N DE DIRECCI N BOT N DE PARADA BOT N ROJO O AZUL DESBLOQUEADO El motor ha sid...

Страница 13: ...de click al presionarlos lo cual indica que ambos botones se encuentran desbloqueados y el motor no tiene ning n l mite configurado BOTONES ROJO Y AZUL DESBLOQUEADOS El motor ha sido configurado a sus...

Страница 14: ......

Отзывы: