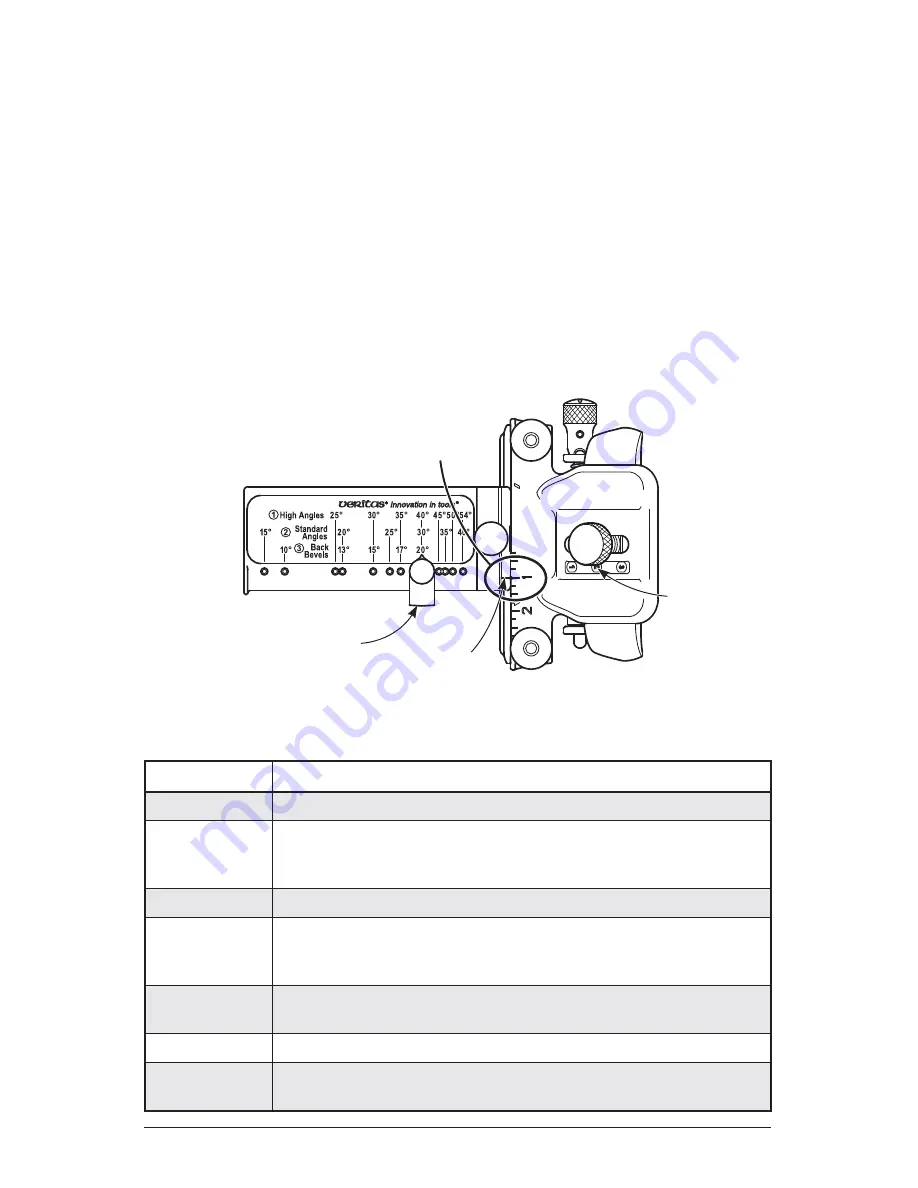
Step 3: Setting the Registration Jig
The registration jig ensures your blade is centered and squared in the blade carrier and
sets the blade projection for the desired bevel angle.
Slide the registration jig onto the dovetail feature along the front of the blade carrier.
Set the registration jig such that the pointer on the top jaw of the jig aligns with the
approximate width of your blade on the scale on the top of the blade carrier (see
Figure 4
). Tighten the registration jig clamp knob only fi nger tight. Do
not
overtighten
as it is desirable to have some up and down movement of the registration jig to allow
it to easily slide off the blade when loosened.
Set the registration stop to the desired bevel angle, aligning it with the scale of your
choice. The registration stop in
Figure 4
is set for a 1
"
wide blade and a 30° bevel
angle using the
d
(yellow) standard-angle confi guration.
Figure 4: Registration jig installed.
Bevel Angle Used on these tools
<15°
Back bevels.
15° to 20°
Paring chisels, skew chisels (including turning skews that
are bevelled both sides), low-angle planes for softwood,
skew-blade planes.
20° to 25°
All of the above (except skews) for hardwood or end-grain use.
25° to 30°
Chisels used both for paring and light mortising, firmer chisels
for softwood, most plane blades (smooth, jack, jointer, etc.),
and spokeshave blades.
30° to 35°
Mortise chisels, firmer chisels for hardwood, plane blades for
hardwood with pin knots.
35° to 40°
Mortise chisels for heavy use, particularly any with brittle steel.
>40°
Scraper plane blades and bevel-up smoothing planes used on
wood with difficult/reversing grain to produce Type II wood chips.
Registration stop set for 30°
(
d
yellow standard angles).
Pointer
Registration jig set
for 1
"
wide blade.
Blade carrier
positioned at
the
d
yellow,
standard-angle
setting.
4
Содержание Mk.II Honing
Страница 1: ...Mk II Honing Guide 05M09 01 U S Pat No 7 553 216 ...
Страница 13: ...05M09 09 Patent Pending Narrow Blade Head ...


