Doc : CSTORE8C-QSG v1.25
COLDSTORE Compact Quick Start Guide
5
G) System Connections
Once the unit is properly located, connect a network cable between your network
switch and the network connection on the COLDSTORE Compact (see side panel
photo on right). Ensure the power supply cable can reach the unit but
DO NOT
INSERT THE POWER JACK
yet.
COLDSTORE Compact is designed for always-on operation and so there is no
ON/OFF switch. The system is powered and unpowered by connecting and
disconnected the power jack. Follow the steps below before powering up as
instructed.
The full control of the system using COLDSTORE Manager is not covered in this
Quick Start Guide – see COLDSTORE User’s Guide.
H) Disk Loading
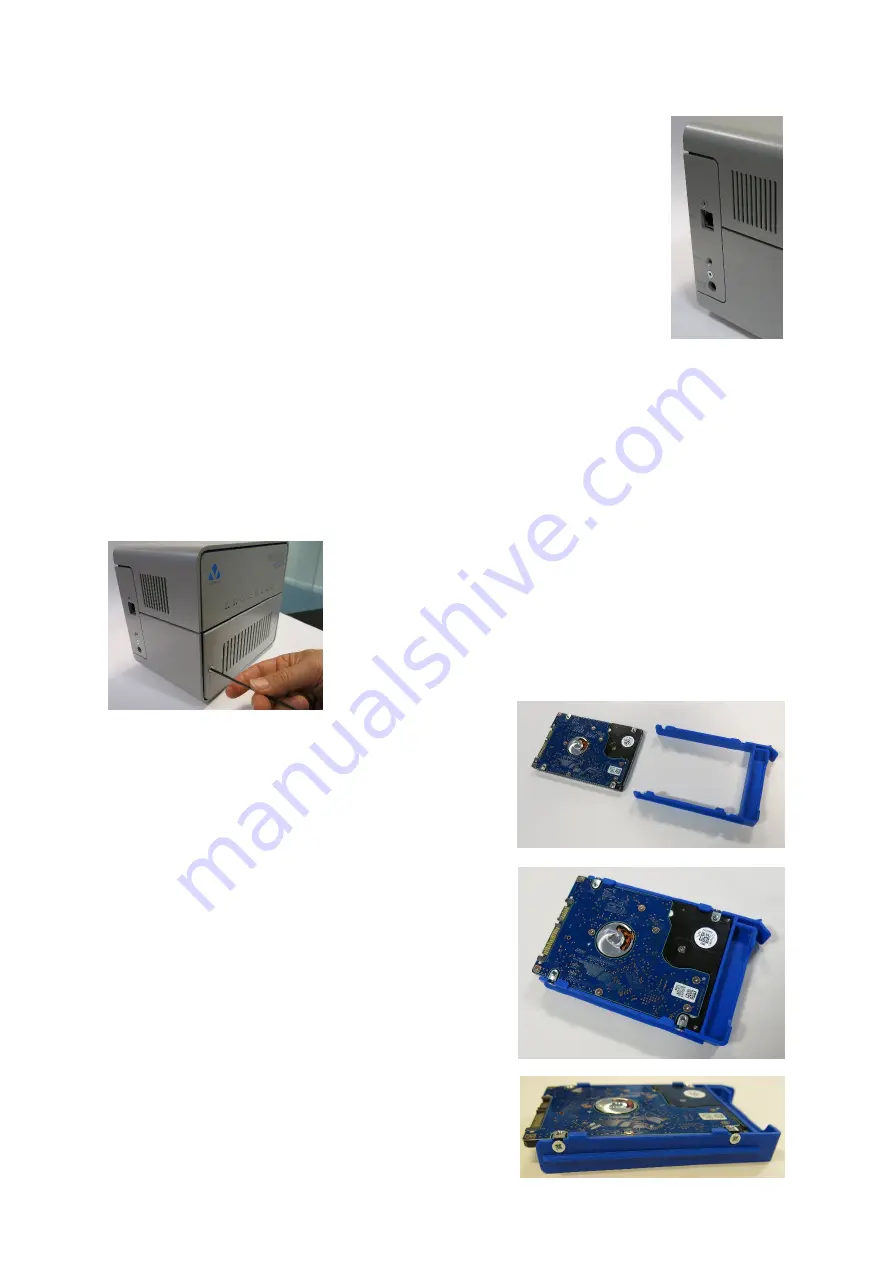
The disk drive slots are accessed by unscrewing the front panel. Using the hex key provided,
unscrew the left and right screws, holding the vented plate to prevent it falling down as it is
released. Set the front plate aside and store the two screws carefully for re-assembly.
COLDSTORE Compact is delivered with 8 removable 2.5” disk
holders. These will normally be found in the disk holder slots in
the packaging.
Any make, model or capacity of 5V DC 2.5” SATA hard disk may
be used in COLDSTORE Compact. Note that older disk models
requiring 12V DC are not supported. For optimum use of disk
space, we recommend that all disks be of identical capacity.
Fix the hard disks into the holders using the mounting
screws provided. Most disks have both base-mounting
and side-mounting screw holes. The COLDSTORE
Compact disk holders use the side-mounting screw holes.
Ensure that each disk is fitted to the holder in the correct
orientation. The base of the disk should mate with the
supporting tabs on the edges of the holder. The SATA
connector should face away from the holder as shown in
the photos on the right.
Use four screws per disk for secure mounting. Ensure
that the mountings screws provided are used and that the
screw heads are screwed in far enough into the
countersunk slot to allow the disk and holder assembly to
slide smoothly in and out of the disk slot guides.
Once secured into the disk holders, insert each of the
disks into the COLDSTORE Compact, using the guide slots
to ensure correct positioning. Gently slide the disk holder
into the slot, ensuring the holder is the correct way up (tab
at the top) then push firmly until the SATA connector
engages and the tab clicks into place.


