background image


2

 / 

16


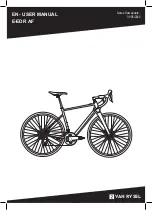
We know you are excited about getting going but please: 


Reseat and charge the battery before the first ride 


Make sure the pedals are tight 


Make sure the front wheel is installed properly and tight 


Inflate the tires properly 


Check that all screws are properly torqued


Carry out a fine adjustment of the gears and brakes


Learn how to use the LCD display 


Wear a helmet before riding


Please Note: Your bike may need further adjustments after assembly.


________________________________________________________


If  you  have  any  trouble  with  setup,  please  contact  us  online  or 

through our email address: 

[email protected]


Please always include your order ID when reaching out to us. 


Содержание ROVER

Страница 1: ...1 16 Instructions to Set Up Your VELOWAVE ROVER Diagram...

Страница 2: ...l screws are properly torqued Carry out a fine adjustment of the gears and brakes Learn how to use the LCD display Wear a helmet before riding Please Note Your bike may need further adjustments after...

Страница 3: ...f our support technicians for guidance 3 Our QA mechanics have assembled and tested your bike beforehand 4 To assemble your bike work on a clean area with enough space to maneuver 5 If installed remov...

Страница 4: ...nting brackets on the front end of the mount with the round edges facing outward Adjust the handlebar angle to your comfortable riding posture 3 Secure the mounting brackets with four screws 4mm allen...

Страница 5: ...s seen shown Keep the spring cam follower and lever on the LEFT side nearest the disk brake Keep the adjustment nut and spring on the RIGHT side See Figure 2 4 Screw the skewer into the end nut until...

Страница 6: ...fork gantry Push the screw provided on the headlight through the installing hole on the fork gantry Tighten the fixing nut onto the screw You might need to secure the fixing nut tightly so the screw...

Страница 7: ...rm Chain Side 3 Sitting on your bike the pedals go on the Left and Right side respectively 4 Keep the pedal Horizontal while hand screwing to get the thread started Then Use your 15mm wrench to tighte...

Страница 8: ...k located at the upper side of the downtube From clockwise direction Unlock gear Lock Power OFF gear Power ON gear To Lock the Battery and Power on the bike 1 Put the key at the UNLOCK gear Place the...

Страница 9: ...attery will pop out 3 Hold the battery with two hands and take it out from the tube Note The battery weighs heavy and should be handled with care When the Battery is Removed Do not touch the and termi...

Страница 10: ...to switch on or switch off the headlight 4 Walking mode Press and hold button for 2 seconds to shift into walking mode the display indicates P and the bike will be propelled at walking pace Release t...

Страница 11: ...uld occur if the charger is left attached to the battery and a power source for longer than 12 hours Detach the charger as soon as possible once the green light indicates a complete charge to avoid un...

Страница 12: ...ature in summer time it is NOT advisable to charge it immediately after riding In winter it is FORBIDDEN to charge the battery in environment below 0 It is recommended to charge the battery in room te...

Страница 13: ...reached the highest allowable temperature Allow the motor to cool down before using the e bike again 11 Motor High Temperature Fault Motor Temperature Sensor Fault Allow the motor to cool down and ch...

Страница 14: ...e Low battery power Charge battery Low tire pressure Inspect tire Heavy load on bike Adjust bike load Driving on rough terrain Adjust route Using throttle only Include pedal assist Battery does not ch...

Страница 15: ...15 16 Label of Your VELOWAVE...

Страница 16: ...16 16 To find out more please visit our website at www velowavebikes com...

Отзывы: