CCTVPROM7
14/07/2010
©
Velleman nv
10
7.4 Playback & Backup
•
Before connecting the DVR to a computer, first install the necessary playback/backup software on that
computer.
7.4.1 Software installation
•
Locate the file “DVR_ClientSetupCHS” on the included CD-ROM and double click it to install the required
backup software.
•
Follow the instructions on the screen.
•
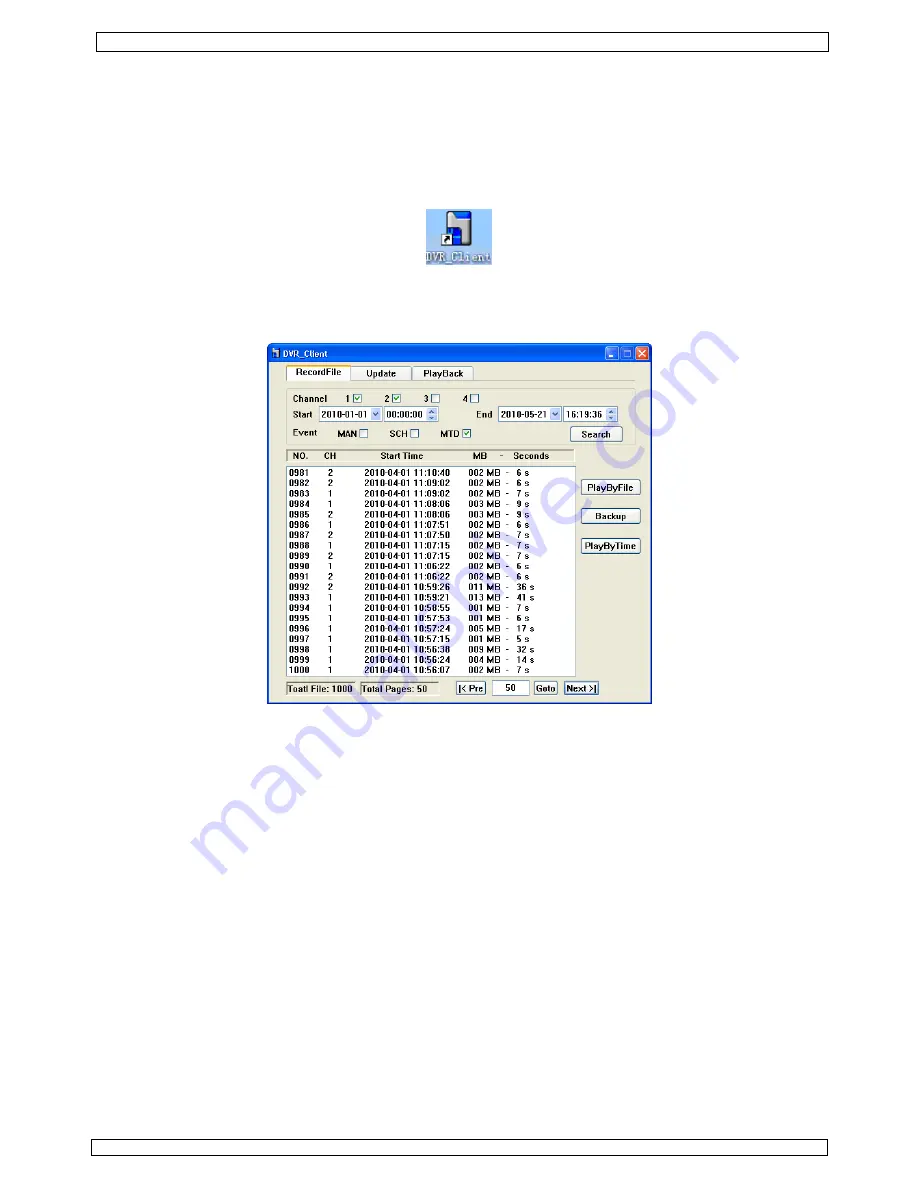
When installation is completed, locate the DVR Client shortcut icon and double click on it to start using
the software.
7.4.2 Hardware connection
•
Plug the included USB cable into the USB port
[A]
and plug the other end into a free USB port of a
computer running the DVR client software. The USB LED
[13]
lights up.
7.4.3 Searching records
•
Select the desired recording channel.
•
Set start and end date and time for the search function.
•
Select the event that triggered the recording (Manual, Scheduled or Motion Detected).
•
Press the
Search
button to retrieve the file overview.
•
Scroll through the pages using the
|<Pre
or
Next>|
buttons or enter a page number and press
Goto
.
7.4.4 PlayByFile
•
Select a file and press the
PlayByFile
button. The video will start to play in the
PlayBack
tab (refer to
§7.4.7
).
7.4.5 Backup
•
Press the
Backup
button to save a copy of the current video on the computer.
•
Choose a backup location, name and type (MJPEG or AVI). Note that it will take some time to save files
as they need to be converted into the desired format.
7.4.6 PlayByTime
•
To use the
PlayByTime
option only one channel may be included in the search function (to avoid
overlapping recordings). When selecting
PlayByTime
all videos that are found will be played
sequentially.
•
The video(s) are also played in the
PlayBack
tab (see
§7.4.7
).
Содержание CCTVPROM7
Страница 2: ...CCTVPROM7 14 07 2010 Velleman nv 2 ...


