


CAMIP10
16.12.2011
©
Velleman nv
8
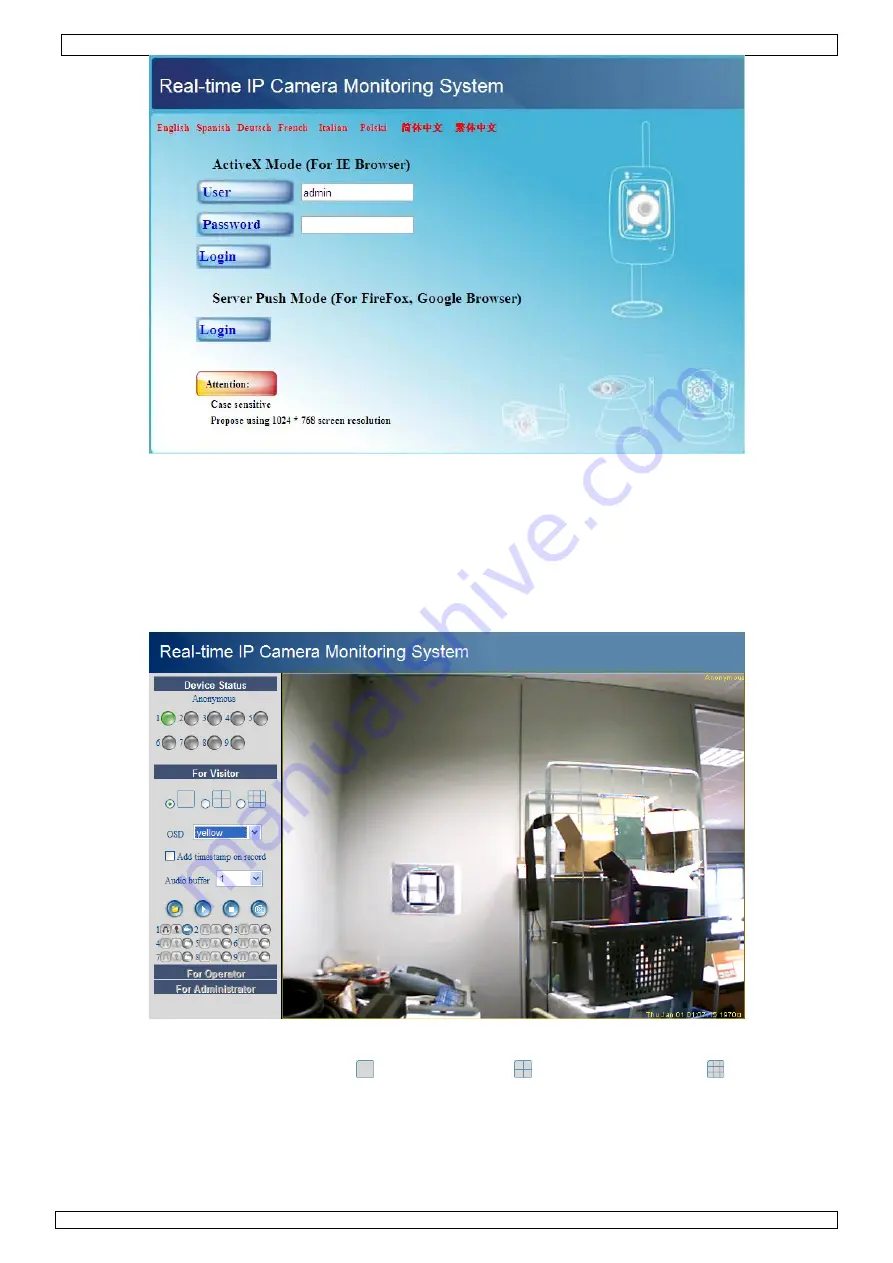
•
Enter your account name and password and click
Login
. Default, the administrator login is
admin
without a password.
Note:
use the upper
Login
button when your browser supports ActiveX Browser Plug-ins. When
using a browser that does not support ActiveX, click on the lower
Login
button.
Some features
e.g. full screen, audio, multi-channel image … will not be available.
•
When login on to the system with an administrator login password, the
For Operator
screen
opens; login on with a user regular user account will open the
For Visitor
layout.
Note:
when asked for (see title bar), allow the system to run add-in.
For Visitor
layout
•
The interface software supports up to 9 cameras. The device status shows the status of each of
these 9 cameras. Green = OK, Yellow = camera connection problem, Red = alarm condition.
•
Select the preferred screen layout:
shows 1 camera,
shows 4 cameras and
shows 9
cameras simultaneously in the camera display pane.
•
Set the preferred colour for the On Screen Display (OSD): disabled (no OSD), black, yellow, red,
white or blue. The OSD shows the name of the camera in the top right corner of the camera
display and a date and time stamp at the bottom.
•
When the ‘Add timestamp on record’ checkbox is checked, date and time are shown on the
recorded file.
Note:
set the time via the
For Administrator
screen (see further).


