FX80 PON Optical Power Meter User Manual
Page 17 of 38
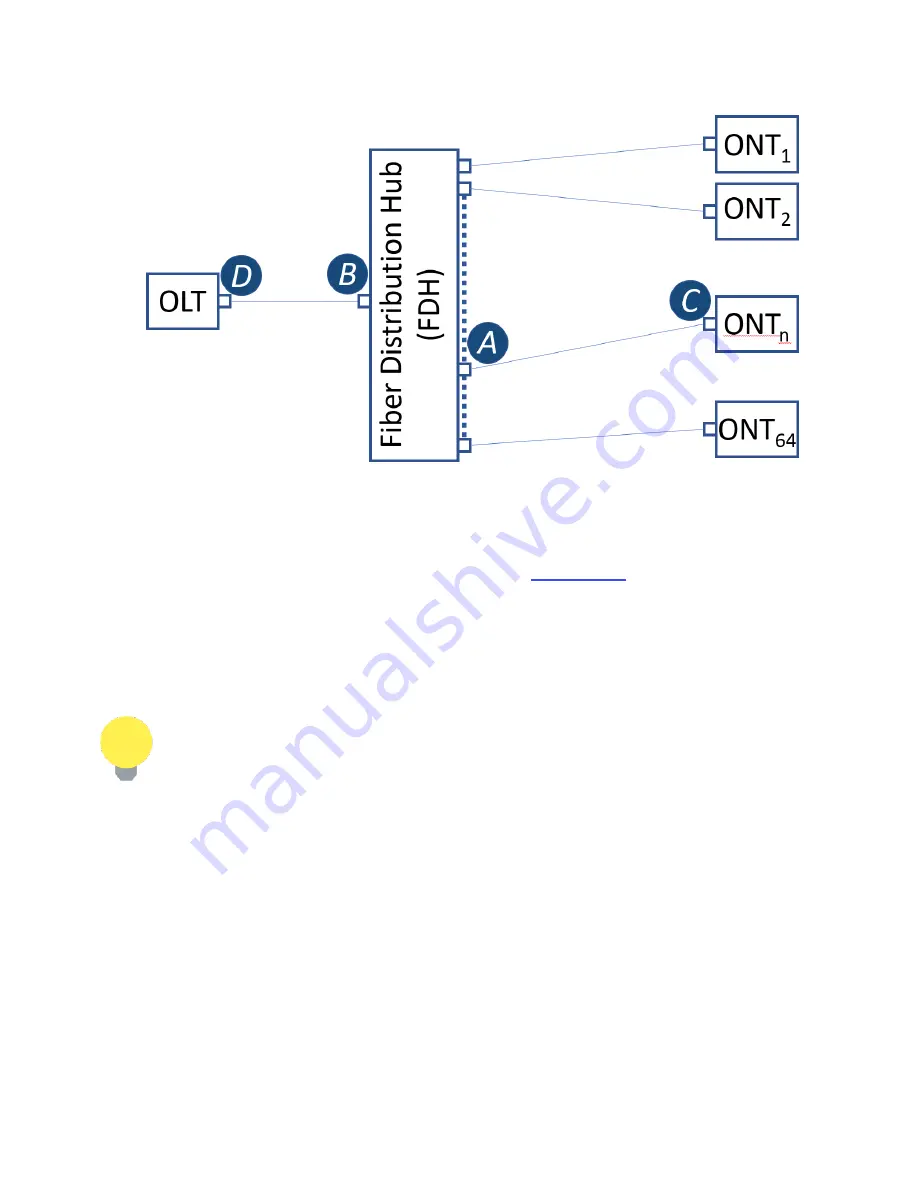
A typical passive optical network (PON) with possible points of measurement
To measure optical power in the passive optical network (PON):
1. Select the necessary mode (PON Burst for active networks, or PON CW for networks
without signals) by pressing the
|MODE|
button. See
Section 6.1
Measurements for details.
2. To test a PON network, insert the FX80 at one of the following locations along the PON
network: OLT, Fiber Distribution Hub/Point (FDP) or ONU/ONT. At least one extra patchcord
is needed to perform a test. If PON network elements have SC/UPC connectors and the
FX80 has SC/APC, two hybrid patchcords are needed.
When testing at the FDP-A location, if there is no drop line installed, the 1310
nm upstream will be seen only if a fiber is temporarily connected to the ONT.
This may require two patch cords.
3. Connect the fiber with 1490/1550 nm downstream traffic to the left-side OLT test port.
Confirm that the 1490 nm signal is immediately detected. 1550 nm will appear only if the
PON network includes RF video signal traffic (RFoG). If no signal is detected, begin
troubleshooting and make sure the proper test port is connected.
4. Once a good 1490 nm signal level is detected, connect the patchcord between the FX80
ONU/ONT right-side test port and the PON network element closest to the ONU/ONT to
measure the 1310 nm upstream signal. There may be a delay in seeing a 1310nm signal. If
the ONT/ONU is power-cycled, it can take one minute or longer before the network is fully
operational. The measurement results are then shown on the screen. The example below
shows typical values one might expect when connected at the ONU (location C) and no P/F
thresholds have been set.


