


Touch Operation
1. Connect the signal cable witch monitor, then turn on computer.
2. Connect the USB cable with monitor and computer.
3. Turn on the monitor (AC switch on).
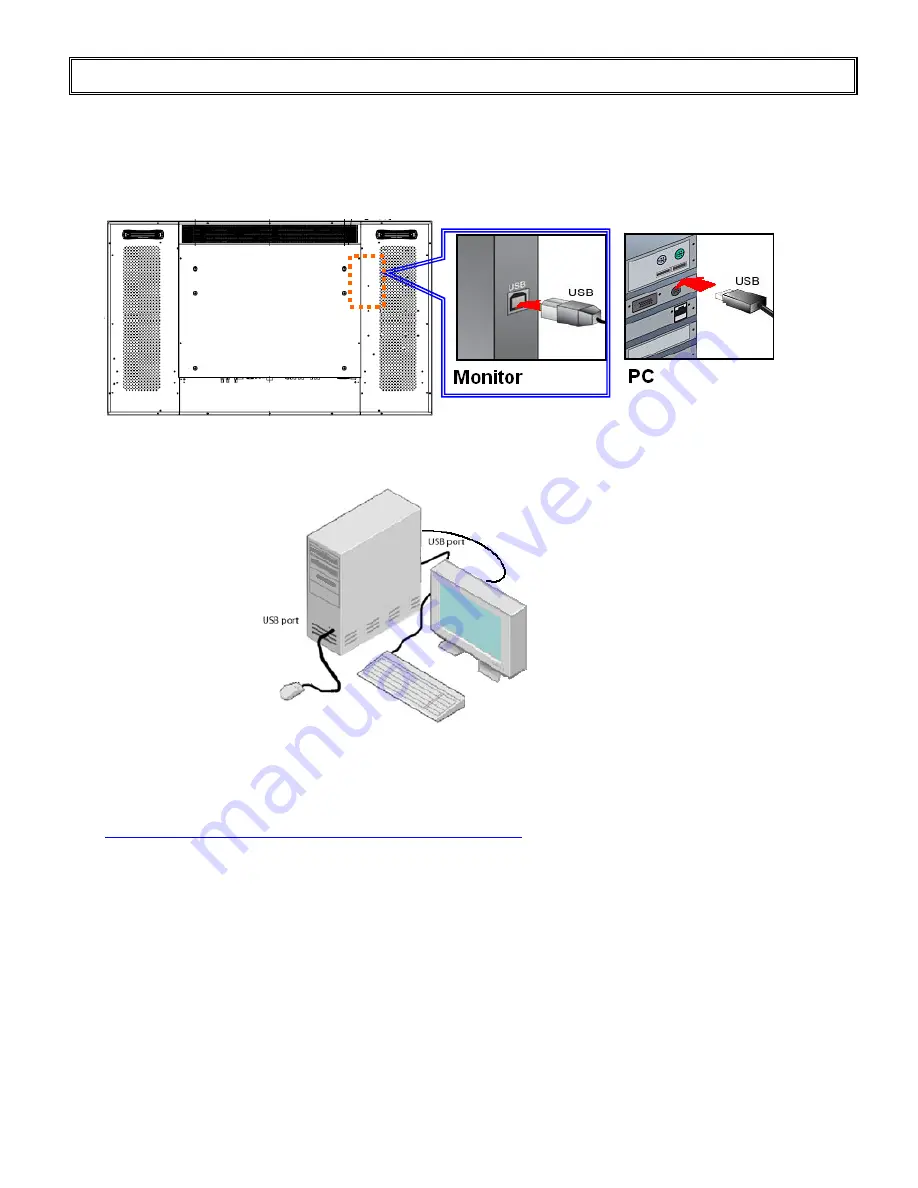
4. Connect one side of USB cable (Type-B USB connector) on the monitor side. See below picture. (Check
“Connection” section for exact location).
5. Connect the other side of USB cable (Type-A USB) to the USB port on computer. See picture below.
6. Wait for 5 seconds and the touch function is ready to go. It can be activated by pen, finger, or any other pointer.
7. This touch monitor is Microsoft Windows 7 compatible. In order to active, go to
http://www.nextwindow.com/nextwindow_support/windriver.html
to download the latest driver. Follow the direction in
the
NW Multitouch Device Driver Installation Guide
(part of the compressed file along with the driver) to install the
driver.
8. Once the driver is installed, restart the PC and the touch function is ready to go with MS Windows 7.
9. Operating Systems Supported:
I.
Microsoft Windows:
i.
Windows 98, NT, 2000, XP, Vista, and 7: Plug-and-play
ii.
Driver required to run dual-touch/gesture on Windows 7 (works as a digitizer)
II.
Mac OS: Plug-and-Play, Single touch only.
III. Linux: Supports Knoppix (based on Debian) distribution with the following requirements:
VT550 Series
35
www.vartechsystems.com
Содержание vt550 series
Страница 1: ...LCD Monitor Models VT550 Series VT550 Series 1 www vartechsystems com ...
Страница 11: ...Dimensions VT550 Series 11 www vartechsystems com ...
Страница 26: ...Basic Settings Advanced Settings System Status VT550 Series 26 www vartechsystems com ...
Страница 43: ...Appendix III Wall Mount Safety Notes Wall mounting safety Notes VT550 Series 43 www vartechsystems com ...
Страница 44: ...VT550 Series 44 www vartechsystems com ...


