


Operating Instruction Manual
Page 9
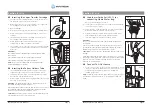
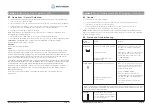
Fig. 4
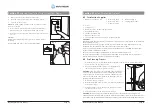
Fig. 5
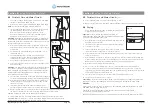
Fig. 6
Section 4
Set-up
4.5
Vapotherm Spike Set (VSS-1): for
connecting Sterile Water Bag
1. Hang a sterile water bag from IV Pole.
2. Connect VSS-1 to the water inlet port on back of unit and make
sure it locks into place (Fig. 5).
3. Ensure the VSS-1 is clamped then remove spike cap. Wipe spike
with disinfectant wipes, 70-90% isopropyl alcohol.
4 Firmly insert spike into sterile water bag while avoiding direct
hand contact with the spike tip and water bag septum.
5. Leave VSS-1 spike set clamped until ready to fill unit.
WARNINGS:
The VSS-1 is single patient use item and should be changed with
each patient.
If the VSS-1 is removed from the Vapotherm device for any reason
the Vapotherm 2000i should be disinfected following the routine
disinfection procedure before being returned to service.
CAUTION:
Never leave the VSS-1 unclamped when the system is not
running.
NOTE: Removing an empty sterile water container does not constitute
opening the closed system. New sterile water containers can be spiked
using the same VSS-1 without removing the device from service
following the procedure above.
4.6
Connect To A Gas Source
1. Connect a source of air, oxygen or medical gas blender to the gas
inlet port of Vapotherm 2000i
(Fig. 6)
. Gas inlet connection is a
hose barb that accepts female fitting on a standard 1/4”
(6.35mm) oxygen tube.
NOTE:
Vapotherm will not operate unless there is gas pressure at gas
inlet. With no flow/pressure sensed, a “System Failure” alarm will
sound.
Operating Instruction Manual
Page 8
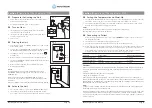
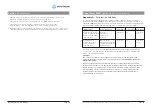
Fig. 1
Fig. 2
Fig. 3
Section 4
Set-up
4.3
Inserting the Vapor Transfer Cartridge
1. The Vapor Transfer Cartridge (VT01-AS or VT01-BS) attaches to
the unit by two water and two air connections.
2. When facing the unit, access is via a hinged cover on right side.
The cartridge may be fitted in either direction.
3. Date the cartridge.
4. Remove protective caps from luer side ports of cartridge
(Fig. 1)
.
5. Attach lower air tube from Vapotherm 2000i to lower end of
cartridge.
6. Insert projecting side ports into matching connections in unit.
Press cartridge firmly into place
(Fig. 2)
.
7. Attach upper air tube from Vapotherm 2000i to top of
cartridge
(Fig. 3)
. Make sure tubing is not kinked.
8 . Close hinged cover. If it does not close easily, check that cartridge
is pressed fully into place and that air tubes are not interfering
with cover.
WARNINGS:
The cartridge must be changed between patients and discarded
after each use.
If the cartridge is removed, the unit should be disinfected.
If the cartridge is dropped, it should be discarded.
NOTE:
Do not remove cartridge from the Vapotherm 2000i
without first draining the machine.
4.4
Inserting the Patient Delivery Tube
1. Insert Patient Delivery Tube into lower portion of the unit by
aligning blue tabs on tube with notches on bottom of unit.
2. Firmly press into place
(Fig. 4, see next page)
. Blue lip on tube
must be flush with the bottom of unit.
3. Rotate 1/4 turn clockwise and pull slightly downwards to lock into
place (Fig. 4,
see next page
).
WARNING:
The Patient Delivery Tube is a single patient use item
and should be changed with each patient.
If the Patient Delivery Tube is removed from the device for any reason
the Vapotherm 2000i should be disinfected following the routine
disinfection procedure before returning to service.
CAUTION:
Unit will not operate correctly if the Patient Delivery Tube
is inserted improperly or not locked into place.
Содержание 2000i
Страница 1: ...2000i Operating Instruction Manual...


