


OWNER’S GUIDE
Page 8
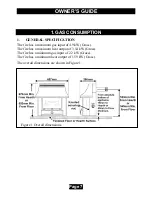
2. OPERATION
2.1
The pilot may be left alight. It is advisable, however, that the pilot is turned
off if the premises are to be left unoccupied for a lengthy period.
2.2
For your safety the fire is fitted with a Flame Supervision Device which will
shut off the gas supply if for any reason the pilot goes out. This device incorporates
a fixed probe that senses the heat from the pilot flame. If the probe is cool the
device will prevent any gas flow unless the control knob is held down. (See the
following lighting instructions).
2.3
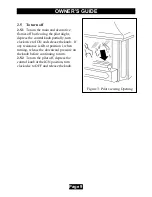
To light the pilot
Warning: If the pilot flame is extinguished either intentionally or unintentionally,
do not attempt to relight the gas until at least 3 minutes have elapsed.
2.3.1
Depress the control knob. While keeping it depressed, turn to IGN position.
Turning the control should normally cause two consecutive sparks to occur which
should ignite the pilot gas. A click should be heard while turning each time a spark
is generated. The pilot flame can be seen by looking through the gap at the front of
the right side front coal - see figure 3.
2.3.2
When the pilot is alight, keep the control knob depressed for a few seconds to
prevent the flame supervision device from shutting off the gas supply while its
probe warms up, as explained above, then release it. If the pilot does not remain
alight turn the knob back to OFF, wait a
few seconds and repeat the lighting
sequence.
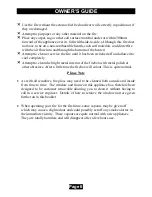
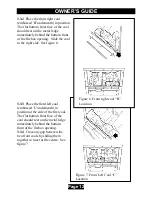
2.4 To select the burner setting.
When the pilot is alight, partially depress
the knob and turn to position 1. Both
main and decorative flame burners should
light at their lowest setting. The
decorative flames should just be visible.
Turn the control knob gradually to your
desired setting. Both burners should
gradually increase in output until at MAX
position the main burner is at its greatest
heat output and the decorative flames are
at their full magnitude.
Figure 2. The control


