OWNER’S GUIDE
Page 13
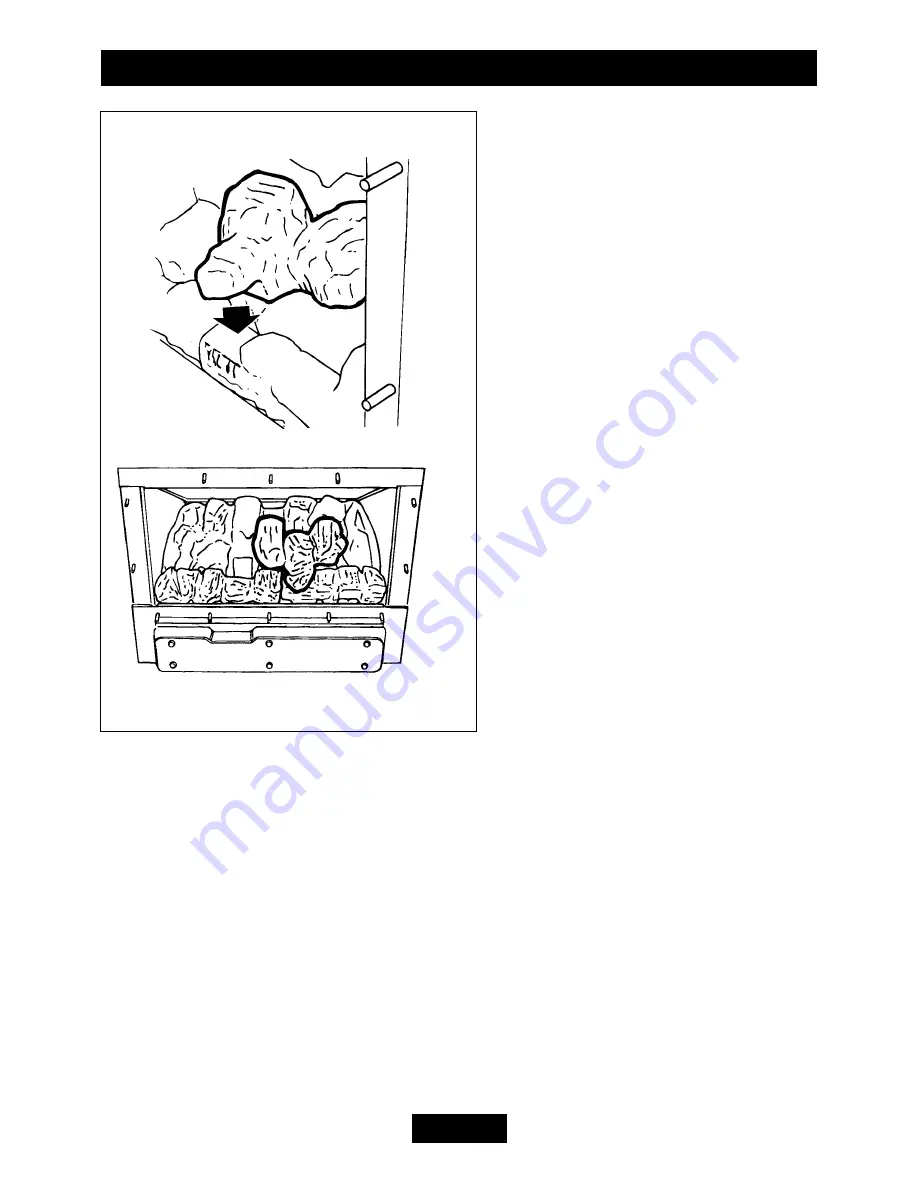
3.3.5
Place the rear right coal
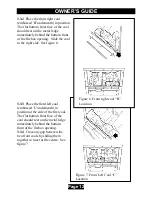
(embossed 'D' underneath) in positionas shown in figure 8.
Figure 8. Rear right coal “D” Location.
Страница 1: ...gas fire Please read thoroughly before using and keep for future reference For Service Phone 0845 960 5040 Manufactured exclusively for British Gas Scottish Gas by Valor Heating Wood Lane Erdington Bi...
Страница 2: ...nstitute The Highest Standards The manufacturer is a member of the Society of British Gas Industries which works to ensure high standards of safety quality and performance Careful Installation The man...
Страница 3: ...10 3 3 Replacing the coal pieces 11 4 SERVICING MAINTENANCE 15 C U S T O M E R C A R E This gas fire is designed to meet the most stringent quality performance and safety requirements to provide our...
Страница 4: ...Kingdom installation must be in accordance with the latest edition of the Gas Safety installation use Regulations In the Republic of Ireland installation must be in accordance with all national and lo...
Страница 5: ...ts for removal of the outer case Provide a suitable guard that complies with BS 6539 or 6778 for the protection of young children the elderly and the infirm Such a guard is also recommended for the pr...
Страница 6: ...o clean the bright metal interior of the firebox with metal polish or other abrasives After a little time the firebox will colour This is quite normal Please Note As with all windows the glass may nee...
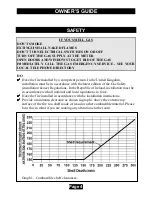
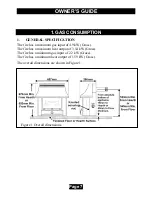
Страница 7: ...re has a maximum gas input of 4 9 kW Gross The fire has a maximum heat output of 3 54 kW Gross The fire has a minimum gas input of 2 2 kW Gross The fire has a minimum heat output of 1 59 kW Gross The...
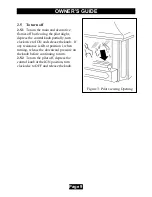
Страница 8: ...onsecutive sparks to occur which should ignite the pilot gas A click should be heard while turning each time a spark is generated The pilot flame can be seen by looking through the gap at the front of...
Страница 9: ...trol knob partially turn clockwise to IGN and release the knob If any resistance is felt at position 1 when turning release the downward pressure on the knob before continuing to turn 2 5 2 To turn th...
Страница 10: ...aced Secure with the 12 wing nuts tightening them evenly 3 1 6 Replace the case front 3 2 Cleaning the coal pieces 3 2 1 This product uses a fuel effect piece containing Refractory Ceramic Fibres RCF...
Страница 11: ...of cardboard or similar 3 2 6 Carefully clean the upper and lower surfaces of the coals with a soft brush or vacuum using a soft brush attachment 3 2 7 Replace the coal pieces as described below 3 3...
Страница 12: ...the right side See figure 6 3 3 3 Place the front left coal embossed C underneath in position at the side of the first coal The flat bottom front face of the coal should rest on the metal ledge immed...
Страница 13: ...OWNER S GUIDE Page 13 3 3 5 Place the rear right coal embossed D underneath in position as shown in figure 8 Figure 8 Rear right coal D Location...
Страница 14: ...embossed E underneath shown in figure 9 3 3 7 Replace the window unit ensuring that the seal around the frame is not damaged or misplaced Secure with the 12 wing nuts tightening them evenly 3 3 8 Repl...
Страница 15: ...safety at least every twelve months If you require your fire to be serviced please contact British Gas or Scottish Gas Telephone 0845 960 5040 and please quote the following details which can be found...