Advice on sowing
68
Ver.3 29/06/07
3.4
Engaging the drill
Figure 3.5
The drill must always be moving when lowered to ground. Keep the hydraulic lever in the pres-
surised piston, i.e., lowering position, until the bout marker has been completely folded out. Using
the Control Station, verify that tramlining has been advanced and that the correct lamp goes out
and the correct one lights and that the alternate during subsequent raising.
When driving, usually
low-lift
and
auto advancing
should have been selected.
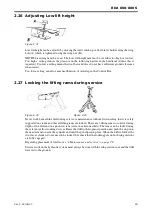
If a seed coulter becomes blocked, do not go under machine unless it has been properly secured
with the yellow locking devices. See ”
2.27 Locking the lifting rams during service” on page 59
3.5
Tramlining
The preparation of tramlines and setting of the Control Station are described in
”2.22.8 Tramline options” on page 54.
During sowing, the most important thing to remember about tramlining is to shut off
Autostep
be-
fore doing anything other than normal sowing or turning in headlands between bouts.
So, remember to switch
Autostep
off before raising the drill to pass an obstruction.
When it is time to refill the seed hopper or take a break, the drill should be raised from the last
furrow, then wait for approx. 10 seconds. Switch off
auto advancing. There is no need to switch
off auto advancing
in case no additional lifting is required during the pause. When continuing
drilling, switch on
auto advancing
before the drill is raised the first time.
3.6
Bout markers
Setting of the bout markers using the Control Station is explained in
45.
See also ”
”3.8 Turning with Low lift” on page 69.
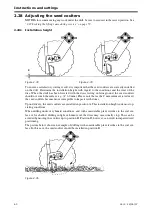
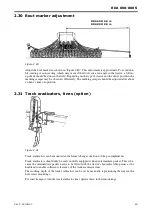
Once a reliable setting for the bout markers has been found, it is a good idea to mark this position
using e.g. a centre punch. Check occasionally that the marker tines are securely tightened.
The final tillage operation before sowing should preferably not be done in exactly the same direc-
tion as that intended for sowing, but at a slight angle to it.
Содержание RAPID RDA S Series
Страница 1: ...Ver 3 29 06 07 900236 dk Instruktioner S maskine RAPID serie RDA 600 800 S Nr 12 800 14 799...
Страница 2: ...2 Ver 3 29 06 07...
Страница 17: ...RDA 600 800 S Ver 3 29 06 07 17...
Страница 20: ...Instructions and settings 20 Ver 3 29 06 07 2 8 Horizontal alignment Figure 2 18 A E C D B...
Страница 71: ...RDA 600 800 S Ver 3 29 06 07 71 Figure 4 4...
Страница 102: ...Appendices 102 Ver 3 29 06 07 6 3 Hydraulic diagram 6 3 1 Hydraulic diagram RDA 600 S Figure 6 1 444638...
Страница 104: ...Appendices 104 Ver 3 29 06 07 6 3 2 Hydraulic diagram RDA 800 S Figure 6 2 444639...
Страница 116: ...Appendices 116 Ver 3 29 06 07...
Страница 117: ......


