inside. It is a good practice to remove all
loads from platter immediately after weighed.
This would prolong the lifetime of the weight
sensor.
5.4 WEIGHING APPLICATIONS
Before weighing, make sure that the
ZERO
INDICATOR
is on. Should a container have to
be used, refer
5.2.1
to tare off the weight
of the container.
Place subject matter on platter and the weight
of it is displayed on
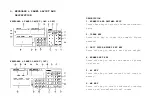
WEIGHT PANEL
.
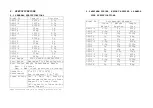
For best weighing result, refer to
SPECIFICATIONS
for recommended minimum weight
to be applied.
5.5 COUNTING APPLICATIONS: -
UNIT PIECE WEIGHT IS KNOWN AND FIXED
a. Refer to
5.1
and
5.2
for zero and tare
b. Enter the unit piece weight and confirm by
pressing
@WT/SET.
The unit piece weight is
now displayed on the
UNIT WEIGHT PANEL
.
c. Place load on the platter. The weight of
the load is displayed on the
WEIGHT PANEL
and the quantity is displayed on the
TOTAL
COUNT PANEL
.
NOTE 1
: For best counting result, refer to
MINIMUM PIECES, WEIGHT APPLIED & SAMPLE SIZE
SPECIFICATIONS
for recommended minimum piece
weight and weight applied.
NOTE 2
: When the individual unit piece weight
is not standardized, it is strongly recommended
that counting procedures as described in
5.6
should be employed.
NOTE 3
: Under this method, the
AUTO PIECE WEIGHT
ENHANCEMENT
function will be disabled for same
subsequent counting.
5.6 COUNTING APPLICATIONS: - UNIT PIECE WEIGHT
IS NOT KNOWN
a. Refer to
5.1
and
5.2
for zero and tare
b. Go through sampling procedures. (Refer to
5.7 SAMPLING
for more details).
c. Step by step add more load onto the platter
(or remove part of the load from the platter).
The latest Weight, unit piece weight and
total quantity would be displayed on the


