25
1
2
4
5
3
6
7
8
1
2
3
4
5
6.1.1 Replacing the bed panel
Make certain that the gas springs
are dismounted first and then the
bed hinges! Otherwise, there is a
danger that the gas springs will be
released in an uncontrolled
manner!
Lifting the bed acrylic
1.
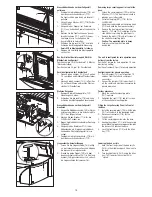
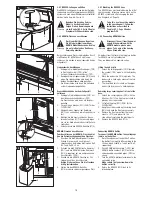
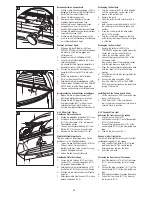
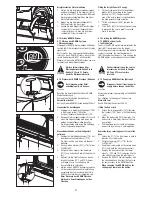
Unlock the two spagnolets (34/2) towards
the symbol (34/3) “open” with the Allen key
(34/1).
2.
Move the bed acrylic (34/5) upwards.
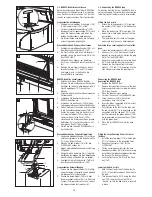
The acrylic sheet bed (35/4) is held
in open position by the two gas
springs.
The air separation sheet (35/5)
(optional) is held parallel to the
acrylic sheet bed by the two
restraining cables.
Dismount the gas springs (left and right) of
the bed kinematics
1.
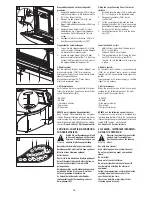
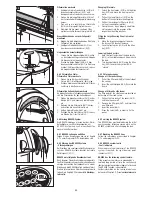
Unfasten the two mounts (35/1) on the air
separation sheet.
2.
Remove the air separation sheet from the
bed.
3.
Unfasten the gas springs (35/3) at the upper
anchors by removing the locking element
(35/2).
4.
Remove the acrylic sheet bed from the bed.
5.
Remove the gas springs from the bed.
6.
Losen the bolts (35/7) at the bed hinge.
7.
Remove the bed acrylic from the groove
(35/8).
8.
Installation of the new acrylic sheet bed is
performed in the reverse order.
9.
After completely installing the acrylic sheet
bed, pull off the protective foil from the top
of the bed.
6.1.2 Replacing the air separation sheet
Lifting the bed acrylic
1.
Unlock the two spagnolets (34/2) towards
the symbol (34/3) “open” with the Allen key
(34/1).
2.
Move the bed acrylic (34/5) upwards. The
bed acrylic is held up by means of the two
gas springs.
3.
The lower bed acrylic is held on the upper
bed acrylic by means of a holding device.
Replacing the air separation sheet
1.
Unfasten the two mounts (35/1) on the air
separation sheet (35/5).
2.
Remove the air separation sheet (35/5) from
the bed housing.
3.
Remove the air separation sheet (35/5).
4.
Place the new air separation sheet in the bed
housing.
5.
Installation of the new air separation sheet
(35/6) is performed in the reverse order.
6.1.1 Liegenscheibe auswechseln
Stellen Sie sicher, dass zuerst die
Gasdruckfedern und dann die
Liegenscharniere demontiert
werden! Sonst besteht die Gefahr,
dass sich die Gasdruckfedern
unkontrolliert lösen!
Liegenscheibe hochklappen
1.
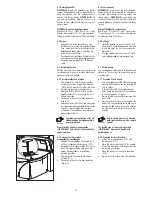
Entriegeln Sie die beiden Drehriegel (34/2)
in Richtung Symbol (34/3) offen
mit dem Innensechskantschlüssel (34/1).
2.
Bewegen Sie die Liegenscheibe (34/5) nach
oben.
Die Liegenscheibe (35/4) wird durch
die beiden Gasdruckfedern oben ge-
halten.
Die Klimascheibe (35/5) (optional)
wird durch die beiden Halteseile
parallel zur Liegenscheibe gehalten.
Gasdruckfedern (links und rechts) der
Liegenkinematik ausbauen
1.
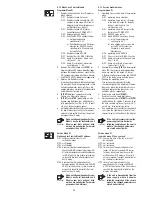
Lösen Sie die beiden Halterungen (35/1) der
Klimascheibe.
2.
Legen Sie die Klimascheibe in der Liege ab.
3.
Lösen Sie die Gasdruckfedern (35/3) an den
oberen Verankerungen durch Entfernen des
Sicherungselements (35/2).
4.
Legen Sie Liegenscheibe auf der Liege ab.
5.
Legen Sie Gasdruckfedern auf der Liege ab.
6.
Lösen Sie die Schrauben (35/7) am Liegen-
scharnier.
7.
Entnehmen Sie die Liegenscheibe aus der
Nut (35/8).
8.
Gehen Sie zur Montage der neuen Liegen-
scheibe entsprechend in umgekehrter
Reihenfolge vor.
9.
Ziehen Sie nach der vollständigen Montage
der Liegenscheibe die Schutzfolie auf der
Oberseite der Liege ab.
6.1.2 Klimascheibe auswechseln (optional)
Liegenscheibe hochklappen
1.
Entriegeln Sie die beiden Drehriegel (34/2)
in Richtung Symbol (34/3) offen
mit dem Innensechskantschlüssel (34/1).
2.
Bewegen Sie die Liegenscheibe (34/5) nach
oben. Die Liegenscheibe wird durch die
beiden Gasdruckfedern oben gehalten.
3.
Die Klimascheibe wird durch die Halterung
an der Liegenscheibe gehalten.
Klimascheibe auswechseln
1.
Lösen Sie die beiden Halterungen (35/1)
von der Klimascheibe (35/5).
2.
Legen Sie die Klimascheibe (35/5) in der
Liegenwanne ab.
3.
Entnehmen Sie die Klimascheibe (35/5).
4.
Legen Sie die neue Klimascheibe in die
Liegenwanne.
5.
Gehen Sie zur Montage der neuen
Klimascheibe (35/6) entsprechend in
umgekehrter Reihenfolge vor.
34
Warning
Warnung
Wichtig!
Important!
35

