14
1
2
3
4
1a
5a
5
5a
1
2
4
3
5
1
2
3
4
5
3.4. BREEZE-Behälter anschliessen
Bei der Auslieferung ab Werk ist der BREEZE Be-
hälter noch nicht angeschlossen. Der verschlos-
sene Behälter wird im vorderen Teil des Fuß-
raumes an seinem späteren Platz transportiert.
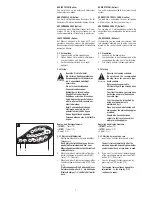
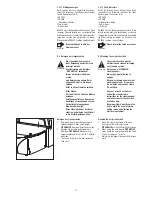
Liegenscheibe hochklappen
1.
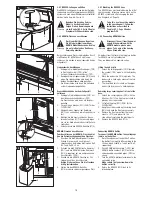
Entriegeln Sie die beiden Drehriegel (15/3)
in Richtung Symbol (15/3) „offen“
mit dem Innensechskantschlüssel (15/1).
2.
Bewegen Sie die Liegenscheibe (15/5) nach
oben. Die Liegenscheibe wird durch die
beiden Gasdruckfedern oben gehalten.
3.
Die Klimascheibe wird durch die Halterung
an der Liegenscheibe gehalten.
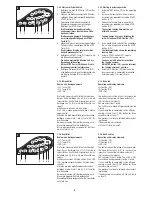
Grosse Abdeckhaub Fußgestell entfernen
1.
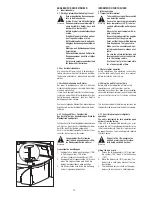
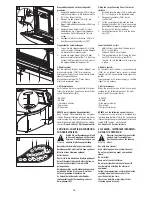
Entriegeln Sie die Abdeckhaube (16/2) mit
dem Innensechskantschlüssel (16/1).
2.
Die Frontschürze wird durch ein Fangseil
gehalten. Lösen Sie den Stecker (16/4) für
das FLOORLIGHT.
3.
Hängen Sie das Fangseil am Karabiner
(16/3) aus und halten Sie die Frontschürze
fest.
4.
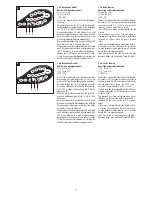
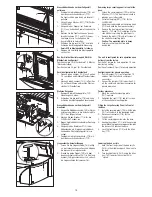
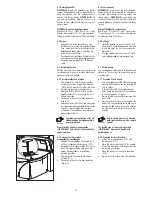
Nehmen Sie die Frontschürze aus den un-
teren Aufnahmen (17/1 und 17/2) heraus
und legen Sie sie zur Seite ohne die
Kunststoffteile zu zerkratzen.
BREEZE-Behälter anschliessen
1.
Entnehmen Sie den BREEZE-Behälter.
2.
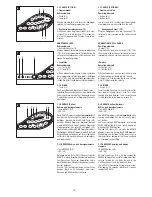
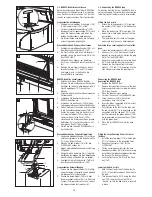
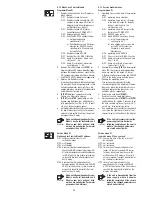
Nehmen Sie die Schläuche vom Deckel des
Behälters ab, in dem Sie die blauen Schnell-
steck-Kupplungen (18/2) nach unten
drücken.
3
Legen Sie die Schläuche auf einem sauberen
Untergrund ab.
4.
Schrauben Sie den Deckel des vollen
BREEZE-Behälters ab.
5.
Schrauben Sie den Deckel (18/3) mit den
Leitungsanschlüssen auf den vollen Behälter.
6.
Setzen Sie die Schläuche bis zum Anschlag
in die Schnellsteck-Kupplungen (18/2) ein.
7.
Achten Sie darauf, dass Sie den Schlauch
mit rotem Aufkleber (18/1) auf den An-
schluss mit dem roten Punkt (18/1a)
stecken und die Schläuche mit den grünen
Aufklebern (18/5) auf die Anschlüsse mit
dem grünen Punkt (18/5a) stecken.
8.
Stellen Sie den vollen BREEZE-Behälter in
das Fußgestell.
Grosse Abdeckhaube Fußgestell montieren
1.
Hängen Sie die Abdeckhaube (17/3) mit ihren
unteren Langlöchern in die Aufnahmestifte
(17/1) des Fußgestells ein.
2.
Stecken Sie den Stecker (16/4) für das
FLOORLIGHT wieder ein.
3.
Kippen Sie die Abdeckhaube etwas Richtung
Fußgestell.
4.
Hängen Sie den Karabiner (16/3) in der Ab-
deckhaube ein. Kippen Sie die Abdeckhaube
oben Richtung Fußgestell, bis sie anliegt.
5.
Verriegeln Sie die Frontschürze (16/2) mit
dem Innensechskantschlüssel (16/1).
Liegenscheibe herunterklappen
1.
Fassen Sie die Liegenscheibe (15/5) mittig
an der vorderen Längsseite an und klappen
Sie diese auf die Liege herunter.
2.
Drehen Sie beide Riegel (15/2) mit dem
Innensechskantschlüssel (15/1) in Richtung
Symbol (15/4) geschlossen zurück , so dass
die Liegenscheibe fest verankert ist.
3.4. Connecting the BREEZE tank
On delivery from the factory, the BREEZE tank is
not yet connected. The closed tank is transported
in the front part of the foot area in its later location.
Lifting the bed acrylic
1.
Unlock the two spagnolets (15/3) towards
the symbol (15/3) “open” with the Allen key
(15/1).
2.
Move the bed acrylic (15/5) upwards. The
bed acrylic is held up by means of the two
gas springs.
3.
The lower bed acrylic is held on the upper
bed acrylic by means of a holding device.
Removing large covering panel in front of the
base.
1.
Unlock the covering panel (16/2) with the
2.
Allen key (16/1). The front apron is held in
place by an
arrester cable. Unfasten the plug
(16/4) for the FLOORLIGHT.
3.
Hang the arrester cable on the spring hook
(16/3) and hold the front apron securely.
4.
Remove the front apron from the lower
mounts (17/1 and 17/2) and place it to the
side without scratching the plastic parts.
Connecting the BREEZE tank
Replacing the BREEZE tank
1.
Remove the BREEZE tank.
2.
Remove the tubes from the cover of the tank
by pressing the blue instant plug-in clutches
(18/2) downwards.
3.
Place the tubes on clean ground.
4.
Unscrew the cover of the full BREEZE tank.
5.
Screw the cover (18/3) with the line
connections onto the full tank.
6.
Insert the tubes completely into the instant
plug-in clutches (18/2).
7.
Pay attention to the fact that the tube with
the red sticker (18/1) is to be placed on the
connection with the red point (18/1a) and
that the tubes with the green stickers (18/5)
are to be placed on the connections (18/5a)
with the green point.
8.
Place the full BREEZE tank into the base
frame.
Fitting the Large Covering Panel in Front of
the Base
1.
Install the covering panel (17/3) with the pins
(17/1) of the base in the elongated holes.
2.
Reconnect connector (16/4) for the
FLOORLIGHT.
3.
Tilt the covering panel towards the base.
4.
Hook both carbines (16/3) into the covering
panel. Move the large covering panel towards
the base until it touches the base.
5.
Lock the front apron (16/2) with the Allen
key (16/1).
Lowering the bed acrylic
1.
Hold the front long side of the bed acrylic
(15/5) in the middle and push it down onto
the bed.
2.
Turn back both bolts (15/2) using the Allan
key (15/1) towards the symbol (15/4)
“closed”, so that the bed acrylic is secured
in place.
15
16
17
18
2
3
1
3


