


Uvitron International PORTA-RAY 400/600W Instruction Manual, Rev. E
Page 13 of 22
SYSTEM OPERATION
6
The PortaRay is designed to be an extremely user-friendly system, which has a minimum of
controls, and is easy to operate. Therefore, the following operating instructions are brief.
6.1 Setup and Operation
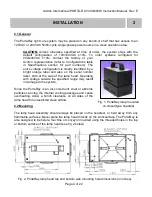
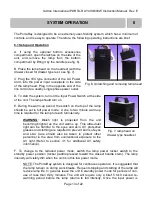
A. If using the optional bottom accessories
compartment, open the latches on the side of the
unit, and remove the lamp from the bottom
compartment by lifting it by the handle (see fig. 6).
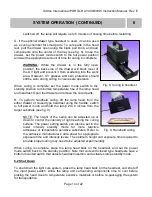
B. Place the lamp head on the headrest (with the
drawer closed for drawer type rest, see fig. 7).
C. Plug the IEC type connector of the AC Power
Cord, into the power input receptacle in the side
of the lamp head. Plug in the opposite end of the
line cord into a nearby single phase power outlet.
D. To start the system, turn on the Input Power Switch at the side
of the unit. The lamp should turn on.
E. During the warm-up period, the switch on the top of the lamp
should be set to full power mode. A one to two minute warm-up
time is required for the lamp to reach full intensity.
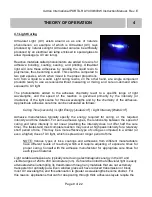
WARNING:
Bluish light is projected from the unit
becoming brighter as the unit warms up. This ultra-violet
light can be harmful to the eyes and skin. UV protective
glasses and clothing are required to prevent burns of eyes
and skin. Care should also be taken to protect other
personnel in the area from unintentional exposure to the
UV light (Refer to section 3.1 for additional UV safety
information).
F. To change to the reduced power mode, switch the lamp power rocker switch to the
standby power position (rocker paddle pressed toward the closest handle stem). The lamp
intensity will visibly dim when the unit is in this low power mode.
NOTE: The PortaRay system is designed for continuous operation. It is suggested that
the lamp remain on during work breaks. Frequent stopping and starting of the lamp will
reduce lamp life. In general, leave the unit in standby power mode for periods of non-
use of less than thirty minutes. The unit will require only a brief 5 to10 second re-
warming period before the lamp returns to full intensity. Once the input power is
Fig. 7, lamp head on
drawer type headrest
Fig. 6, Unlatching and removing lamp head


