DS1093-119A
39
b) Set the ports on the DVR and port-forward of the same ports to the router. There are two different ways to do this:
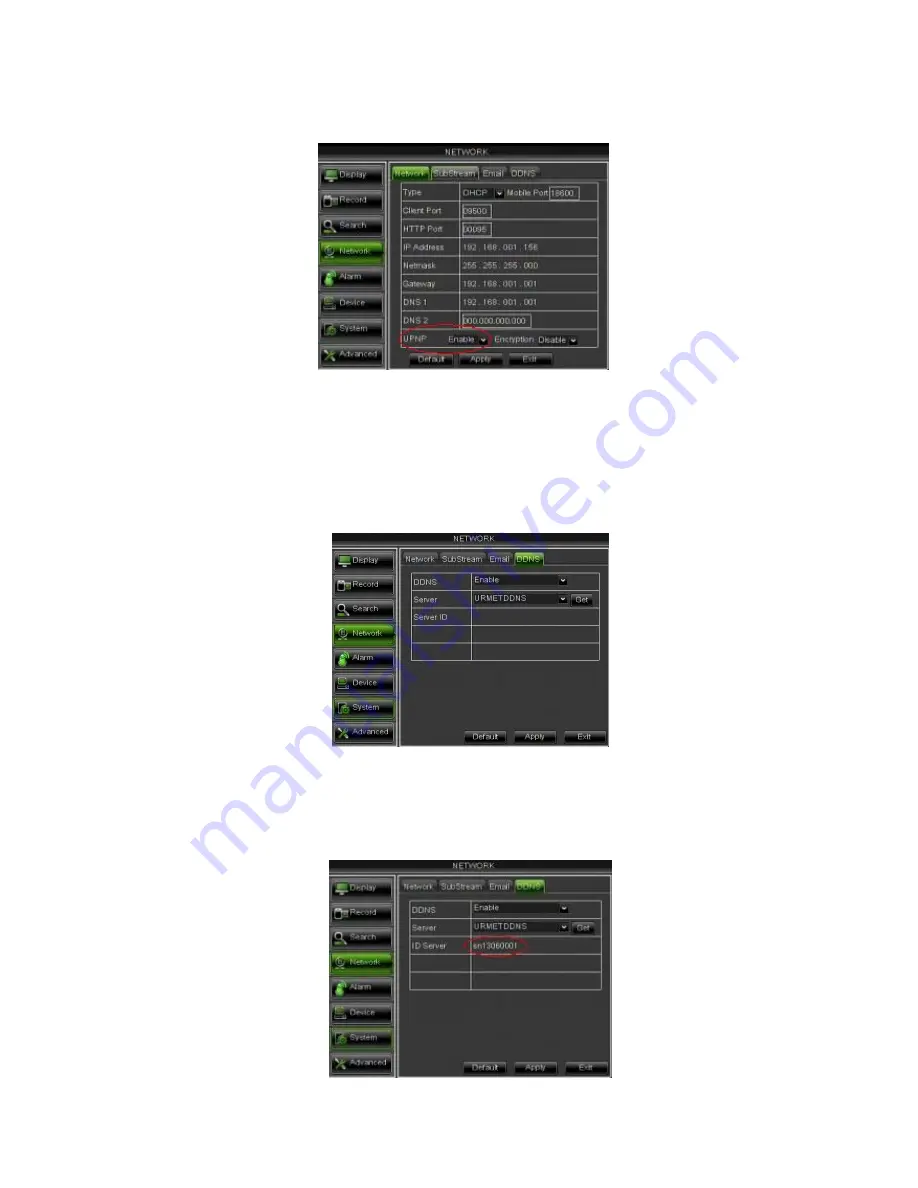
Automatic mode: If the UPnP function is supported and enabled on the router, simply enable the function
also on the DVR on the bottom of the “Menu Network” page (see below).
Manual mode: if the UPnP function cannot be used, manually set port-forwarding on the port-forwarding
(or virtual server) table of the router.
IMPORTANT NOTE:
The firewall of some routers could block forwarding of the ports set on port-forwarding tables.
Carefully check the firewall settings of your router too.
3. DDNS activation
Select the DDNS submenu in the DVR network menu. A page like the following will appear:
IMPORTANT NOTE:
Before getting Urmet DDNS ID make sure that user password is enabled, otherwise it cannot
continue with Urmet DDNS ID getting procedure.
Check that the DDNS function is enabled and that the URMETDDNS server is selected. Click on the
Get
button and wait
for ten seconds or so for the DVR ID to be generated. This is needed for remote access via the URMET web portal (see
below).
Take note of the ID of your DVR provided by the URMETDDNS server.


