background image


DS1093-029 


Mod.
1093


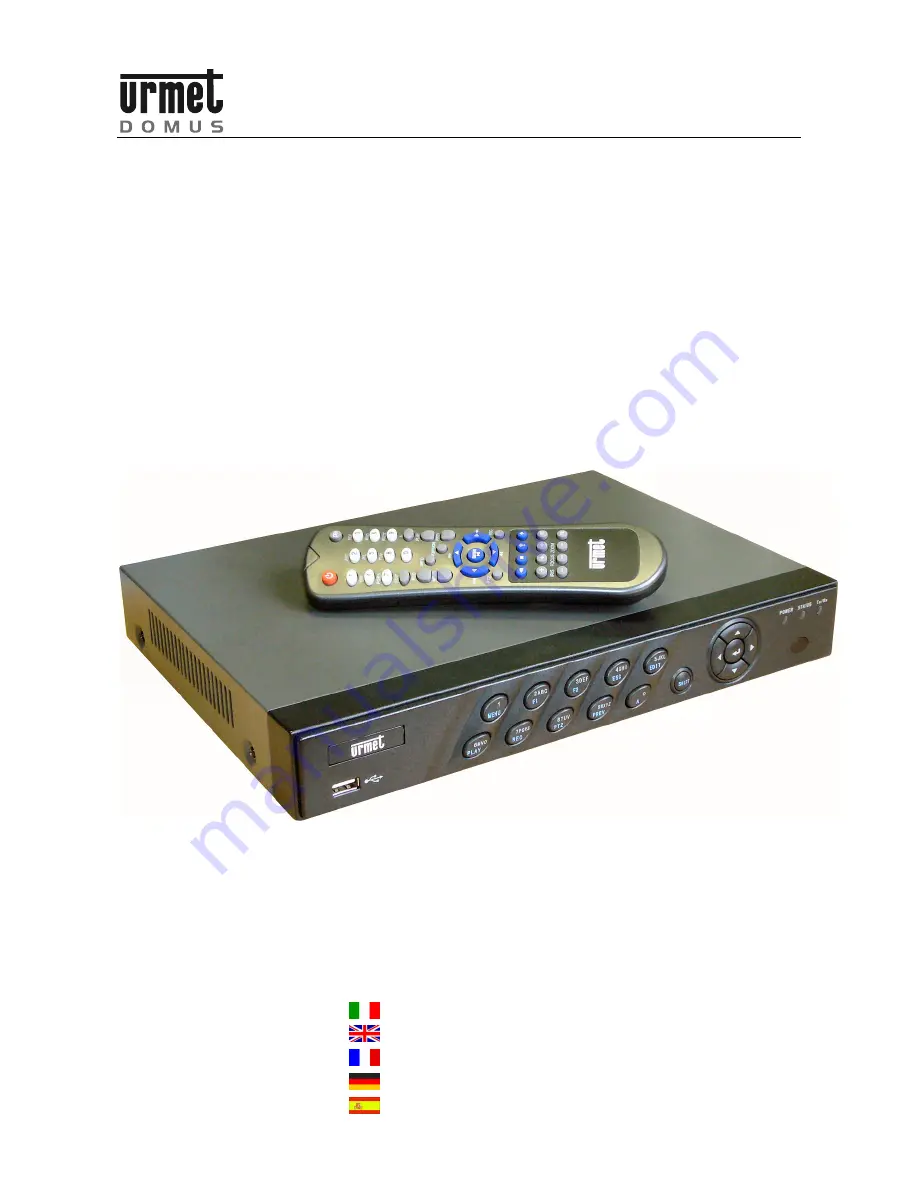
DVR 4 CANALI VIDEO H.264 4CIF Sch. 1093/061SVN 

4 VIDEO CHANNEL DVR H.264 4CIF Ref. 1093/061SVN 

MAGNETOSCOPE NUM. 4 CAN. VIDEO H.264 4CIF Réf

.

 1093/061SVN


DVR 4 VIDEO-KANÄLE H.264 4CIF Typ 1093/061SVN


DVR 4 CANALES VÍDEO H.264 4CIF Ref. 1093/061SVN 


GUIDA RAPIDA 

QUICK GUIDE 

GUIDE RAPIDE 

SCHNELLANLEITUNG

GUÍA RÁPIDA 


Содержание 1093 Series

Страница 1: ...VN 4 VIDEO CHANNEL DVR H 264 4CIF Ref 1093 061SVN MAGNETOSCOPE NUM 4 CAN VIDEO H 264 4CIF Réf 1093 061SVN DVR 4 VIDEO KANÄLE H 264 4CIF Typ 1093 061SVN DVR 4 CANALES VÍDEO H 264 4CIF Ref 1093 061SVN GUIDA RAPIDA QUICK GUIDE GUIDE RAPIDE SCHNELLANLEITUNG GUÍA RÁPIDA ...

Страница 2: ... 2 2 1 2 Nome 11 2 3 Menu registrazione 12 2 3 1 Impostazioni base menu registrazione 13 2 3 1 1 Hard disk pieno 13 2 3 1 2 Selezionare telecamera 13 2 3 1 3 Tipo di flusso 13 2 3 1 4 Risoluzione 13 2 3 1 5 Durata 13 2 3 1 6 Enable event para 13 2 3 1 7 Qualità Tipo bit rate Frame type Interval parameter 13 2 3 1 8 Frame rate 13 2 3 1 9 Bit rate 14 2 3 1 10 Abilita registrazioni 14 2 3 1 11 Progra...

Страница 3: ...per l installazione del software 24 4 2 Configurazione di protezione e sicurezza 24 4 3 Avvio 26 4 4 Finestra principale e descrizione dell interfaccia 26 4 4 1 Area informazioni 27 4 4 2 Interfaccia di stato del DVR e dei canali connessi 27 4 4 3 Tasti di visualizzazione 27 4 4 4 Griglia di visualizzazione 28 4 4 5 Tasti funzione 28 4 4 6 Impostazioni di visualizzazione 28 4 4 7 Interfaccia coman...

Страница 4: ...uare l operazione di spegnimento dopo avere arrestato tutte le registrazioni e le riproduzioni onde evitare di rovinare l hard disk 1 2 1 SPEGNIMENTO DIRETTO Premere il tasto di alimentazione posto sul retro 1 2 2 SPEGNIMENTO DAL MENU PRINCIPALE Premere il tasto MENU per accedere al menù principale Selezionare la voce UTILITÀ e premere il tasto ENTER Selezionare la voce ARRESTA INIZIO e premere il...

Страница 5: ...le visualizzare o nascondere la barra di stato delle telecamere mediante la pressione del tasto A sul pannello frontale del dispositivo STATI DI REGISTRAZIONE Gli stati di registrazione della telecamera sono mostrati nella tabella sottostante ICONA COLORE DESCRIZIONE DELLO STATO Bianco Nessun segnale video Giallo Presenza segnale video Rosa Registrazione manuale Verde Registrazione in tempo reale ...

Страница 6: ... Rec Copia su telecamera Base IP Port Mask Gateway Porta Http Email PPPoE utente pw verifica DDNS Registrazione Avanzate Rete Avanzate Mac Tipo Rete DNS Mcast IP IP PC Remoto Porta su PC Remoto NTP Base Ingresso di allarme Tipo di allarme Notifica Copia su ingresso Uscita di allarme tempo Tempo uscita allarme Copia su uscita allarme Avvisi Base Telecamera Baud rate Data bits Stop bits Parità Fluss...

Страница 7: ... In questo caso premere il tasto MENU ed immettere nuovamente la password NOTA BENE LA PASSWORD DI DEFAULT È 12345 Si consiglia di modificare la password di default per evitare intrusioni nel dispositivo Per digitare modificare la password ricordarsi di premere il tasto SHIFT assicurandosi che il led STATUS sia acceso seguito dalle cifre numeriche Al termine dell operazione premere nuovamente il t...

Страница 8: ...o stesso indirizzo L indirizzo di default è 01 Per modificare l indirizzo ID del dispositivo utilizzare i tasti numerici 0 9 posti sul pannello frontale Il valore dell indirizzo deve essere compreso tra 1 255 2 1 1 3 Richiesta password In questa voce di menù è possibile abilitare o disabilitare la richiesta della password in occasione delle seguenti funzionalità Menu Abilitare disabilitare la rich...

Страница 9: ... 1 8 Trasparenza menu In questa voce di menù è possibile variare il livello di trasparenza del menù OSD Utilizzare i tasti per l impostazione È possibile scegliere tra i seguenti valori 1 1 3 1 1 3 No Trasparenza Il valore 3 1 indica che è il menù OSD a prevalere di circa 3 volte su quanto si stava precedentemente visualizzando e viceversa il valore 1 3 2 1 1 9 Data Ora Ora Legale In questa voce d...

Страница 10: ...Active Frame sull icona TELECAMERE quindi premere il tasto ENTER Comparirà la videata come mostrato nella figura seguente Figura 7 menù telecamere impostazioni di base Tale videata fa riferimento alle impostazioni base del menù Selezionare la voce AVANZATE e premere il tasto ENTER per accedere alle impostazioni avanzate La voce evidenziata rappresenta la voce selezionata Utilizzando i tasti frecci...

Страница 11: ... dei caratteri Utilizzando i tasti freccia è possibile spostare il cursore Per cancellare un carattere premere il tasto EDIT Prima di uscire dalla modalità di Modifica ricordarsi di premere nuovamente il tasto SHIFT per tornare al controllo precedente il led STATUS ritornerà ad essere spento CARATTERE DI TIPO ALFABETICO Le barre di input dei caratteri di tipo alfabetico sono le seguenti La corrisp...

Страница 12: ... la voce POSIZIONE e premendo il tasto ENTER si accede all interfaccia di impostazione della posizione del nome della telecamera Utilizzare i tasti per impostare la posizione desiderata e premere il tasto ENTER per uscire dall interfaccia di impostazione 2 3 MENU REGISTRAZIONE Descrizione Accedere a questo menù per variare le impostazioni di registrazione e di configurazione di ciascun segnale vid...

Страница 13: ...razione 4CIF DCIF 2CIF CIF e QCIF Utilizzare i tasti per la selezione del tipo di risoluzione Nella tabella sottostante sono indicate le corrispondenze tra sigla e relativo valore della risoluzione in formato PAL SIGLA RISOLUZIONE PAL 4CIF 704x576 DCIF 528x384 2CIF 704x288 CIF 352x288 QCIF 176x144 Tabella 1 corrispondenza tra sigla e risoluzione PAL Il modello Urmet DVR DVS Sch 1093 061SVN permett...

Страница 14: ...are Selezionando la voce Programmare e premendo il tasto ENTER si accede al menù di programmazione mostrato qui sotto Figura 9 menù di programmazione registrazione La voce evidenziata rappresenta la voce selezionata Utilizzando i tasti freccia è possibile spostare il cursore sulle varie voci del menù Una volta posizionato il cursore sulla voce desiderata per modificarla premere il tasto ENTER ed u...

Страница 15: ...ppena il sensore va in allarme o il motion rileva dei movimenti Motion e allarme In questa modalità la registrazione viene avviata non appena il sensore va in allarme e il motion rileva dei movimenti Manuale In questa modalità la registrazione viene avviata manualmente mediante la pressione sul tasto REC Per arrestare la registrazione premere nuovamente il tasto REC 2 3 1 12 Pre REC In caso di eve...

Страница 16: ...immettere l indirizzo IP Utilizzare i tasti per spostare il cursore Premere EDIT per cancallare Premere ENTER per confermare o ESC per annullare L indirizzo IP immesso non deve risultare in conflitto con altri indirizzi IP Se in rete c è un server DHCP è possibile impostare l indirizzo 0 0 0 0 quindi salvare e riavviare il dispositivo Durante la fase di riavvio il dispositivo si connetterà al serv...

Страница 17: ...azioni future 2 4 1 8 PPPoe In questa voce di menù è possibile abilitare la funzione PPPoE in dial up Per l operazione di abilitazione selezionare la relativa casella di controllo utilizzando i tasti e premere il tasto ENTER o EDIT Il simbolo indica che la funzione PPPoE è stata abilitata mentre il simbolo indica che è stata disabilitata Abilitando l opzione PPoE è possibile definire utente passwo...

Страница 18: ...il tasto ESC Per uscire dal menù di configurazione premere più volte il tasto ESC fino alla chiusura della finestra di configurazione Nella lista box dei nomi degli utenti le impostazioni di fabbrica del dispositivo prevedono un amministratore di default caratterizzato da nome admin password 12345 Il nome admin non è modificabile mentre è possibile modificare la password NOTA BENE LA PASSWORD DI D...

Страница 19: ... Edit ed inserire la nuova password Se la password inserita e quella di verifica sono uguali la password verrà salvata e diventerà quella effettiva Se la password inserita e quella di verifica non sono uguali apparirà una finestra di errore che segnalerà l anomalia Figura 12 messaggio di errore cambio password In questo caso premere il tasto Enter per tornare al menù precedente e ripetere la proce...

Страница 20: ...FT assicurandosi che il led STATUS sia acceso seguito dalle cifre numeriche Al termine dell operazione premere nuovamente il tasto SHIFT per tornare alle funzioni di default ed il led STATUS ritornerà ad essere spento La password impostata non deve essere persa o dimenticata per nessuna ragione Si consiglia di annotare la password scelta e conservarla in luogo sicuro In caso di creazione di passwo...

Страница 21: ... su un canale si accenderà l icona di colore rosa sulla barra di stato delle telecamere visualizzata a monitor 3 1 4 AVVIO TOTALE Selezionando questa voce e premendo il tasto ENTER o EDIT è possibile avviare contemporaneamente la registrazione su tutti i canali video 3 1 5 STOP TOTALE Selezionando questa voce e premendo il tasto ENTER o EDIT è possibile arrestare contemporaneamente la registrazion...

Страница 22: ... e ore minuti del periodo da impostare Utilizzare i tasti per impostare giorno mese anno e ore minuti Eventuali sovrapposizioni di orario verranno segnalate mediante appositi messaggi 3 2 4 RICERCA Selezionando la voce CERCA viene avviata la ricerca in funzione dei parametri di ricerca impostati L elenco dei file risultanti dalla ricerca effettuata verrà mostrato nella lista box sottostante Per og...

Страница 23: ...l tasto PLAY Per visualizzare o nascondere la barra d interfaccia comandi premere il tasto MENU Premere il tasto ESC per uscire dalla modalità di riproduzione 3 3 1 PLAY Selezionando la voce Play viene avviata la riproduzione senza interruzione delle registrazioni in funzione dei parametri di ricerca impostati La riproduzione si arresterà una volta raggiunta la fine dell ultima riproduzione presen...

Страница 24: ...nte potrebbe essere la fluidità dei flussi video in LIVE 4 1 REQUISITI MINIMI PER L INSTALLAZIONE DEL SOFTWARE Processore Pentium 4 3GHz Ram 512 MB Scheda video MMX 128 MB 128 bit Sistema operativo Win 2000 Pro Win XP Pro sp2 Browser Internet I E 6 0 o successivi 4 2 CONFIGURAZIONE DI PROTEZIONE E SICUREZZA Prima di effettuare la connessione con Pc remoto occorre procedere con la configurazione di...

Страница 25: ...b all area Cliccare sulla voce Aggiungi Apparirà la seguente videata di conferma NOTA BENE Non selezionare la voce Richiedi verifica server https per tutti i siti dell area Cliccare ripetutamente su OK per concludere Procedere con l installazione dell Active X NOTA BENE Terminata la procedura di installazione dell Active X è possibile ripristinare il livello di protezione di I E desiderato per i s...

Страница 26: ...ti si accederà alla schermata principale dell interfaccia web in caso contrario apparirà il seguente messaggio di errore Figura 17 messaggio di errore NOTA BENE Per una visualizzazione dell interfaccia web in modalità full screen occorre impostare la risoluzione del monitor PC a 1024x768 4 4 FINESTRA PRINCIPALE E DESCRIZIONE DELL INTERFACCIA Se l operazione di login è avvenuta con successo apparir...

Страница 27: ... nel formato anno mese giorno e ore minuti secondi Nome utente con cui si è effettuata l operazione di login 4 4 2 INTERFACCIA DI STATO DEL DVR E DEI CANALI CONNESSI In tale sezione vengono riportate le seguenti informazioni nome del dispositivo a cui si è connessi nome dei canali video disponibili stato dei canali video disponibili connesso non connesso ICONA DESCRIZIONE Canale video disponibile ...

Страница 28: ...ideo 20071113 data nel formato anno mese giorno 094244 ora nel formato ore minuti secondi 6227453 identificativo Una prima pressione l icona muterà come segue consente di attivare la registrazione del canale video LIVE selezionato riquadro rosso su PC mentre una seconda pressione la arresta La sequenza acquisita viene salvata di default nella cartella C mpeg4record Tasto non abilitato Ripristina l...

Страница 29: ...ne dell apertura chiusura dell iris della Dome collegata Agire sui pulsanti e per effettuare la regolazione 4 4 8 TASTI DI GESTIONE E CONFIGURAZIONE ICONA DESCRIZIONE Consente la disconnessione dall interfaccia web Consente di accedere all interfaccia LIVE Consente di accedere all interfaccia di playback Consente di accedere al menù di configurazione del sistema Consente di accedere all interfacci...

Страница 30: ...cita video spot SI 1 BNC livello elettrico 1 0Vpp impedenza 75 Ω Frame Rate registrazioni per canale video 4CIF 6fps DCIF e 2CIF 12fps CIF e QCIF 25fps Memoria Hard disk 320 GB default Tipo di stream Video Audio Max bit rate per canale 32Kbps 768Kbps Ingressi audio SI Interfacce ingressi audio RCA livello elettrico lineare impedenza 1K 2Vpp 1 Uscita audio RCA livello elettrico lineare impedenza 60...

Страница 31: ...tuare lo zoom dell area desiderata Nella tabella sottostante sono indicate le corrispondenze tra la sigla ed il relativo valore della risoluzione in formato PAL SIGLA RISOLUZIONE PAL 4CIF 704x576 DCIF 528x384 2CIF 704x288 CIF 352x288 QCIF 176x144 6 EVOLUZIONI FUTURE La URMET Domus SpA nell ottica di un costante miglioramento della propria gamma al fine di rispondere a tutte le esigenze di un setto...

Страница 32: ... 2 1 1 Select camera 40 2 2 1 2 Name 41 2 3 Recording menu 42 2 3 1 Recording menu basic settings 42 2 3 1 1 Hard disk full 42 2 3 1 2 Select camera 42 2 3 1 3 Stream type 42 2 3 1 4 Resolution 42 2 3 1 5 Duration 43 2 3 1 6 Enable event para 43 2 3 1 7 Quality Bit rate type Frame type Interval parameter 43 2 3 1 8 Frame rate 43 2 3 1 9 Bit rate 43 2 3 1 10 Enable rec 43 2 3 1 11 Schedule 43 2 3 1...

Страница 33: ...r interface 52 4 1 Minimum software installation requirements 52 4 2 Protection and security configuration 52 4 3 How to switch the device on 54 4 4 Home page and description of the interface 55 4 4 1 Information area 55 4 4 2 DVR and connected channels status interface 56 4 4 3 View buttons 56 4 4 4 Viewing grid 56 4 4 5 Function buttons 57 4 4 6 View settings 57 4 4 7 PTZ interface 57 4 4 8 Mana...

Страница 34: ...witch off from main menu Make sure that no recording or playback is in progress before switching the unit off to prevent damage to the hard disk 1 2 1 DIRECT SWITCH OFF Press the power button on the back 1 2 2 SWITCH OFF FROM MAIN MENU Press MENU to access the main menu Select UTILITIES and press ENTER Select POWER OFF START and press ENTER Press again ENTER to confirm 1 3 REMOTE CONTROL ENABLE Th...

Страница 35: ...ically Press A on the front panel of the device to view or hide the camera status bar RECORDING STATUSES The recording statuses of the camera are shown in the following table ICON COLOUR STATUS DESCRIPTION White No video signal Yellow Video signal present Pink Manual recording Green Real time recording Blue Recording following motion detection Red Recording following external alarm ALARM STATUS Th...

Страница 36: ...Enable rec Pre Rec Post Rec Copy to camera Basic IP Port Mask Gateway Http port Email PPPoE DDNS Recording Advanced Network Advanced Mac NIC type IP server Mcast IP Remote host IP Remote host port NTP Basic Select alarm in Alarm type Alarm handling Copy to alarm Alarm out time Alarm out time Copy to alarm out Exceptions Basic Select camera Baud rate Data bits Stop bits Parity Flow ctrl Protocol PT...

Страница 37: ...rect In this case press MENU and enter the password again IMPORTANT NOTE THE DEFAULT PASSWORD IS 12345 It is advisable to change the default password to prevent intrusions To enter edit the password remember to press SHIFT make sure that the STATUS LED lights up followed by the number keys At the end of the operation press SHIFT to go back to default functions The STATUS LED will go out Do not los...

Страница 38: ...n be used to assign an address to the DVR for controlling it with a remote control Define a different address for each device if several DVRs are installed otherwise the remote control will control all DVRs with the same address at the same time The default address is 01 Use keys 0 9 on the front panel to edit the device ID address The address must be from 1 255 2 1 1 3 Require password This optio...

Страница 39: ...ER or EDIT to enable or disenable the password Symbol indicates that the selected option is enabled symbol indicates that it is not 2 1 1 7 Brightness This option can be used to vary the OSD menu brightness Use to select 2 1 1 8 Menu trasparency This option can be used to vary the OSD menu transparency level Use to select Possible selections 1 1 3 1 1 3 and No Trans 3 1 indicates that the OSD prev...

Страница 40: ...osition the Active Frame on the CAMERA icon and press ENTER The following window will appear Figure 27 cameras menu basic settings This page contains the basic menu settings Select ADVANCED SETTINGS and press ENTER to access advanced settings The selected item is highlighted Press arrows to point the cursor to the various menu items Point the cursor to the required item and press ENTER to edit it ...

Страница 41: ...delete a character ALPHABETIC TYPE CHARACTER The alphabetic character input bars are Correspondence between number keys and the respective alphabetic characters which can be entered is shown on the front panel of the device and summarised in the table below NUMBER KEY ALPHABETIC CHARACTERS 2 ABC abc 3 DEF def 4 GHI ghi 5 JKL jkl 6 MNO mno 7 PQRS pqrs 8 TUV tuv 9 WXYZ wxyz How to enter a character ...

Страница 42: ...ty of the hard disk is reached If several hard disks are present in the DVR the system will start writing on the SLAVE secondary disks when the MASTER main disk is full When the SLAVE disk is full the system will start writing over the MASTER disk if overwrite option is checked and then back on the SLAVE disks 2 3 1 2 Select camera This option is used to select the camera on which to edit the reco...

Страница 43: ...ce occupation to the detriment of recording quality less fluid sequences Selecting a lower frame rate will save hard disk space IMPORTANT NOTE The Bit rate value is set automatically according to the Frame Rate selected by users 2 3 1 9 Bit rate This option is used to set the bit rate fixed bit rate or max bit rate variable bit rate to be used Possible options are 32 kbps 48 kbps 64 kbps 80 kbps 9...

Страница 44: ...ates that it is not Check the All day option to define the recording mode The following recording modes can be selected all time mot det alarm mot alm mot alm command All time In this mode recording is continuous for 24 hours IMPORTANT NOTE If All Time is selected in the event of a blackout or if the device is switched off the device will automatically resume recording as soon as network voltage i...

Страница 45: ...ms Point the cursor to the required item and press ENTER to edit it Use buttons to change the available options for the selected menu item Select CONFIRM and press ENTER to make the changes effective Select CANCEL and press ENTER to cancel the changes Press ESC to go back by one step Press ESC several times until the configuration window closes to quit the configuration menu 2 4 1 NETWORK MENU BAS...

Страница 46: ...his function permits the time synchronization of the DVR through Internet The user has to indicate the NTP Host chosen for the synchronization based on his own time zone Proper configuration of Web Port Data Port IP address Gateway and IP DNS of the DVR must be guaranteed for the correct use of the NTP function 2 4 1 7 2 IP server For future application 2 4 1 8 PPPoe This option is used to enable ...

Страница 47: ...one step Press ESC several times until the configuration window closes to quit the configuration menu The box contains a list of the default users The features of the default administrator are User admin Password 12345 The admin name cannot be edited The password can be edited IMPORTANT NOTE THE DEFAULT PASSWORD IS 12345 It is advisable to change the default password to prevent intrusions To enter...

Страница 48: ...mode i e using the front panel if an alphanumeric password is chosen For safety reasons the password is case sensitive 3 DVR FUNCTIONS 3 1 MANUAL RECORDING Press REC on the front panel of the device in LIVE mode A password must be entered by default The following login window shown in the following figure will appear Figure 33 login page Press to point the cursor to Password and then use the numbe...

Страница 49: ...rm red transmitting on the network amber recording and transmitting on the network 3 1 3 START STOP This option is used to start stop the recording on a certain video channel To set select the respective check box using and press ENTER or EDIT Symbol indicates that recording can be started on a selected channel symbol indicates that the recording can be stopped The following will light up on a cha...

Страница 50: ...ime Motion Allarms Command and All Use to select 3 2 3 TIME SEARCH BY DATE AND TIME This option is used to define recording search by date and time Use to point the cursor to the day month year of the period to be set Press to select day month year and hours minutes Specific messages will appear if times overlap 3 2 4 SEARCH Select SEARCH to start searching according to the set parameters The hit ...

Страница 51: ... Press PLAY to mute the audio Press MENU to show or hide the command interface bar Press ESC to quit playback mode 3 3 1 PLAY Select Play to start playback without interruption of recordings according to the set search parameters Playback will stop when the end of the last recording on the last page of the list box is reached Rewind current playback by approximately 30 seconds Decrease playback sp...

Страница 52: ...e most effective 4 1 MINIMUM SOFTWARE INSTALLATION REQUIREMENTS Processor Pentium 4 3GHz RAM 512 MB Video board MMX 128 MB 128 bit Operating system Win 2000 Pro Win XP Pro sp2 Browser Internet I E 6 0 or higher 4 2 PROTECTION AND SECURITY CONFIGURATION Configure security as follows before connecting to a remote PC Open Internet Explorer by double clicking on The following page or the home page wil...

Страница 53: ... Add this website to the zone field Click on Add The following confirmation screen will appear IMPORTANT NOTE Do not check Requie server verification https for all sites in this zone Click on OK several times to end the procedure Proceed by installing Active X IMPORTANT NOTE You can reset the required I E protection level for trusted sites after installing Active X ...

Страница 54: ...lished The default settings are User admin Password 12345 Figure 36 login window The home page of the web interface may be accessed if the user name and password are correct Otherwise the following error message will appear Figure 37 error message IMPORTANT NOTE Set PC monitor resolution to 1024x768 for viewing the web interface in full screen mode ...

Страница 55: ...aying DVR status and available channels 3 Viewing grid 4 Viewing mode 5 Function buttons 6 View setting interface for each video channel 7 PTZ interface 8 Management configuration button bar 4 4 1 INFORMATION AREA This section contains the following information Degree of use of the CPU value expressed in Current date and time in format year month day and hours minutes seconds User name used to log...

Страница 56: ...ilable and connected 4 4 3 VIEW BUTTONS ICON DESCRIPTION View one channel View four channels View nine channels View six channels View eight channels View sixteen channels 4 4 4 VIEWING GRID The corresponding grid will be displayed according to the viewing mode selected using the corresponding buttons The red box left click to select indicates the position where the view stream of the selected cha...

Страница 57: ...abled Restores default settings 4 4 6 VIEW SETTINGS ICON DESCRIPTION This is used to adjust the volume during playback if audio is available and if VIDEO AUDIO stream is set in system configuration menu Drag the cursor to set This setting is used to adjust the brightness of the picture Drag the cursor to set This setting is used to adjust the contrast of the picture Drag the cursor to set This set...

Страница 58: ...sed to access the playback interface This used to access the system configuration menu This is used to access the DVR recorded events interface 4 4 8 1 Logout Click on to log out from the web interface correctly The following dialog will appear Figure 40 logout dialog Select OK to confirm all active connections will be automatically closed Otherwise click on Annulla ...

Страница 59: ...o output Yes 1 BNC electrical level 1 0Vpp impedance 75 Ω Frame Rate recordings per video channel 4CIF 6fps DCIF e 2CIF 12fps CIF and QCIF 25fps Memory Hard disk 320 GB default Stream type Video Audio Bit rate per channel 32Kbps 768Kbps Audio inputs Yes Audio input interface RCA linear electrical level impedance 1K 2Vpp 1 Audio output linear electrical level impedance 600 1 Audio compression rate ...

Страница 60: ... zoom Correspondence between code and respective resolution in PAL format are shown in the following table CODE RESOLUTION PAL 4CIF 704x576 DCIF 528x384 2CIF 704x288 CIF 352x288 QCIF 176x144 6 FUTURE EVOLUTIONS In the perspective of continuous improvement of the URMET Domus SpA product range and to better respond to the multifarious needs of an increasingly dynamic and demanding sector we have cre...

Страница 61: ...69 2 2 1 2 Nom 70 2 3 Menu enregistrement 71 2 3 1 Paramètres de base du menu enregistrement 71 2 3 1 1 Disque dur plein 71 2 3 1 2 Sélec caméra 72 2 3 1 3 Typ de flux 72 2 3 1 4 Resolution 72 2 3 1 5 Durée de conservation des enregistrements 72 2 3 1 6 Enregistrements sur événements 72 2 3 1 7 Qualité débit espace types d images intervalle 72 2 3 1 8 Fréq image 72 2 3 1 9 Freq 73 2 3 1 10 Enregis...

Страница 62: ...rer 82 4 1 Configuration minimum pour l installation du logiciel 82 4 2 Configuration de protection et de sécurité 82 4 3 Démarrage 84 4 4 Fenêtre principale et description de l interface 85 4 4 1 Zone d informations 85 4 4 2 Interface d état du dvr et des canaux connectés 86 4 4 3 Touches de visualisation 86 4 4 4 Grille d affichage 86 4 4 5 Touches de fonction 87 4 4 6 Paramètres d affichage 87 ...

Страница 63: ...registrements et les reproductions pour ne pas abîmer le disque dur 1 2 1 MISE HORS TENSION DIRECTE Appuyer sur la touche d alimentation située à l arrière 1 2 2 MISE HORS TENSION DEPUIS LE MENU PRINCIPAL Appuyer sur la touche MENU pour accéder au menu principal Sélectionner la rubrique DIVERSES et appuyer sur la touche ENTER Sélectionner la rubrique Eteindre Demar et appuyer sur la touche ENTER A...

Страница 64: ...Il est possible d afficher ou de masquer la barre d état des caméras en appuyant sur la touche A située sur la façade du dispositif ETATS D ENREGISTREMENT Les états d enregistrement de la caméra sont énumérés dans le tableau ci après ICONE COULEUR DESCRIPTION DE L ETAT Blanc Aucun signal vidéo Jaune Présence du signal vidéo Rose Enregistrement manuel Vert Enregistrement en temps réel Bleu Enregist...

Страница 65: ...d T pré alarme Post alarm Copie vers cam Base IP Port Masq Passerel Http Port Email PPPoE util MDP véri DDNS Enregistrement Avancés Réseau Avancés Mac NIC Typ IP Server Mcast IP Adr IP Déport Port télécomande NTP Base Sélect entrée al Typ alarm Notifier alarm Copie à entr al Sort alarm T T sortie alarm Copier à sort alarm Anamalies Base Sélec caméra Vitesse Bits donn Stop bits Parité Ctrl Flux Pro...

Страница 66: ...he MENU et entrer de nouveau le mot de passe N B MOT DE PASSE PAR DEFAUT 12345 Il est conseillé de modifier le mot de passe par défaut pour éviter toute intrusion dans le dispositif Pour entrer modifier le mot de passe ne pas oublier d appuyer sur la touche SHIFT en s assurant que la diode STATUS est allumée suivie des chiffres Une fois cette opération exécutée appuyer de nouveau sur la touche SHI...

Страница 67: ...s le cas contraire la télécommande pilotera en même temps tous DVR ayant la même adresse L adresse implicite est 01 Pour modifier l adresse ID du dispositif utiliser les touches numériques 0 9 situées sur la façade La valeur de l adresse doit être comprise entre 1 et 255 2 1 1 3 Nécessite MDP Dans cette rubrique du menu il est possible d habiliter ou d exclure la demande du mot de passe pour les f...

Страница 68: ... menu permet de modifier le niveau de transparence du menu OSD Utiliser les touches pour la programmation Le choix est offert parmi les valeurs suivantes 1 1 3 1 1 3 No Trans La valeur 3 1 indique que le menu OSD prédomine d environ 3 fois sur ce qui était précédemment affiché et vice versa pour la valeur 1 3 2 1 1 9 Date Heure Dst Dans cette rubrique du menu il est possible de programmer la date ...

Страница 69: ...an fait référence aux paramètres de base du menu Sélectionner Réglages avancés et appuyer sur la touche ENTER pour accéder aux fonctions avancées L option mise en évidence est celle sélectionnée A l aide des touches flèches il est possible de déplacer le curseur sur les différentes options du menu Après avoir positionné le curseur sur la rubrique désirée appuyer sur la touche ENTER pour la modifie...

Страница 70: ...uveau sur la touche SHIFT pour revenir à la commande précédente la diode STATUS sera de nouveau éteinte CARACTERE ALPHABETIQUE Les barres d entrée des caractères de type alphabétique sont les suivantes La correspondance entre la touche numérique et les caractères alphabétiques utilisables est indiquée sur la façade du dispositif et elle est récapitulée dans le tableau ci dessous TOUCHE NUMERIQUE C...

Страница 71: ...de configuration du canal d enregistrement Cet écran fait référence aux paramètres de base du menu L option mise en évidence est celle sélectionnée A l aide des touches flèches il est possible de déplacer le curseur sur les différentes options du menu Après avoir positionné le curseur sur la rubrique désirée appuyer sur la touche ENTER pour la modifier en utilisant les touches il est possible de m...

Страница 72: ...aux 2 3 1 5 Durée de conservation des enregistrements Il est possible de déterminer le nombre de jours de conservation des enregistrements sur le disque dur du DVR Les enregistrements plus anciens ne seront plus les accessibles N B 24 heures indiquent les précédents de 24 heures à partir du début de la recherche 2 3 1 6 Enregistrements sur événements Cette fonction permet de déterminer les paramèt...

Страница 73: ...onnée A l aide des touches flèches il est possible de déplacer le curseur sur les différentes options du menu Après avoir positionné le curseur sur la rubrique désirée appuyer sur la touche ENTER pour la modifier en utilisant les touches il est possible de modifier les options disponibles pour la rubrique de menu sélectionnée Sélectionner l option CONFIRM et appuyer sur la touche ENTER pour valide...

Страница 74: ... enregistrement démarre manuellement en appuyant sur la touche REC Pour arrêter l enregistrement appuyer de nouveau sur la touche REC 2 3 1 12 TPréalarme En cas d événement de mouvement ou d alarme externe l enregistrement contiendra aussi la vidéo qui précède l alarme pour une durée égale au délai programmé Il est possible de sélectionner l une de ces options Nr 5s 10 15s 20 25 30 et Max Utiliser...

Страница 75: ... pour déplacer le curseur Appuyer sur EDIT pour effacer Appuyer sur ENTER pour confirmer ou sur ESC pour annuler L adresse IP entré ne doit pas être en contradiction avec les autres adresses IP Si le réseau comporte un serveur DHCP il est possible de programmer l adresse 0 0 0 0 puis mémoriser et faire redémarrer le dispositif Pendant la phase de redémarrage le dispositif se connectera au serveur ...

Страница 76: ...n d habilitation sélectionner la case de contrôle correspondante en utilisant les touches et appuyer sur la touche ENTER ou EDIT Le symbole indique que la fonction PPPoE a été habilitée tandis que le symbole indique qu elle a été exclue En habilitant l option PPoE il est possible de définir utilisateur MDP véri Utilisateur Dans cette rubrique il est possible d entrer le nom utilisateur pour l opér...

Страница 77: ...récédente appuyer sur la touche ESC Pour quitter le menu de configuration appuyer à plusieurs reprises sur la touche ESC jusqu à la fermeture de la fenêtre de configuration Dans l encadré des noms des utilisateurs la configuration d usine du dispositif prévoit un administrateur implicite caractérisé par nom admin MDP 12345 Le nom utilisateur admin n est pas modifiable contrairement au mot de passe...

Страница 78: ...se Si les mots de passe entrés et de vérification sont identiques le mot de passe sera mémorisé et deviendra effectif Si les mots de passe entrés et de vérification ne sont pas identiques une fenêtre d erreur s ouvrira pour signaler l anomalie Figure 52 message d erreur pour changement de mot de passe Dans ce cas appuyer sur la touche Enter pour revenir au menu précédent et répéter la procédure d ...

Страница 79: ...absolument pas être égaré ou oublié Il est conseillé de noter le mot de passe choisi et de le conserver en lieu sûr En cas de création d un mot de passe alphanumérique à l aide du logiciel prévu à cet effet il ne sera pas possible d accéder au dispositif en mode local c est à dire à partir de la façade L écran suivant sera affiché Figure 54 menu d enregistrement L option mise en évidence est celle...

Страница 80: ...e A l aide des touches flèches il est possible de déplacer le curseur sur les différentes options du menu Pour quitter le menu d enregistrement appuyer sur la touche ESC 3 2 1 CANAL Dans cette rubrique du menu il est possible de sélectionner le canal principale à reproduire Utiliser les touches pour la sélection 3 2 2 TYPE ENR TYPE D EVENEMENT Dans cette rubrique du menu il est possible de sélecti...

Страница 81: ...che ENTER Pour exclure le son appuyer sur la touche PLAY Pour afficher ou cacher la barre d interface des commandes appuyer sur la touche MENU Appuyer sur la touche ESC pour quitter la modalité de reproduction 3 3 1 PLAY Sélectionner la rubrique Play pour lancer sans interruption la reproduction des enregistrements en fonction des paramètres de recherche programmés La reproduction s arrêtera à la ...

Страница 82: ... MINIMUM POUR L INSTALLATION DU LOGICIEL Processeur Pentium 4 3GHz Ram 512 MO Carte vidéo MMX 128 MO 128 bits Système d exploitation Win 2000 Pro Win XP Pro sp2 Gestionnaire de navigation Internet 6 0 ou versions suivantes 4 2 CONFIGURATION DE PROTECTION ET DE SECURITE Avant d effectuer la connexion avec le PC distant il est nécessaire de procéder à la configuration de protection en respectant la ...

Страница 83: ...e IP du dispositif accessible en appuyant sur la touche F2 présente sur la façade du dispositif dans le champ Aggiungi il sito Web all area Cliquer sur Aggiungi L écran de validation suivant s affichera N B Ne pas sélectionner l option Richiedi verifica server https per tutti i siti dell area Cliquer à plusieurs reprises sur OK pour terminer ...

Страница 84: ...es suivants User name admin password 12345 Figure 56 fenêtre d accès Si le nom utilisateur et le mot de passe sont corrects l on accèdera à l écran principal de l interface Web dans le cas contraire le message d erreur suivant s affichera Figure 57 message d erreur N B Pour une visualisation correcte de l interface Web en mode plein écran il est nécessaire de programmer une résolution 1024x768 de ...

Страница 85: ...canaux disponibles 3 Grille d affichage 4 Modalités d affichage 5 Touches de fonction 6 Interface des paramètres d affichage de chaque canal vidéo 7 Interface des commandes PTZ 8 Barre des touches de gestion configuration 4 4 1 ZONE D INFORMATIONS Cette zone contient les informations suivantes Degré d utilisation de la CPU valeur exprimée en Date et heure courantes au format année mois jour et heu...

Страница 86: ...ualisation à un seul canal Visualisation à quatre canaux Visualisation à neuf canaux Visualisation à six canaux Visualisation à huit canaux Visualisation à seize canaux 4 4 4 GRILLE D AFFICHAGE Suivant la modalité d affichage sélectionnée à l aide des touches prévus à cet effet la grille correspondante sera affichée L encadré rouge sélectionnable en cliquant avec la touche gauche de la souris indi...

Страница 87: ...AFFICHAGE ICONE DESCRIPTION Permet de moduler le son pendant une reproduction si la transmission audio est disponible et si la modalité stream VIDEO AUDIO a été habilitée dans le menu de configuration du système chapitre 5 3 2 1 Faire glisser le pointeur pour effectuer le réglage Permet de régler la luminosité de l image Faire glisser le pointeur pour effectuer le réglage Permet de régler le contr...

Страница 88: ...du système Permet d accéder à l interface des événements enregistrés sur le DVR 4 4 8 1 Déconnexion Logout En cliquant sur l icône il est possible de se déconnecter correctement de l interface Web La fenêtre de dialogue suivante sera affichée Figure 60 fenêtre de déconnexion En choisissant l option OK l on confirme la sortie et les éventuelles connexions actives se refermeront automatiquement dans...

Страница 89: ...C niveau électrique 1 0Vpp impédance 75 Ω Frame Rate enregistrements par canal vidéo 4CIF 6fps DCIF e 2CIF 12fps CIF et QCIF 25fps Mémoire Disque dur 320 GO par défaut Type de flux Vidéo Audio Bit rate max par canal 32Kops 768Kops Entrées audio OUI Interfaces entrées audio RCA niveau électrique linéaire impédance 1K 2Vpp 1 Sortie audio niveau électrique linéaire impédance 600 1 Vitesse de compress...

Страница 90: ...leur de résolution au format PAL SIGLE RESOLUTION PAL 4CIF 704x576 DCIF 528x384 2CIF 704x288 CIF 352x288 QCIF 176x144 6 FUTURES EVOLUTIONS Dans l optique de l amélioration continue de sa propre gamme de produits et en vue de répondre aux attentes les plus diverses d un secteur toujours plus dynamique et plus exigeant la société URMET Domus SpA a créé cette nouvelle section du guide de consultation...

Страница 91: ...100 2 2 1 2 NAME 100 2 3 MENÜ AUFNAHME 102 2 3 1 GRUNDEINSTELLUNGEN DES MENÜS AUFNAHME 102 2 3 1 1 WENN HD VOLL 102 2 3 1 2 WÄHLE KAMERA 102 2 3 1 3 STREAM TYP 103 2 3 1 4 AUFLOESUNG 103 2 3 1 5 Dauer 103 2 3 1 6 Enable event para 103 2 3 1 7 Qualität Bitratentyp Bildwiederholungsrate Intervall Parameter 103 2 3 1 8 FRAME RATE 103 2 3 1 9 BIT RATE 103 2 3 1 10 AUFNAME EIN 104 2 3 1 11 ZEITPLAN 105...

Страница 92: ...ORAUSSETZUNGEN FÜR DIE INSTALLATION DER SOFTWARE 115 4 2 KONFIGURATION FÜR SCHUTZ UND SICHERHEIT 115 4 3 START 116 4 4 HAUPTFENSTER UND BESCHREIBUNG DERSCHNITTSTELLE 117 4 4 1 INFORMATIONSBEREICH 117 4 4 2 SCHNITTSTELLE DES STATUS DES DVR UND DER ANGESCHLOSSENEN KANÄLE 118 4 4 3 ANZEIGETASTEN 118 4 4 4 ANZEIGERASTER 118 4 4 5 FUNKTIONSTASTEN 119 4 4 6 EINSTELLUNGEN DER ANZEIGE 119 4 4 7 SCHNITTSTE...

Страница 93: ... Ausschaltvorgang durchzuführen nachdem alle Aufzeichnungen und Wiedergaben gestoppt wurden um das Beschädigen der Festplatte zu vermeiden 1 2 1 DIREKTES AUSSCHALTEN Die Einschalttaste auf der Geräterückseite betätigen 1 2 2 AUSSCHALTEN ÜBER DAS HAUPTMENÜ Die Taste MENU betätigen um zum Hauptmenü zu gelangen Den Menüpunkt WERKZEUGE auswählen und dann die Taste ENTER betätigen Den Menüpunkt REBOOT ...

Страница 94: ...ch angezeigt Die Statusleiste der Kamera kann durch Drücken der Taste A auf der Fronttafel des Geräts eingeblendet oder verborgen werden AUFZEICHNUNGSZUSTÄNDE Die Aufzeichnungszustände der Kamera sind in der nachstehenden Tabelle dargestellt SYMBOL FARBE STATUSBESCHREIBUNG Weiß Kein Videosignal Gelb Videosignal vorhanden Rosa Manuelle Aufzeichnung Grün Aufzeichnung in Echtzeit Blau Aufzeichnung be...

Страница 95: ...m Grundein stellung IP Port Mask Gateway Http Port Email PPPoE benutzername passwort überprüfen DDNS Aufnahme Erweitert Netzwerk Erweitert Mac NIC Typ IP Server Mcast IP Remote Host IP Remote Host Port NTP Grundein stellung Ausw Alarm Eing Alarm Typ Aktion Alarm Kopiere zu Alm In Alarm Ausg Zeit Alarm Aus Zeit Kopiere zu Alm Out Ausnahmen Grundein stellung Wähle Kamera Baud rate Data bits Stop bit...

Страница 96: ...ie Taste MENU und geben Sie das Passwort nochmals ein ACHTUNG DAS STANDARDPASSWORT IST 12345 Das Standardpasswort sollte geändert werden um unerwünschte Zugriffe auf das Gerät zu vermeiden Achten Sie bei der Passworteingabe bzw änderung darauf die SHIFT Taste zu betätigen und vergewissern Sie sich das die STATUS LED eingeschaltet ist Nehmen Sie dann die Eingabe mit den Nummerntasten vor Nach der E...

Страница 97: ...derselben Adresse an Die Standardadresse ist 01 Um die ID Adresse des Geräts zu ändern verwenden Sie die Nummerntasten 0 9 an der Frontseite Der Adresswert muss zwischen 1 255 liegen 2 1 1 3 BENÖTIGE PASSWORT Unter diesem Menüpunkt kann die Passwortabfrage bei den folgenden Funktionen aktiviert oder deaktiviert werden Menu Aktivierung Deaktivierung der Kennwortabfrage beim Zugriff auf das Konfigur...

Страница 98: ... 1 1 8 MENÜ TRANSPARENZ Unter diesem Menüpunkt kann die Transparenz des OSD Menüs geändert werden Nehmen Sie die Einstellung mit den Tasten vor Es kann zwischen den folgenden Werten ausgewählt werden 1 1 3 1 1 3 Nicht Transp Der Wert 3 1 gibt an dass das OSD Menü ca 3 Mal gegenüber der vorangegangenen Anzeige den Vorrang hat und umgekehrt ist der Wert 1 3 2 1 1 9 DATUM ZEIT Unter diesem Menüpunkt ...

Страница 99: ...E Modus Den Active Frame auf Vorschau positionieren und dann die Taste ENTER drücken Es erscheint das folgende Bild Abbildung 66 Menü vorschau 2 1 1 10 1 Post event display Es ist jetzt möglich die Zeit der Anzeige des Ereignis Kanals Bewegungserkennung Alarm Videoverlust Sabotage welcher im Vollbild nach dem Stoppen des Ereignisses auf dem Alarm Monitor dargestellt wird einzustellen Der Wert kann...

Страница 100: ...am zu machen Den Menüpunkt ABBRUCH auswählen und die Taste ENTER drücken um die vorgenommenen Änderungen zu löschen Um einen Schritt zurückzukehren drücken Sie die Taste ESC Um das Konfigurationsmenü zu verlassen mehrmals die Taste ESC drücken bis das Konfigurationsfenster geschlossen wird 2 2 1 GRUNDEINSTELLUNGEN MENÜ KAMERA 2 2 1 1 WÄHLE KAMERA Unter diesem Menüpunkt kann die Kamera Videoeingang...

Страница 101: ...Sie die Taste SHIFT auf der Gerätefrontseite vergewissern Sie sich dass die STATUS LED eingeschaltet ist Nehmen Sie anschließend die Eingabe mit den Nummerntasten 2 9 vor Zur Eingabe des Zeichens A einmal die Taste 2 drücken Zur Eingabe des Zeichens B Taste 2 zweimal schnell hintereinander drücken Zur Eingabe des Zeichens C Taste 2 dreimal schnell hintereinander drücken Verschieben Sie den Cursor ...

Страница 102: ...önnen mit den Pfeiltasten geändert werden Den Menüpunkt BESTÄTIGEN auswählen und die Taste ENTER drücken um die vorgenommenen Änderungen wirksam zu machen Den Menüpunkt ABBRUCH auswählen und die Taste ENTER drücken um die vorgenommenen Änderungen zu löschen Um einen Schritt zurückzukehren drücken Sie die Taste ESC Um das Konfigurationsmenü zu verlassen mehrmals die Taste ESC drücken bis das Konfig...

Страница 103: ...ion der Videoparameter im Falle von Ereignissen wie Bewegungserkennung Alarmeingang Videoverlust and Sabotage Diese Parameter können gegenüber der Standard Aufzeichnung verschiedne sein z B ohne Ereignisse 2 3 1 7 Qualität Bitratentyp Bildwiederholungsrate Intervall Parameter Diese Funktion erlaubt die Einstellungen der Videoparameter für jeden einzelnen Kanal 2 3 1 8 FRAME RATE Unter diesem Menüp...

Страница 104: ... Rate automatisch gesetzte Bit Rate nicht zu verändern 2 3 1 10 AUFNAME EIN Unter diesem Menüpunkt kann die Aufzeichnung für die ausgewählte Kamera aktiviert oder deaktiviert werden Für den Vorgang der Aktivierung das jeweilige Kontrollfeld unter Verwendung der Tasten auswählen und die Taste ENTER oder EDIT betätigen Das Symbol zeigt an dass die Aufzeichnung aktiviert wurde während das Symbol anze...

Страница 105: ... gegeben ist wenn es sich um im Menü Registrazione programmierte Aufzeichnungen handelt Die manuell gestarteten Aufzeichnungen werden daher nicht gleichzeitig mit der Rückkehr der Stromversorgung wieder aufgenommen 2 3 1 11 1 TAG Unter diesem Menüpunkt kann die Aufzeichnung auf der ausgewählten Kamera für jeden Wochentag eingestellt und programmiert werden Verwenden Sie die Tasten zur Auswahl Unte...

Страница 106: ...t die Taste REC betätigen 2 3 1 12 ZEIT PRE REC Im Fall eines Ereignisses durch Motion oder externen Alarm enthält die Aufzeichnung auch das Video vor dem Alarm für eine Dauer die der eingegebenen Zeit entspricht Es kann unter folgenden Optionen gewählt werden Nr 5s 10 15s 20 25 30 und Max pre rec Verwenden Sie die Tasten zur Auswahl Durch das Auswählen von Nr führt das Gerät keine Vor Aufzeichnun...

Страница 107: ...C Um das Konfigurationsmenü zu verlassen mehrmals die Taste ESC drücken bis das Konfigurationsfenster geschlossen wird 2 4 1 GRUNDEINSTELLUNGEN DES MENÜS NETZWERK 2 4 1 1 IP Unter diesem Menüpunkt kann die IP Adresse des DVR eingegeben werden Die Taste EDIT drücken und über die numerischen Tasten 0 9 die IP Adresse eingeben Verwenden Sie die Tasten um den Cursor zu verschieben Drücken Sie EDIT um ...

Страница 108: ...tzone maßgebend ist Eine ordnungsgemäße Konfiguration des Web Ports des Daten Ports der IP Adresse des Gateways und der IP DNS wird am DVR für eine korrekte Funktion des NTP vorausgesetzt 2 4 1 7 2 IP server Zukünftige Funktion 2 4 1 8 PPPOE Unter diesem Menüpunkt kann die Funktion PPPoE in Dial up aktiviert werden Für den Vorgang der Aktivierung das jeweilige Kontrollfeld unter Verwendung der Tas...

Страница 109: ...rationsmenü zu verlassen mehrmals die Taste ESC drücken bis das Konfigurationsfenster geschlossen wird Im Auswahlkasten der Benutzernamen wird von den werkseitigen Einstellungen ein Standard Administrator mit folgenden Zugangsdaten vorgegeben name admin passwort 12345 Der Name admin kann nicht geändert werden während das Kennwort geändert werden kann ACHTUNG DAS STANDARDPASSWORT IST 12345 Das Stan...

Страница 110: ...nd das neue Kennwort eingeben Sind das eingegebene und das überprüfte Kennwort gleich wird das Kennwort gespeichert und wird zum gültigen Kennwort Sind das eingegebene und das überprüfte Kennwort nicht gleich erscheint eine Fehlermeldung die die Anomalie anzeigt Abbildung 72 Fehlermeldung Kennwortänderung In diesem Fall die Taste Enter drücken um zum vorangegangenen Menü zurückzukehren und den Ein...

Страница 111: ...t Nehmen Sie dann die Eingabe mit den Nummerntasten vor Nach der Eingabe erneut die Taste SHIFT betätigen um zu den Standardfunktionen zurückzukehren Die STATUS LED schaltet sich wieder aus Achten Sie unbedingt darauf dass Sie das eingegebene Passwort nicht vergessen oder verlegen Es wird daher empfohlen dass gewählte Kennwort aufzuschreiben und an einem sicheren Ort aufzubewahren Bei Erzeugung ei...

Страница 112: ...auf dem Monitor angezeigten Kamera 3 1 4 START ALL Durch Auswahl dieses Menüpunkts und Betätigten der Taste ENTER oder EDIT kann die Aufzeichnung gleichzeitig auf allen Videokanälen gestartet werden 3 1 5 STOP ALL Durch Auswahl dieses Menüpunkts und Betätigten der Taste ENTER oder EDIT kann die Aufzeichnung gleichzeitig auf allen Videokanälen gestoppt werden ACHTUNG Um die manuelle Aufzeichnung vo...

Страница 113: ...ufen den Active Frame auf dem Menüpunkt Pag No Positionieren und die Tasten betätigen oder die Seitennummer direkt eingeben Wählen Sie die Aufzeichnung mit aus Sollte das Gerät keine Aufzeichnungen finden die die eingegebenen Suchkriterien erfüllen wird eine entsprechende Meldung angezeigt 3 3 WIEDERGABE EINER AUFZEICHNUNG Nachdem die Suchparameter eingegeben wurden Ereignistyp Datum Uhrzeit und d...

Страница 114: ...swahl von einzeln erfolgt der Vorlauf Frame per Frame über die Taste ENTER Zur Tonabschaltung drücken Sie PLAY Um die Leiste der Befehlschnittstelle einzublenden oder zu verbergen die Taste MENU betätigen Die Taste ESC drücken um den Wiedergabemodus zu verlassen 3 3 1 PLAY Durch Auswahl des Menüpunkts Play wird die Wiedergabe der Aufzeichnungen ohne Unterbrechung abhängig von den eingegebenen Such...

Страница 115: ... 128 bit Betriebssystem Win 2000 Pro Win XP Pro sp2 Internet Browser I E 6 0 oder neuere 4 2 KONFIGURATION FÜR SCHUTZ UND SICHERHEIT Vor der Verbindung an den Fern PC muss die Schutzkonfiguration anhand des folgenden Vorgangs erfolgen Den Browser Internet Explorer durch Doppelklick auf das Symbol öffnen Es erscheint die folgende Ansicht oder in jedem Fall die programmierte Startseite Doppelt auf d...

Страница 116: ...siti dell area nicht auswählen Wiederholt auf OK klicken um abzuschließen 4 3 START Beim Start der Verbindung wird das folgende Login Fenster für die Authentifizierung der für die Benutzung der Software aktivierten Benutzer eingeblendet Die werkseitigen Einstellungen sehen vor User name admin Password 12345 Abb 76 Login Fenster ...

Страница 117: ... folgende Hauptfenster Abb 78 Hauptansicht der Web Schnittstelle ID BESCHREIBUNG 1 Informationsbereich 2 Schnittstelle der Anzeige hinsichtlich des Status des DVR und der verfügbaren Kanäle 3 Anzeigeraster 4 Anzeigemodus 5 Funktionstasten 6 Schnittstelle der Einstellungen der Anzeige jedes Videokanals 7 Schnittstelle der PTZ Steuerungen 8 Steuer Konfigurationstastenleiste 4 4 1 INFORMATIONSBEREICH...

Страница 118: ...schlossen 4 4 3 ANZEIGETASTEN SYMBOL BESCHREIBUNG Anzeige auf einem Kanal Anzeige auf vier Kanälen Anzeige auf neun Kanälen Anzeige auf sechs Kanälen Anzeige auf acht Kanälen Anzeige auf sechzehn Kanälen 4 4 4 ANZEIGERASTER Je nach programmiertem Anzeigemodus über die entsprechenden Tasten wird das entsprechende Raster eingeblendet Das rote Quadrat mit einem Klick der linken Maustaste auswählbar z...

Страница 119: ...IBUNG Gestattet die Änderung des Audioniveaus während einer Wiedergabe wenn die Audioübertragung verfügbar ist nur auf Typ 1093 041 und wenn der Stream Modus VIDEO AUDIO im Konfigurationsmenü des Systems eingegeben wurde Kap 5 3 2 1 Die Anzeige ziehen um die Einstellung vorzunehmen Gestattet die Änderung der Bildhelligkeit Die Anzeige ziehen um die Einstellung vorzunehmen Gestattet die Änderung de...

Страница 120: ...onfigurationsmenü des Systems Gestattet den Zugriff auf die Schnittstelle der auf DVR aufgezeichneten Ereignisse 4 4 8 1 UNTERBRECHEN DER VERBINDUNG LOGOUT Durch Klicken auf das Symbol kann die Verbindung mit der Web Schnittstelle korrekt unterbrochen werden Es erscheint das folgende Dialogfenster Abb 80 Logout Fenster Durch Auswählen der Option OK wird das Verlassen bestätigt und eventuell aktive...

Страница 121: ...usgang Ja 1 BNC Pegel 1 0Vpp Impedanz 75 Ω Bildfrequenz Aufzeichnungen pro Videokanal 4CIF 6fps DCIF e 2CIF 12fps CIF und QCIF 25fps Speicher Hard Disk 320 GB Standard Streamíng Video Audio Max Bitrate pro Kanal 32Kbps 512Mbps Audioeingänge JA Schnittstellen Audioeingänge RCA Linearpegel Impedanz 1K 2Vpp 1 Audioausgang Linearpegel Impedanz 600 1 Audio Kompressionsrate 16 Kbps Aufnahmemodus Kontinu...

Страница 122: ...e Entsprechungen zwischen der Bezeichnung und dem jeweiligen Wert der Auflösung im PAL Format angegeben BEZEICHNUNG AUFLÖSUNG PAL 4CIF 704x576 DCIF 528x384 2CIF 704x288 CIF 352x288 QCIF 176x144 6 ZUKÜNFTIGE ENTWICKLUNGEN Die URMET Domus SpA hat in Hinblick auf eine kontinuierliche Verbesserung ihres Produktangebots und um den Ansprüchen eines immer dynamischeren und anspruchsvolleren Sektor zu gen...

Страница 123: ...e unidad 132 2 3 Menu grabacion 133 2 3 1 Configuraciones básicas del menú grabación 133 2 3 1 1 D D lleno 133 2 3 1 2 Seleccionar camara 133 2 3 1 3 Stream type 134 2 3 1 4 Resolución 134 2 3 1 5 Días de grabación 134 2 3 1 6 Enable event para 134 2 3 1 7 Calidad y tipo de tasa de bits tipo de cuadro parámetro de intervalo 134 2 3 1 8 Frame rate 134 2 3 1 9 Bit rate 134 2 3 1 10 Habilitar grabaci...

Страница 124: ...a la instalación del software 144 4 2 Configuración de protección y seguridad 144 4 3 Inicio 145 4 4 Ventana principal y descripción de la interfaz 146 4 4 1 Área información 146 4 4 2 Interfaz de estado del dvr y de los canales conectados 147 4 4 3 Teclas de visualización 147 4 4 4 Grilla de visualización 147 4 4 5 Teclas de función 148 4 4 6 Configuraciones de visualización 148 4 4 7 Interfaz de...

Страница 125: ...haber detenido todas las grabaciones y las reproducciones para evitar que se estropee el disco duro 1 2 1 APAGADO DIRECTO Pulsar el botón de alimentación situado en la parte trasera 1 2 2 APAGADO EN EL MENU PRINCIPAL Pulsar la tecla MENU para acceder al menú principal Seleccionar la opción UTILIDADES y pulsar la tecla ENTER Seleccionar la opción APAGAR EMPEZAR y pulsar la tecla ENTER Pulsar nuevam...

Страница 126: ...er u ocultar la barra de estado de las cámaras pulsando la tecla A del tablero delantero del dispositivo ESTADOS DE GRABACIÓN Los estados de grabación de la cámara se muestran en la tabla siguiente ICONO COLOR DESCRIPCIÓN DEL ESTADO Blanco Ninguna señal vídeo Amarillo Presencia de señal vídeo Rosa Grabación manual Verde Grabación en tiempo real Azul Grabación en motion detection detección de movim...

Страница 127: ...tar grab P Horaria Pre Grab Post Grab Copiar a cámara Base IP Puerto Máscara Gateway Http Port Email PPPoE utente pw verifica DDNS Grabando Avanzadas Red Avanzadas Mac NIC type Servidor Mcast IP Remote host IP Puerto host remote NTP Base Select alarm in Tipo de alarma Config alarma Copy to alarma in Salida Tempo de alarma Copiar a salida Exceptions Base Seleccionar cámara Baud rate Data bits Stop ...

Страница 128: ...nos 3 segundos En dicho caso pulsar la tecla MENU e introducir nuevamente la contraseña NOTA LA CONTRASEÑA PREDETERMINADA ES 12345 Se recomienda modificar la contraseña predeterminada para evitar intromisiones en el dispositivo Para escribir modificar la contraseña se debe pulsar la tecla SHIFT comprobando que el led STATUS esté encendido seguida de las cifras numéricas Al final de la operación pu...

Страница 129: ...DVR hay que configurar una dirección distinta para cada dispositivo de lo contrario el control a distancia controlará simultáneamente todos los DVR con la misma dirección La dirección predeterminada es 01 Para modificar la dirección ID del dispositivo utilizar las teclas numéricas 0 9 del tablero delantero El valor de la dirección debe ser una cifra de 1 a 255 2 1 1 3 Contraseña En esta opción del...

Страница 130: ... configuración 2 1 1 8 Trasparencia menu En esta opción del menú es posible modificar el nivel de transparencia del menú OSD Utilizar las teclas para la configuración Se puede seleccionar uno de los siguientes valores 1 1 3 1 1 3 y No Trans El valor 3 1 indica que el menú OSD es el que prevalece unas 3 veces sobre lo que se estaba visualizando antes y el valor 1 3 indica lo contrario 2 1 1 9 Fecha...

Страница 131: ...ocar el Active Frame en el icono CAMARA y pulsar la tecla ENTER Aparece la pantalla ilustrada en la siguiente figura Figura 87 menú cámaras configuraciones básicas Esta pantalla se refiere a las configuraciones básicas del menú Seleccionar la opción CONFIG AVANZADA y pulsar la tecla ENTER para acceder a las configuraciones avanzadas La opción resaltada representa la que está seleccionada Utilizand...

Страница 132: ...ento de introducción de un carácter Pulsar la tecla SHIFT para activar las funciones numéricas Utilizar las teclas numéricas 0 9 del tablero delantero para introducir los caracteres Utilizando las teclas de dirección es posible desplazar el cursor Para eliminar un carácter pulsar la tecla EDIT CARÁCTER DE TIPO ALFABÉTICO Las barras de introducción de los caracteres de tipo alfabético son las sigui...

Страница 133: ...R para activar las modificaciones aportadas Seleccionar la opción CANCELAR y pulsar la tecla ENTER para eliminar las modificaciones Para volver un paso atrás pulsar la tecla ESC Para salir del menú de configuración pulsar varias veces la tecla ESC hasta que se cierre el cuadro de configuración NOTA Para activar las variaciones de algunas configuraciones es necesario reiniciar el dispositivo 2 3 1 ...

Страница 134: ... En esta opción del menú se puede configurar el número de fotogramas memorizados por segundo en la cámara seleccionada Es posible seleccionar entre las opciones 1 2 4 6 8 10 12 15 16 18 20 22 y 25 Utilizar las teclas para la selección A un frame rate elevado corresponden filmaciones reproducidas en tiempo real con secuencias más fluidas Un frame rate inferior permite un ahorro de espacio en el dis...

Страница 135: ...ara volver un paso atrás pulsar la tecla ESC Para salir del menú de configuración pulsar varias veces la tecla ESC hasta que se cierre el cuadro de configuración NOTA En caso de interrupción de la energía eléctrica el dispositivo reanuda automáticamente las grabaciones cuando se restablece la misma sólo y exclusivamente si se trata de grabaciones programadas en el menú Registrazione Por lo tanto l...

Страница 136: ...m En este modo la grabación se activa apenas el sensor entra en alarma y el motion detecta movimientos Comando En este modo la grabación se activa manualmente pulsando la tecla REC Para detener la grabación pulsar nuevamente la tecla REC 2 3 1 12 Pre grab En situaciones de eventos de tipo motion o de alarma externa la grabación también contiene el vídeo anterior a la alarma de un periodo equivalen...

Страница 137: ... 2 4 1 CONFIGURACIONES BÁSICAS DEL MENÚ RED 2 4 1 1 IP En esta opción del menú es posible configurar la dirección IP del DVR Pulsar la tecla EDIT y con las teclas numéricas 0 9 introducir la dirección IP Utilizar las teclas para desplazar el cursor Pulsar EDIT para cancelar Pulsar ENTER para aceptar o ESC para anular La dirección IP introducida no debe estar en conflicto con otras direcciones IP S...

Страница 138: ...en dial up Para la operación de activación seleccionar la casilla de control correspondiente utilizando las teclas y pulsar la tecla ENTER o EDIT El símbolo indica que la función PPPoE está activada mientras que el símbolo indica que está desactivada Activando la opción PPPoE es posible definir usuario pass veri Usuario En esta opción del menú es posible introducir el nombre de usuario para la ope...

Страница 139: ...de nombres de los usuarios las configuraciones de fábrica del dispositivo prevén un administrador predeterminado caracterizado por nombre admin contraseña 12345 El nombre admin no se puede modificar pero es posible modificar la contraseña NOTA LA CONTRASEÑA PREDETERMINADA ES 12345 Se recomienda modificar la contraseña predeterminada para evitar intromisiones en el dispositivo Para escribir modific...

Страница 140: ... tecla Enter para volver al menú anterior y repetir la operación de introducción NOTA Si se crean nuevos usuarios en local utilizando el tablero delantero del DVR es posible configurar sólo contraseñas numéricas mientras que mediante el software también es posible crear contraseñas alfanuméricas Si se crea una contraseña alfanumérica no será posible acceder al dispositivo en local utilizando el ta...

Страница 141: ...r lo tanto las grabaciones iniciadas manualmente no se reanudarán con el restablecimiento de la energía eléctrica 3 1 1 CHAN En esta opción del menú que no se puede seleccionar están listados todos los canales del dispositivo 3 1 2 ESTADO En esta opción del menú que no se puede seleccionar se muestran con una serie de leds los estados de cada uno de los canales vídeo Se pueden distinguir los sigui...

Страница 142: ...eleccionar el tipo de grabación que se quiere buscar Es posible seleccionar entre las opciones Todos Manual Alármas Det Mov y Siempre Utilizar las teclas para la selección 3 2 3 TEMPO FECHA Y HORA En esta opción del menú es posible definir la búsqueda de las grabaciones por fecha y hora Utilizar las teclas para ubicar el cursor sobre el día mes año y sobre las horas minutos del periodo a configura...

Страница 143: ... la tecla PLAY Para ver u ocultar la barra de interfaz de mandos pulsar la tecla MENU Pulsar la tecla ESC para salir del modo de reproducción 3 3 1 PLAY Seleccionando la opción Play inicia la reproducción de las grabaciones sin interrupción según los parámetros de búsqueda configurados La reproducción se detiene cuando se llega al final de la última reproducción presente en la última página del cu...

Страница 144: ...SITOS MÍNIMOS PARA LA INSTALACIÓN DEL SOFTWARE Procesador Pentium 4 3 GHz Ram 512 MB Tarjeta vídeo MMX 128 MB 128 bits Sistema operativo Win 2000 Pro Win XP Pro sp2 Navegador Internet I E 6 0 o posteriores 4 2 CONFIGURACIÓN DE PROTECCIÓN Y SEGURIDAD Antes de efectuar la conexión con el PC remoto hay que llevar a cabo la configuración de protección respetando el siguiente procedimiento Abrir el nav...

Страница 145: ...ón Aggiungi Aparece la siguiente pantalla de confirmación NOTA No seleccionar la opción Richiedi verifica server https per tutti i siti dell area Hacer clic repetidamente en OK para concluir 4 3 INICIO Cuando inicia la conexión aparece el siguiente cuadro de login para la autenticación de los usuarios habilitados para el uso Las configuraciones predeterminadas prevén User name admin password 12345...

Страница 146: ...iente ventana principal Figura 98 pantalla principal de la interfaz Web ID DESCRIPCIÓN 1 Área información 2 Interfaz de visualización del estado del DVR y de los canales disponibles 3 Grilla de visualización 4 Modo de visualización 5 Teclas de función 6 Interfaz de configuraciones de visualización de cada uno de los canales vídeo 7 Interfaz de comandos PTZ 8 Barra de teclas de manejo configuración...

Страница 147: ... Visualización de un solo canal Visualización de cuatro canales Visualización de nueve canales Visualización de seis canales Visualización de ocho canales Visualización de dieciséis canales 4 4 4 GRILLA DE VISUALIZACION De acuerdo con el modo de visualización seleccionado con las respectivas teclas aparece la grilla correspondiente El recuadro rojo que se puede seleccionar con un clic del botón iz...

Страница 148: ...nadas 4 4 6 CONFIGURACIONES DE VISUALIZACION ICONO DESCRIPCIÓN Permite variar el nivel del sonido durante una reproducción si la transmisión audio está disponible y si se configuró el modo de secuencia VIDEO AUDIO en el menú de configuración del sistema Arrastrar el indicador para efectuar la regulación Permite variar el brillo de la imagen Arrastrar el indicador para efectuar la regulación Permit...

Страница 149: ...de configuración del sistema Permite acceder a la interfaz de los eventos grabados en el DVR 4 4 8 1 Desconexión Logout Haciendo clic en el icono es posible desconectarse correctamente de la interfaz Web Aparece el siguiente cuadro de diálogo Figura 100 cuadro de logout Seleccionando la opción OK se acepta la salida y se cierran automáticamente las posibles conexiones activas de lo contrario hacer...

Страница 150: ... BNC nivel eléctrico 1 0 Vpp impedancia 75 Ω Frame Rate grabaciones por canal vídeo 4CIF 6fps DCIF e 2CIF 12fps CIF e QCIF 25fps Memoria Disco duro 320 GB predeterminado Tipo di stream Vídeo y audio Max bit rate por canal 32Kbps 768Kbps Entradas audio Sí Interfaces entradas audio BNC nivel eléctrico lineal impedancia 1K 2Vpp 1 Salida audio nivel eléctrico lineal impedancia 600 1 Rate compresión au...

Страница 151: ...seada para el zoom En la siguiente tabla se indican los valores de la resolución en formato PAL correspondientes a cada sigla SIGLA RESOLUCIÓN PAL 4CIF 704x576 DCIF 528x384 2CIF 704x288 CIF 352x288 QCIF 176x144 6 FUTURAS EVOLUCIONES URMET Domus SpA desde el punto de vista de una constante mejora de su gama para responder a todas las exigencias de un sector cada vez más dinámico y exigente ha cread...

Страница 152: ...GONOVO VE Via del Lavoro 71 Tel 049 738 63 00 r a Fax 049 738 63 11 66020 S GIOVANNI TEATINO CH Via Nenni 17 loc Sambuceto Tel 085 44 64 851 Tel 085 44 64 033 Fax 085 44 61 862 SEDE URMET DOMUS S p A 10154 TORINO ITALY VIA BOLOGNA 188 C Telef 011 24 00 000 RIC AUT Fax 011 24 00 300 323 Area Tecnica Servizio Clienti 011 23 39 810 http www urmetdomus com e mail info urmetdomus it Prodotto in Cina su...

Отзывы: