52
DS1093-176
¾
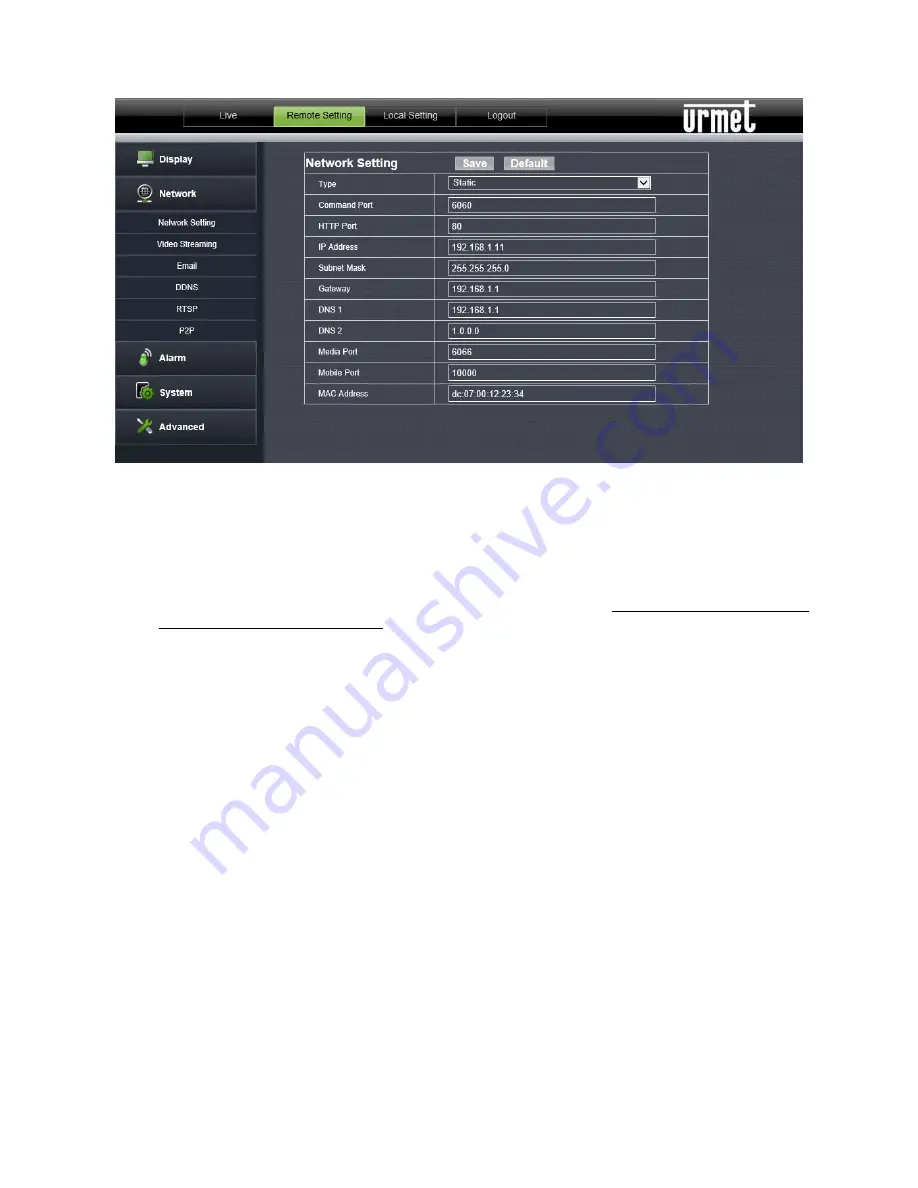
The IP CAMERA parameters must be allocated manually. Select “
Type = Static
” on the “Menu
Æ
Network”
and fill in the following fields: IP address, subnet mask, gateway and DNS.
Press
SAVE
to save the changes.
Ú
IMPORTANT NOTE:
The DNS fields must be filled in correctly for correct operation of the DDNS system.
1.
Port setup
At this point the external doors of the router must be forwarded to the IP CAMERA. The function is usually
called “Port-forwarding” or “Virtual Server” in the router configuration menu. The ports set on the router must
correspond to those of the IP CAMERA.
a)
Set different values on the IP CAMERA if the default ports of the IP CAMERA (80, 6060,6066) are already in
use in the port-forwarding table of the router.
b)
Set the ports on the IP CAMERA and port-forward of the same ports to the router. There are two different ways
to do this:
¾
Automatic mode: If the UPnP function is supported and enabled on the router, simply enable the
function also on the IP CAMERA on the bottom of the “Remote Settings
Æ
Network” page.
¾
Manual mode: if the UPnP function cannot be used, manually set port-forwarding on the port-
forwarding (or virtual server) table of the router.
Ú
IMPORTANT NOTE:
The firewall of some routers could block forwarding of the ports set on port-forwarding tables.
Carefully check the firewall settings of your router too.
Ú
IMPORTANT NOTE:
A DDNS server can be used. Select from the available options in the list. See the instructions
on the user manual of the device router for more information.


