background image

www.uponor-usa.com • www.uponor.ca

24

Uponor Climate Co˘ntrol™ - Multifunction Installation Guide

25

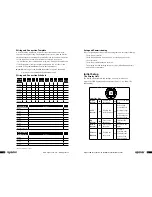
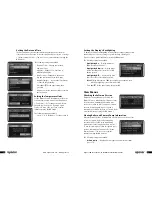
Setting the Date and Time

The date and time screen will automatically appear when the controller  
is turned on for the first time. Access this menu at: Uponor Screen > Settings 
> System Settings > Clock >. (The use of the > symbol indicates pressing the 
OK button.) 

                                          The following settings are available: 

•  Date and Time — Change year, month  

and time of day.

•  AM/PM — Change to 24-hour time or  

AM/PM time display.

•    Date Format — Change how the month,  

day and year will appear on the display. 

•  Daylight Savings — Set the date (Fixed Date)  

or Cancel Daylight Saving. 

•  Press 

 or 

 for the right setting, then  

press OK.

•  Adjust as necessary, then press OK to return to  

the clock menu.

Setting the Temperature Units

Set the Climate Co˘ntrol - Multifunction controller 
to display temperature units as either Fahrenheit 
(°F) or Celsius (°C). To change the units, follow 
this path: Uponor Screen > Settings > System 
Settings > Units >. (The use of the > symbol 
indicates pressing the OK button.)

The following setting is available:
   • Select °F or °C (default is °F), then press OK.

Setting the Display's Backlighting 

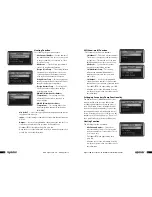
To adjust the display's backlighting to change the backlight settings, follow 
this path: Uponor Screen > Settings > System Settings > Backlight >.  
(The use of the > symbol indicates pressing the OK button.)

The following settings are available:

•  

Backlighting On

 — Display remains at 

100% intensity at all times.

•  

Backlighting Dimmed

 — Display will go  

to 50% intensity after 10 seconds of last 
button pressed.

•  

Backlighting Off

 — Display will go dark 

after 10 seconds of last button pressed. 

       Note:

  Display will return to 100% intensity upon next button press 

when backlighting is set to Dimmed or Off.

• Press 

 or 

 for the right setting, then press OK.

View Menus

Checking the Software Version

Designed to be upgradated in the field, the 
Climate Co˘ntrol - Multifunction software versions 
of the interface, database and firmware may 
need to be verified as well. To view the software 
versions, follow this path: Uponor Screen > 
Information > Software Versions >. (The use of the 
> symbol indicates pressing the OK button.)

Viewing Boiler and Primary Pump Information

When the Climate Co˘ntrol - Multifunction unit is wired and the setup of the 
system is complete, boiler and primary pump 
operation can be verified along with viewing 
temperatures on the supply and return sensors.  
To view this information, follow this path: Uponor 
Screen > Information > Functions > Boiler and 
Primary Pump >. (The use of the > symbol 
indicates pressing the OK button.)

The following settings are available:

•  

Boiler Activity

 — Display all boiler stages and their current status  

(on or off).

Содержание Climate Control-Multifunction

Страница 1: ...Uponor Climate Co ntrolTM Multifunction Installation Guide RA DIAN T HEATING SYST EMS CLIMATE CO NTROL MULTIFUNCTION INSTALLATION GUIDE...

Страница 2: ...stic Hot Water DHW 3 Zone Pump Control 3 Mixing 3 Snow Melting 3 Semi automatic Control 4 Fully Automatic Control 4 Slab Idle 4 High Temperature 4 Pump Exercising 4 Section 3 Safety Measures 5 Section...

Страница 3: ...tion s architecture supports up to eight outputs e g pumps modulating valves boilers The unused ports can support additional zone pumps within the system rather than adding other control elements View...

Страница 4: ...ol Multifunction unit monitors the return boiler temperature If the temperature drops too low the system will begin to close the three way valves If this option doesn t work the high temperature pumps...

Страница 5: ...set temperature High Temperature If the control supports high temperature control the system will turn on the high temperature pump until the demand call ends However if the minimum boiler return temp...

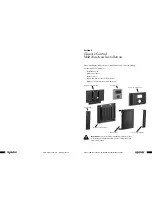
Страница 6: ...following list Installation guide Main control panel Outdoor sensor Supply and return sensor or dual sensor Data key mounted inside display enclosure Important Read the following installation instruc...

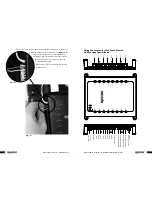
Страница 7: ...nstalling any additional screws Mark the location with a pencil or pen if anchors are being used See Figure 4 2 6 Install the remaining screws to finish mounting the control Optional Control Panel Mou...

Страница 8: ...en active LEDs for the inputs and outputs will turn green On Tx Run Rx Port 1 Input 1 Operate MMI Port 8 Input 8 Port 3 Port 2 Port 4 Port 5 Input 2 Input 3 Input 4 Input 5 Port 6 Input 6 Port 7 Input...

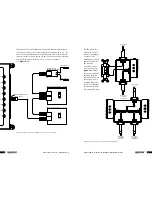
Страница 9: ...Control A9012010 for space heating Auto Man A Terminal B Terminal A B Power Space Heating High Temp DHW Typical heating device e g boiler Top View Side View Port 1 Port 8 Port 3 Port 2 Port 4 Port 5 P...

Страница 10: ...d snow melting The Climate Co ntrol hydronic controller can connect to any 0 10VAC motor and valve using the Uponor Modulating Valve Control A9063020 Note The motor must be 75 milliamps or less from a...

Страница 11: ...maximum of three amps in a variety of applications Common types of uses include primary secondary and domestic hot water DHW pumps As an added feature the Climate Co ntrol Multifunction hydronic contr...

Страница 12: ...ite White Red Wire to Pump or Circulator 2 amps Max On Auto Call Pump Relay A9013030 Pump Relay A9013030 Pump Relay A9013030 Off Call On Auto Line Voltage In 115v L N Black Red White or Circulator Wir...

Страница 13: ...elt connection with slab sensing Auto Active Remote Push Button optional Top View Side View Port 1 Port 8 Port 3 Port 2 Port 4 Port 5 Port 6 Port 7 Uponor Snow Melt Control A9013051 10K Slab Sensor To...

Страница 14: ...d properly on the sheet provided The wiring compartments are enclosed The display is lit and showing the Uponor logo default date and time and outdoor temperature Initial Setup The Display Unit The di...

Страница 15: ...path Uponor Screen Settings System Settings Backlight The use of the symbol indicates pressing the OK button The following settings are available Backlighting On Display remains at 100 intensity at al...

Страница 16: ...hannel is active If not active 0 0 F displays Supply and Return Temp Display current temperature for the supply and return sensors if the sensors are connected If not connected 0 0 F displays Press or...

Страница 17: ...limate Co ntrol Multifunction the most versatile control in mechanical room functionality allows the installer to tell the control which devices are connected and which functions to use If a port has...

Страница 18: ...K button The following selections are available DHW Setting Set the requirement for the tank temperature through the tank sensor Demand Input Set the input number for a connection that will start the...

Страница 19: ...nformation correctly to match the system then press OK to accept the information SM Snow melt Function The following selections are available SM Channel This sets a reference number This does not corr...

Страница 20: ...or ice Outdoor Hi Low Temp This setting indicates the outdoor temperatures all snow melt functions will no longer run SM Delta T This setting indicates the target differential temperature between the...

Страница 21: ...Solutions Notes Nothing showing on the display Display appears dark blank No power to control unit Connection issue between control and display Check 24VAC power supply and connection Check cable for...

Страница 22: ...55124 USA Tel 800 321 4739 Fax 952 891 1409 Web www uponor usa com Uponor Ltd 655 Park Street Regina SK S4N 5N1 CANADA Tel 888 994 7726 Fax 800 638 9517 Web www uponor ca ClimateCtrl_InsG_1 08 Copyri...

Отзывы: