GB - 8
4) Timeshift
Select icon and press
OK
button to enter
Timeshift
Mode.
This function enables 10 minutes’ buffer from live broadcast.
1. Press
OK
button to resume listening to the radio program. Press
OK
button
again to pause.
2. Press
LEFT
or
RIGHT
button to accelerate fast backward or forward.
3. Press
BACK
button to exit time shift mode and return to live.
AFS (Alternative Frequency Switching)
Note: The availability of a frequency for a given station may vary according to the
time of the day. Make sure that current time and date of your set is set properly in
order to display correct AFS information.
The appearance of icon below broadcasting language indicates that some
Alternative Frequency is available for your selection.
Press
UP
or
DOWN
button to enter AFS mode.
Press
BACK
button
to exit from AFS mode.
Note: The color of icon indicates the status of this function.
Grey color : Alternative Frequency is not available.
Orange Color : Alternative Frequency is available.
5) Expert Mode
Select icon and press
OK
button to enter
Expert Mode.
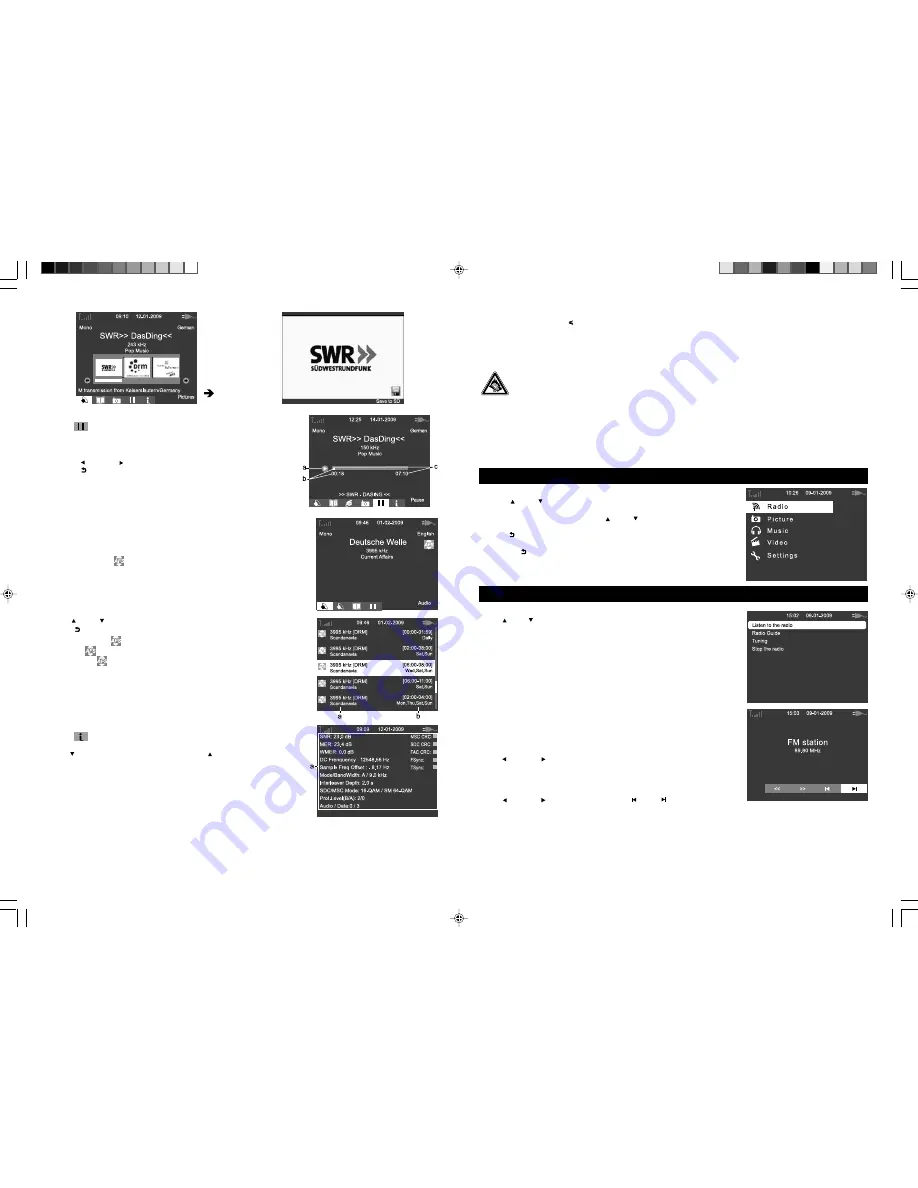
The status and information of current DRM station can be checked in expert mode.
Press
DOWN
button to go to next page. Press
UP
button to return to previous
page.
SNR: Signal Noise Ratio
MER: Modulation Error Ratio
WMER: weighted MER
DC Frequency: Reference Frequency
Sample Freq Offset: Sample Frequency Offset
Mode/BandWidth: Robustness Mode/Spectrum occupancy Bandwidth
SDC/MSC: Service Description Channel/Main Service Channel
Prot.Level: Protection Level
Audio/Data: the number of audio/data stream.
full screen mode
a. Play/Pause
b. Elapsed time of playback
c. Elapsed time of recorder
a. Frequency Radio
b. Time piece
a. Reception Status
GB - 5
2) Using headphones/earphones
Maximum output voltage 150mV
HEADPHONE VOLUME WARNING
Connect earphones (not included) with the volume set low and increase it if required. Prolonged listening through some
earphones at high volume settings can result in hearing damage. When headphones/earphones are connected, no sound
will be emitted from the unit’s speaker.
Caution: Avoid listening to sound at levels which may be harmful to your ears.
Continuous use of earphones at high volume can damage the user’s hearing.
3) External antenna
The external antenna is for SW reception only. Connect the external antenna (provided) to the antenna jack on the back of
unit. Completely extend to its full length for better reception.
4) Connecting the unit to your computer
You can transfer files from your computer to the SD/ MMC card via the USB socket on right side of unit.
Use the extended USB cable (not supplied) to connect the unit with the computer.
MENU NAVIGATION SELECTING A MENU
1. Turn ON the unit and the main menu is displayed.
2. Press
UP
or
DOWN
button to select a menu option. Press
OK
button to
confirm.
3. When a submenu is on screen, use
UP
or
DOWN
button to select one of
the available options. Then press
OK
button to confirm.
4. Press
BACK
button to return to a previous menu.
Note: Press
BACK
button at any time during operation to return to the previous
operation.
RADIO
1. Select “Radio” in the main menu and press
OK
button to display radio submenu.
2. Use
UP
or
DOWN
button to select one of the available options. Then press
OK
to confirm.
1) Listen to the radio
Select “ Listen to the radio” and press
OK
button to listen to the last station.
The menu displays the band and frequency. The station name and the type of
programme is displayed when broadcast like for example on RDS FM station.
Changing a radio station and fine tuning
Press
LEFT
or
RIGHT
button to select “ << ” or “ >>” icon on LCD display
and press OK button a number of times to tune step by step, down or up the radio
frequency respectively.
Listening to a preset station
Press
LEFT
or
RIGHT
button to select “ ” or “ ” icon on LCD display
and press OK button repeatedly to select and listen to a desired preset station
from the “Radio guide” list.
DRM-2472 IB UNIW 001 REV0 - GB.p65
2009-3-19, 18:53
7


