Installation of the Transmitter
The following are the five different ways to connect the TV Listener J3. Your installation
will depend on the type of equipment you have.
1.
STEREO INSTALLATION
– for equipment with two audio output jacks (stereo televi-
sions, DVD players, cable boxes). Refer to Pg. 6.
2.
MONO INSTALLATION
– for equipment with only one audio output jack (mono televi-
sions, DVD players, cable boxes). Refer to Pg. 6.
3.
SMALL HEADPHONE JACK INSTALLATION
– for equipment with a small headphone
jack (most CD players, portable stereos, MP3 players). Refer to Pg. 7.
4.
LARGE HEADPHONE JACK INSTALLATION
– for equipment with a large headphone
jack (some home stereo systems). Refer to Pg. 8.
5.
MICROPHONE INSTALLATION
– for equipment that does not have any audio output
jacks. Refer to Pg. 8.
How It Works
The TV Listener J3 works just like your remote control, sending an invisible infrared
signal from your television or any other audio device to the deluxe stereo headset.
Unlike radio frequency devices, infrared is not subject to interference from cordless
phones, wireless networks, microwaves, etc. You adjust the volume on the wireless,
lightweight headset to suit your personal needs. Multiple headsets can be used
with one transmitter.
Setting Up the System
Charge the batteries in the headset for 16 hours prior to first use.
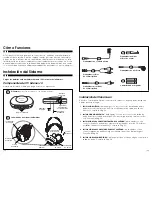
TV Listener J3 Components
Check that you have all the following components before installation.
RCA 3.5mm stereo adapter
RCA 3.5mm mono adapter
6.3mm stereo headphone adapter
Microphone adapter
AC adapter
{
4
}
{
5
}
Transmitter
(connects to your TV or other audio device)
Wireless Headset
Infrared Rays
Headphone
Adapter
AC Adapter Jack
Power Switch
Infrared
Sensors
Battery
Compartments
Infrared Sensors
Power
Indicator
Light
Power
Switch
Volume
Control
Charging
Adapter
Charging
Indicator Light
Charging
Jack
2 AAA rechargeable batteries


