background image

Point-It! Pro Quick Guide 


November 2021 

Unique Perspectives Ltd. 

www.housemate.ie ● [email protected]


Ballyline ● Callan ● Co. Kilkenny ● Ireland 
Phone: +353 56 7725913 

Page 7 of 12 


Programmable Settings 

Step 1: Choose Program mode 

Make sure the Point-It! is switched on and then press and hold the program button, located through 
a hole in the bottom of the joystick. An Allen key is provided to enable you to do this. When you first 
press the program button you will hear a low-pitched beep. Keep holding the button until you hear a 
mid-pitched beep and then release the button. You are now in program mode.


Step 2: Select the 

Joystick mode


The joystick can be set to 

Normal

JSwitch

 or 

Joystick Flick

. In Program mode, 

deflecting the joystick selects the joystick mode. Deflect the joystick left to select 

Normal

 (1 beep). 

Deflect the joystick backwards to select 

JSwitch

(2 beeps). Deflect the joystick to the right 

to select 

Joystick Flick

(3 beeps). 

 
Step 3: Select the 

Joystick forward function

.


When 

JSwitch

 or 

Joystick Flick

 mode is selected the forward deflection can be 

programmed to be either a double click or a centre click. Deflect the joystick forward to toggle 
between the two options. 1 beep indicates 

Double Click

, 2 beeps indicates 

Centre Click

. On 

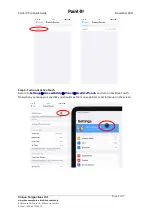
iOS devices you can program the actions of the 3 mouse buttons (left/centre/right) at 

Settings

Accessibility

Touch

AssitiveTouch

Devices

Point-It! Pro.


Step 4: Select the 

Drag lock time

.


The 

drag lock time

 is the length of time you must hold the top button (or left switch) before the 

drag lock is enabled. In program mode pressing the top button or left switch input selects the drag 
lock time.  Press the button to hear what the drag lock time is already set to. 1 beep = 2 second, 2 
beeps = 3½  seconds, 3 beeps = 5 seconds, 4 beeps = disabled. If you want to change the drag lock 
time press and hold the button, or switch, until you hear a second set of beeps indicating the new 
drag lock time. 
 

Step 5: Select the 

Right Switch function

.


The 

Right Switch

 input can be programmed to one of four functions: 

Right Mouse Click

Mouse Speed

Smart Mode 1

 and 

Smart Mode 2

. Press a switch connected to the right switch 

input to hear what the Right Switch is programmed to do. 1 beep = Normal (Right mouse click), 2 
beeps = Change Mouse Speed, 3 beeps = Smart Mode 1, 4 beeps = Smart Mode 2. If you want to 
change the right switch function press and hold the switch, until you hear a second set of beeps 
indicating the new function. Smart Mode is further explained in the next section. 
 

Step 6: Exit program mode


To exit program mode press the program button again. The Point-It! will emit a long low beep as the 
changes are saved.  
 

Note:

 In program mode Point-It! will automatically turn off without saving any changes if there is no 

activity for 5 minutes. 

Содержание Point-It! Pro

Страница 1: ...e 1 of 12 Quick Guide to the Bluetooth Point It Pro This quick guide describes how to use the Bluetooth version of the Point It Pro joystick and how to pair your Bluetooth Point It with an Android MAC PC iPAD or iPhone Note The Bluetooth Point It can be used to operate the mouse pointer on Android devices iOS devices running 13 or higher Windows MAC computers ...

Страница 2: ...des special programmable features to enable a user to change mouse speeds perform drag operations independently switch between devices and other operations Connections Mounting Status LED Fast Flashing Blue Not paired Slow flashing blue Paired but not connected Steady Blue Connected Orange Charging Power on Left click if a switch is connected into the Left switch input this button is disabled Righ...

Страница 3: ...ion request After a moment a Bluetooth connection request dialog may appear If it does choose Yes Your device should then connect to Point It and if successful will appear as connected in the list of Bluetooth devices You should also hear Point It emit the connect sound a low pitched beep followed by a high pitched beep and the Blue LED should stop flashing You should now be able to move the mouse...

Страница 4: ...ilkenny Ireland Phone 353 56 7725913 Page 4 of 12 Step 2 Turn on pair Point It Pro Turn on the Point It by pressing any left button It should beep After a moment Point It Pro should appear in the list of Bluetooth devices When it does click on it to start the pairing process After a moment it should appear as Connected ...

Страница 5: ...ousemate ie Ballyline Callan Co Kilkenny Ireland Phone 353 56 7725913 Page 5 of 12 Step 3 Turn on Assistive Touch Return to Settings Accessibility Touch AssitiveTouch and turn on Assistive Touch Now when you move your joystick you should see the mouse pointer a circle move on the screen ...

Страница 6: ...er to perform a mouse action press the top button or a switch connected to the left input Then deflect the joystick depending on what action you require according to the diagram below In Joystick Flick mode flick the joystick briefly in the direction according to what action you require To perform a genuine mouse move keep the joystick deflected in the desired direction until it starts moving How ...

Страница 7: ...program the actions of the 3 mouse buttons left centre right at Settings Accessibility Touch AssitiveTouch Devices Point It Pro Step 4 Select the Drag lock time The drag lock time is the length of time you must hold the top button or left switch before the drag lock is enabled In program mode pressing the top button or left switch input selects the drag lock time Press the button to hear what the ...

Страница 8: ...nt It times out and turns off it will always attempt to connect to the last device it was connected to when it is turned on again Smart Mode 2 This version of Smart Mode is specific to the Joystick Switch and Joystick Flick modes In this mode it is the right deflection of the joystick that changes device rather than the connected switch In this case a switch connected to the Right input sets the m...

Страница 9: ...ing the Point It Pro Connect the Point It to the charger provided or to a USB socket on your computer using the USB C cable provided The LED will illuminate orange when the battery is on charge The Point It Pro contains a 350mAh Li Polymer battery Under continuous operation from a full charge the battery will last 6 hours However because the Point It power saves when not in use normal battery life...

Страница 10: ...s are available from www rehadapt com Rehadapt L3D GA mounting plate Rehadapt TC L3D mounting system Warning For safe installation select a screw length between 6mm and 10mm to attach the Point It to the mounting plate Twister Switches The Point It can be supplied with Mo Vis Twister switches www mo vis com and a rotatable mounting ring as shown below Together these accessories enable you to posit...

Страница 11: ... Agent There are no user serviceable parts within the Point It Do not attempt to open the case except to inspect or disconnect the battery In accordance with the requirements of CE marking of this device and the Company s policy it is requested that re occurring faults or defects be reported back to Unique Perspectives Ltd Safety Misuse Do not install maintain or operate the Point It without readi...

Страница 12: ...ery strong signals could still cause a problem Report any malfunctions immediately to your Service Agent Sales Service Information For Sales and Service advice or in case of any difficulty please contact Unique Perspectives Ltd Ballyclovan Callan Kilkenny R95D9E8 Ireland Telephone WEB EMAIL 353 56 7725913 www housemate ie info housemate ie NOTE The Point It should be clearly labelled with the manu...

Отзывы: