background image

Page 6

For technical questions, please call 1-888-866-5797.

Item 62678 


Installation

Read the entire Important Safety Information section at the beginning of this document including all 
text under subheadings therein before set up or use of this product.

Safe can be mounted to floor, against wall or on wheels.    

Installing to Floor or Against Wall

WARNING!

  Verify that installation surface has no 

hidden utility lines before drilling or driving screws.

1.  Only install Safe on a stable, level, clean 

and dry surface capable of supporting 
the weight of Safe and its contents. 


2.  Remove liner from Safe.

3.  Locate mounting holes on bottom 

of Safe for floor installation.

Note:

  Wheels should not be installed 

if mounting to the floor.

4.  Locate mounting holes on back of 

Safe for installation against wall.


5.  Using the Safe as a template, mark locations 

of mounting holes on mounting surface.  

6.  Secure Safe with fasteners appropriate for the 

mounting surface, which are rated to support 
the weight of the Safe and its contents. 


7.  Replace liner.

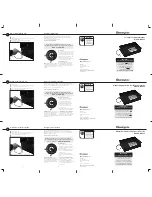
Installing Wheels

1.  Empty, close and lock Safe.

2.  Tip Safe on its side.

3.  Install four Wheels using Axles, Washers, 

and Cotter Pins according to 

Figure A.

4.  Return Safe to upright position.

5.  Move empty Safe to desired location.

Wheel

Axle

Cotter 

Pin

Washer

Bottom Outside 

Corner

Figure A 


Содержание 62678

Страница 1: ...nd the receipt in a safe and dry place for future reference When unpacking make sure that the product is intact and undamaged If any parts are missing or broken please call 1 888 866 5797 as soon as possible Copyright 2015 by Harbor Freight Tools All rights reserved No portion of this manual or any artwork contained herein may be reproduced in any shape or form without the express written consent ...

Страница 2: ...SI approved safety goggles during installation 3 Mount securely before use 4 Install only according to these instructions Improper installation can create hazards 5 Keep installation area clean and well lit 6 Keep bystanders out of the area during installation 7 Do not install when tired or when under the influence of alcohol drugs or medication 8 Use an assistant when moving safe 9 Only install S...

Страница 3: ...r missing contact Harbor Freight Tools for a replacement 7 Do not store Keys inside of the Safe Place the keys in a secure location outside of the safe 8 WARNING The brass components of this product contain lead a chemical known to the State of California to cause cancer and birth defects or other reproductive harm California Health Safety Code 25249 5 et seq 9 The warnings cautions and instructio...

Страница 4: ...n Read the entire Important Safety Information section at the beginning of this document including all text under subheadings therein before set up or use of this product Functions Lights Keyhole Cover Green Red Yellow Keypad Knob Handle Controls Battery Cover Entry Code Button Door Inside ...

Страница 5: ... Safe beeps and Yellow light illuminates b Within 15 seconds enter an Entry Code up to 8 digits on Keypad followed by either A or B Code has been accepted when Safe beeps Code has not been accepted if Yellow light turns off without beeping 2 Set Reset User Code a Press and hold Entry Code Button until Safe beeps and Yellow light illuminates b Within 15 seconds enter an Entry Code up to 8 digits on...

Страница 6: ...d its contents 2 Remove liner from Safe 3 Locate mounting holes on bottom of Safe for floor installation Note Wheels should not be installed if mounting to the floor 4 Locate mounting holes on back of Safe for installation against wall 5 Using the Safe as a template mark locations of mounting holes on mounting surface 6 Secure Safe with fasteners appropriate for the mounting surface which are rate...

Страница 7: ...keypad clean with a soft dry cloth or brush 3 Do not get any oil or other liquids on or near the electronic mechanism 4 If key lock sticks use graphite lubricant such as pencil lead Rub pencil lead over Key then insert Key and turn back and forth Repeat until lock moves freely Record Serial Number Here Note If product has no serial number record month and year of purchase instead Note Replacement ...

Страница 8: ...so the above limitation of exclusion may not apply to you THIS WARRANTY IS EXPRESSLY IN LIEU OF ALL OTHER WARRANTIES EXPRESS OR IMPLIED INCLUDING THE WARRANTIES OF MERCHANTABILITY AND FITNESS To take advantage of this warranty the product or part must be returned to us with transportation charges prepaid Proof of purchase date and an explanation of the complaint must accompany the merchandise If o...

Страница 9: ...nd the receipt in a safe and dry place for future reference When unpacking make sure that the product is intact and undamaged If any parts are missing or broken please call 1 888 866 5797 as soon as possible Copyright 2015 by Harbor Freight Tools All rights reserved No portion of this manual or any artwork contained herein may be reproduced in any shape or form without the express written consent ...

Страница 10: ...SI approved safety goggles during installation 3 Mount securely before use 4 Install only according to these instructions Improper installation can create hazards 5 Keep installation area clean and well lit 6 Keep bystanders out of the area during installation 7 Do not install when tired or when under the influence of alcohol drugs or medication 8 Use an assistant when moving safe 9 Only install S...

Страница 11: ...r missing contact Harbor Freight Tools for a replacement 7 Do not store Keys inside of the Safe Place the keys in a secure location outside of the safe 8 WARNING The brass components of this product contain lead a chemical known to the State of California to cause cancer and birth defects or other reproductive harm California Health Safety Code 25249 5 et seq 9 The warnings cautions and instructio...

Страница 12: ...n Read the entire Important Safety Information section at the beginning of this document including all text under subheadings therein before set up or use of this product Functions Lights Keyhole Cover Green Red Yellow Keypad Knob Handle Controls Battery Cover Entry Code Button Door Inside ...

Страница 13: ... Safe beeps and Yellow light illuminates b Within 15 seconds enter an Entry Code up to 8 digits on Keypad followed by either A or B Code has been accepted when Safe beeps Code has not been accepted if Yellow light turns off without beeping 2 Set Reset User Code a Press and hold Entry Code Button until Safe beeps and Yellow light illuminates b Within 15 seconds enter an Entry Code up to 8 digits on...

Страница 14: ...d its contents 2 Remove liner from Safe 3 Locate mounting holes on bottom of Safe for floor installation Note Wheels should not be installed if mounting to the floor 4 Locate mounting holes on back of Safe for installation against wall 5 Using the Safe as a template mark locations of mounting holes on mounting surface 6 Secure Safe with fasteners appropriate for the mounting surface which are rate...

Страница 15: ...keypad clean with a soft dry cloth or brush 3 Do not get any oil or other liquids on or near the electronic mechanism 4 If key lock sticks use graphite lubricant such as pencil lead Rub pencil lead over Key then insert Key and turn back and forth Repeat until lock moves freely Record Serial Number Here Note If product has no serial number record month and year of purchase instead Note Replacement ...

Страница 16: ...so the above limitation of exclusion may not apply to you THIS WARRANTY IS EXPRESSLY IN LIEU OF ALL OTHER WARRANTIES EXPRESS OR IMPLIED INCLUDING THE WARRANTIES OF MERCHANTABILITY AND FITNESS To take advantage of this warranty the product or part must be returned to us with transportation charges prepaid Proof of purchase date and an explanation of the complaint must accompany the merchandise If o...

Отзывы: