PC Client Introduction
103
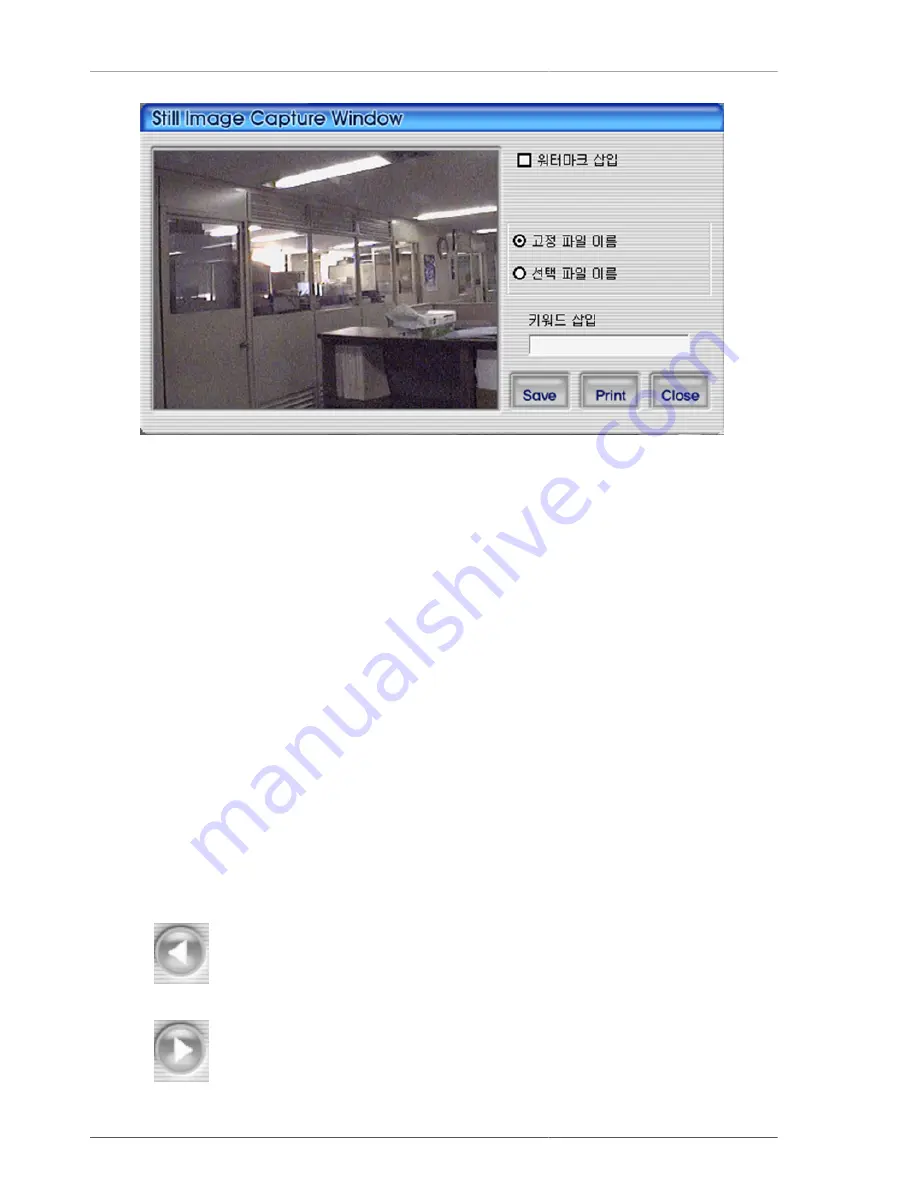
Figure 4.61. Still image captured screen
1. Watermark insertion : To insert watermark into the still image, please select the check box.
2. Fixed File Name : This is to save still image set by the fixed name on program.
3. Selected File Name : This is to save the still image with user's preferred file name on to the preferred folder.
4. Keyword Insertion : For easy search on Uniplayer_H264, the user can enter keyword.
5. Close : This is to close still image capture screen.
6. Print : This is to print out the captured still images.
7. Save : This is to save still images. Saving location will be under still image saving foloder on RAMS setup
screen.
4.6.5.1. Watermark Insertion
If the user wants to insert watermark on to still image and save it, the user needs to check the watermark insertion
check box and save it from the above captured screen.
4.6.6. Still Image Print
To print out the still image, press Print button on the above captured screen. And then use the Print button on the
main screen. This button can't be used during video playback.
4.6.7. Video file reversed playback, playback, pause, stop, movement between the
frames, faster playback
•
: This is to make a reversed playback of video files.
•
Содержание H.264 Real Time DVR
Страница 1: ...FULL MANUAL H 264 Real Time DVR Version 1 0 0 Unimo Technology ...
Страница 70: ...PC Client Introduction 60 Figure 4 7 When DVR is not on recording ...
Страница 72: ...PC Client Introduction 62 Figure 4 9 This screen shows the searched recoreded data on DVR ...
Страница 73: ...PC Client Introduction 63 Figure 4 10 Backup Guide Screen ...
Страница 75: ...PC Client Introduction 65 Figure 4 12 This screen shows the searched recoreded data on DVR ...
Страница 81: ...PC Client Introduction 71 Figure 4 17 D Zoom Example ...
Страница 111: ...PC Client Introduction 101 Figure 4 59 Calendar Search Screen ...
Страница 115: ...PC Client Introduction 105 Figure 4 62 Still Image Screen Figure 4 63 Watermark Except Screen ...
Страница 130: ...PC Client Introduction 120 Figure 4 83 ADD DVR Screen Figure 4 84 DVR connection screen 3 Changing the channel ...


