background image


                                                                                                            UT3200 Series User Manual 

27 


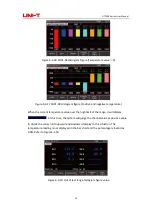
Figure 6-3-1 GUEST CAL page 

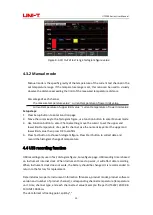
001 channel as example, press Setup enter Setup page, use Function button to choose GUEST 
CAL, move the cursor key to [0.0], use Function button to choose 
 

Function button 

Description 

CORRECT ALL 

Enter  amendment  value,  use  numeric 
keyboard  to  input  value  then  enter  OK  to 
confirm 

RESET ALL 

Delete channel’s amendment value 


RESET ALL 

Press Setup enter Setup page, use Function button to choose GUEST CAL 

Function button 

Description 

YES 

Delete all the amendment value 

NO 

Cancel delete, exit 

CANCEL 

Cancel delete, exit 


Switch to Channel Set page 

Press Setup enter Setup page, use Function button to choose GUEST CAL and then to choose 
PAGE UP or PAGE DOWN to switch page 
 

7. SYSTEM CONFIG 

▪ Language 
▪ Date/Time 
▪ Account 
▪ Com mode 
▪ System information 
▪ System services 
 

Содержание UT3200 Series

Страница 1: ...UT3200 Series Benchtop Thermometer ...

Страница 2: ...n China and other countries including obtained patents and pending patents The company reserves the right to change the product specifications and prices Limited Warranty and Liability Uni Trend guarantees that the product is free from any defect in material and workmanship within three years from the purchase date This warranty does not apply to damages caused by accident negligence misuse modifi...

Страница 3: ...nt cover It may have charge didn t run out after turn off There is a potential danger of electric shock Do not use Instrument in wrong situation WARNING Do not add DC voltage of more than 350V or AC voltage of more than 220V to the test end otherwise the Instrument will be damaged Environment friendly use period EFUP The period during which the hazardous substances do not leak or mutate under norm...

Страница 4: ...16 i 4 2 1 Curve figure the high and lower limit set up 16 ii 4 2 2 Curve figure set up 17 c 4 3 Histogram figure 18 i 4 3 1 Automatic mode 18 ii 4 3 2 Manual mode 20 d 4 4 USB recording function 20 e 4 5 Print screen 21 9 5 TEMPERATURE ALAR 21 a 5 1 Comparator set up 21 b 5 2 Channel setting 22 c 5 3 High or lower limit indication 23 10 6 SETUP 24 a 6 1 Setup page 24 i 6 1 1 RATE 25 ii 6 1 2 UNIT...

Страница 5: ...t will display data in numerical reading histogram and curve figure Data can record on the USB memory Instrument has the over high and low temperature alarm and communication transmission function Its great performance easy operation can satisfy production laboratory and research requirements Instrument has RS232 interface to connect computer to collect analysis and print data It support USB real ...

Страница 6: ...tocol RS232 communication interface USB communication interface Compatible with SCPI instruction set Remote control Support up to 115200bps baud rate compatible with SCPI protocol ASCIl transport System config Chinese English switch Date time button sound Administrator User account Administrator can set the password Environmental temperature Indicator temperature 15 35 humidity 80 RH Operation tem...

Страница 7: ... 2 0 1350 0 8 J thermocouple 100 0 1 0 0 1200 0 7 N thermocouple 100 0 1 5 0 1300 0 9 E thermocouple 100 0 0 9 0 850 0 7 S thermocouple 0 100 4 5 100 300 3 0 300 1750 2 2 R thermocouple 0 100 4 5 100 300 3 0 300 1750 2 2 B thermocouple 600 800 5 5 800 1000 3 8 1000 800 2 5 1 4 Front Cover Figure 1 4 1 UT3208 as example ...

Страница 8: ... Test button is display measurement result Setup button is used for set measurement parameters When press LOCK button others can t work Long press 1 second to unlock Number button to input numbers and values add subtract and delete button Cursor button is used for move up down left right Enter button is used for confirm USB interface 4 3 inch LCD display Figure 1 4 1 Function ...

Страница 9: ...emperature UNIT Collecting data Figure 1 4 2 Symbol 1 5 Back front Figure 1 5 1 Back front UT3208 as example Number Description RS232 interface USB interface AC power socket without fuses the fuses installed in Instrument interior A set of data acquisition modules UT3208 UT3216 24 32 are equipped with 2 3 4 test modules ...

Страница 10: ... cord 1 Use only a specified power cord which is authorized in the country of use 8G USB 1 8 channel temperature test module x set temperature test module is equipped with Instrument model UT3208 16 24 32 are equipped with 1 2 3 4 test modules USB communication cable 1 Channel identification sticker 1 Certificate and warranty license 1 Manual 1 Electronic file download from official website 2 2 Th...

Страница 11: ...2000 meter 2 4 Cleaning Do not clean Instrument inside Use a clean cloth to wipe cover WARNING Do not use solvent alcohol or gasoline to clean Instrument 2 5 Instrument lift handle Lift handle is adjustable hold both sides then pull see Figure as below Figure 2 5 1 original position Figure 2 5 2 Test position Figure 2 5 3 Undock position Figure 2 5 4 Lift position ...

Страница 12: ...will burn out Do not use patch panel without ground connection 3 2 Test line and installation Instrument is equipped with K type thermocouple test lines as shown in Figure 3 3 1 each of 8 way temperature test modules contains 8 test lines which can measure the temperature of 8 channels at most at the same time The specific model and specifications of each set of test modules are as follows Model a...

Страница 13: ...230V AC Figure 2 6 1 Instrument data collect port Figure 2 6 2 Test line interface 3 3 Channel mark Instrument is equipped with paster to distinguish different channels which printed with channel number CH01 CH02 etc User can past it on different test lines upon their needs Figure 3 4 1 Benchtop Thermometer take UT3232 as an example Data acquisition module in the first row on the left from left to...

Страница 14: ...nd USB to avoid the problem of incompatible identification The format and capacity of the USB can be referred to FAT FAT32 and EXFAT with the maximum capacity of 128G 3 5 Operation guide Connect power correctly Turn on Instrument switch the screen will light up Check the contact lines of each temperature are connected well Start to collect data if the connection is wrong there is no temperature di...

Страница 15: ...to display measurement result numerical reading histogram figure and curve figure Numerical reading is the best way to read one or more channel values at some point in time Press Start button Instrument will start to collect data A green flashing cursor at the top of the screen indicates that the data is being collected test values will show in blue Press Stop button to terminate data collect Refe...

Страница 16: ...sents time and the vertical axis represents temperature The vertical axis range is based on the set of high and low temperature You can evaluate object temperature before test to narrow the range of vertical axis graph 4 2 1 Curve figure the high and lower limit set up 1 Press Setup button to enter Function page 2 Use the cursor key to the high or lower limit use the numeric keypad to enter the hi...

Страница 17: ...axis equal to the time axis 4 Press Test button then press Function button to enter curve figure page Press Start Instrument will start to collect data and record the curve of temperature change 4 2 2 Curve figure set up Function Button Description Stop Stop data collect Return Return to test value page Up The curve goes up in parallel Down The curve goes down in parallel Switch The original page ...

Страница 18: ...mum value of the same set of test modules 8 channel values 0 Percentage of each channel the measure temperature value the absolute value of the same set of test modules 8 channel values of positive percentage the measure temperature value the maximum value of the same set of test modules 8 channel values of negative percentage the measure temperature value the absolute value of the same set of tes...

Страница 19: ...emperature value over the high limit of the range it will display At this time the system will judge the channel value as positive value to divide the column into upward and downward display in this situation The temperature reading is not displayed in the bar chart and the percentage is invalid as 0 0 Refer to Figure4 3 1D Figure 4 3 1D Out of test range histogram figure value ...

Страница 20: ... cursor to set the upper and lower limit temperature of a specific channel use the numeric key enter the upper and lower limit value then press OK to confirm 4 Press Test button to choose histogram figure Press Start button to collect data and record the histogram change of temperature 4 4 USB recording function USB recording only use in Test Histogram figure Curve figure page USB recoding time is...

Страница 21: ...o stop data collection before use Print Sc to screenshot test value or histogram figure Screenshot image will stored in USB drive file automatically 5 TEMPERATURE ALAR Set the temperature limit of each channel when test temperature over the set limit temperature Instrument will display alarm 5 1 Comparator set up Figure 5 1 1 Comparator ...

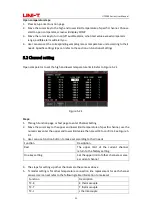
Страница 22: ... Figure 5 2 1 Steps 1 Through Function page or Test page to enter Channel Setting 2 Move the cursor key to the upper and lower limit temperature of specific channel use the numeric key enter the upper and lower limit value then press OK to confirm See Figure 5 2 1 3 User can use Function button to make set according to their needs Function Description Rest The upper limit of the current channel re...

Страница 23: ...er and lower limits settled press Test enter measure page Test value within the upper and lower limits range test result is blue font Test value exceed the upper limit test result is red font Test value under the lower limit test result is green font When comparator function turn on alarm bell will alert you if the test result is not at the upper and lower limit range Return Setup page to turn off...

Страница 24: ...s short way to enter Setup page This page can complete all the set of Test function including Comparator Beep Curve figure of low temperature Curve figure of high temperature Scale Curve figure timeline Histogram mode Key beep Rate Unit File name initial Time period per file Delay record time interval Figure 6 1 1 Setup page ...

Страница 25: ...ption degrees Celsius K Kelvin degrees degrees Fahrenheit 6 1 3 KEY BEEP Press Setup to enter Setup page move the cursor key to KEY BEEP then use Function button to choose Function button Description ON Turn on OFF Turn off 6 1 4 USB File name initial 1 Press Setup enter Setup page 2 Move the cursor key to FILE NAME INITIAL 3 Use Function button to enter file name create new file prefix Example en...

Страница 26: ...hour it will create a new file and save it automatically 6 1 6 DELAY record time interval USB record time interval can set 1s 5s 10s 20s 1min 2min 5min 10min 20min 30min 1h Steps 1 Press Setup enter Setup page 2 Move the cursor key to turn off TIME PERIOD PER FILE 3 Move the cursor key to DELAY then use Function button to set time interval 6 2 Channel set page This page can set channel s model nam...

Страница 27: ...alue then enter OK to confirm RESET ALL Delete channel s amendment value RESET ALL Press Setup enter Setup page use Function button to choose GUEST CAL Function button Description YES Delete all the amendment value NO Cancel delete exit CANCEL Cancel delete exit Switch to Channel Set page Press Setup enter Setup page use Function button to choose GUEST CAL and then to choose PAGE UP or PAGE DOWN t...

Страница 28: ...e is 24 hour Steps 1 Press Setup shortcut to enter Setup page use Function button to choose SYSTEM CONFIG 2 Move the cursor key to choose date or time 3 Use Function button to set date and time Function button Description YEAR INCR one year YEAR DECR one year MONTH INCR one month MONTH DECR one month DAY INCR one day DAY DECR one day Function button Description HOUR INCR one hour HOUR DECR one hou...

Страница 29: ... password you can call UNI T company s sales department DELETE PASSWORD Administrator will not protected by password 7 1 4 Com mode The Instrument is equipped with Mini USB interface and RS232 interface When Instrument sensing interface signal change it will connect with the host machine as the set of baud rate and the keyboard will be locked It should confirm the set of baud rate is right to make...

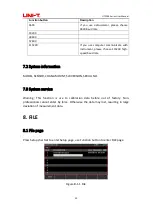
Страница 30: ...gh speed baud rate 7 2 System information MODEL SENSOR CHAN AMOUNT SW VERSION SERIAL NO 7 3 System service Warning This function is use to calibration data before out of factory Non professionals cannot enter by force Otherwise the data may lost resulting in large deviation of measurement data 8 FILE 8 1 File page Press Setup shortcut to enter Setup page use Function button to enter FILE page Figu...

Страница 31: ...lete settings 9 COM MODE 9 1 RS 232C You can use UNI T RS 232 DB 9 serial communication line to connect the RS 232 interface of a controller such as PC and PLC The serial port is RS 232 standard TXD transmit external data RXD receive external data and GND signal ground lines Hardware handshake CTS and RTS lines are not used Attention Only UNI T DB 9 cable null modem can be used The cable length sh...

Страница 32: ...nd laptops You need to use USB interface to communicate The Instrument is equipped with USB 232 interface this function is the same as RS232 Turn on USB function There are two options USB RS232 If you need use USB interface enter SYSTEM CONFIG move the cursor key to COM MODE and then use Function button to choose USB Install drive on the computer The USB interface needs to install a driver to work...

Страница 33: ... installation is complete it will display Driver is successfully installed 4 Open device manager on the computer record the interface number COM17 it will be used for communication 9 3 SCPI Language Instrument interface uses SCPI language which fully supports the standard command SCPI of programmable instruments ...

Отзывы: