


Step by step
35
Many times, when you make an edit, you may wish to make a permanent change to the clip
and save the edited file. Again, Ulead VideoStudio gives you a margin of safety in that it saves
the trimmed video to a new file and does not alter the original. You can go ahead and delete the
original to recover disk space when you are sure of your changes (press the Delete key or
drag the clip to the Trash can).
The method of trimming illustrated here allows you to use your original video file as the source
for a number of different clips in the Library. This type of editing does not affect the source
file anyway.
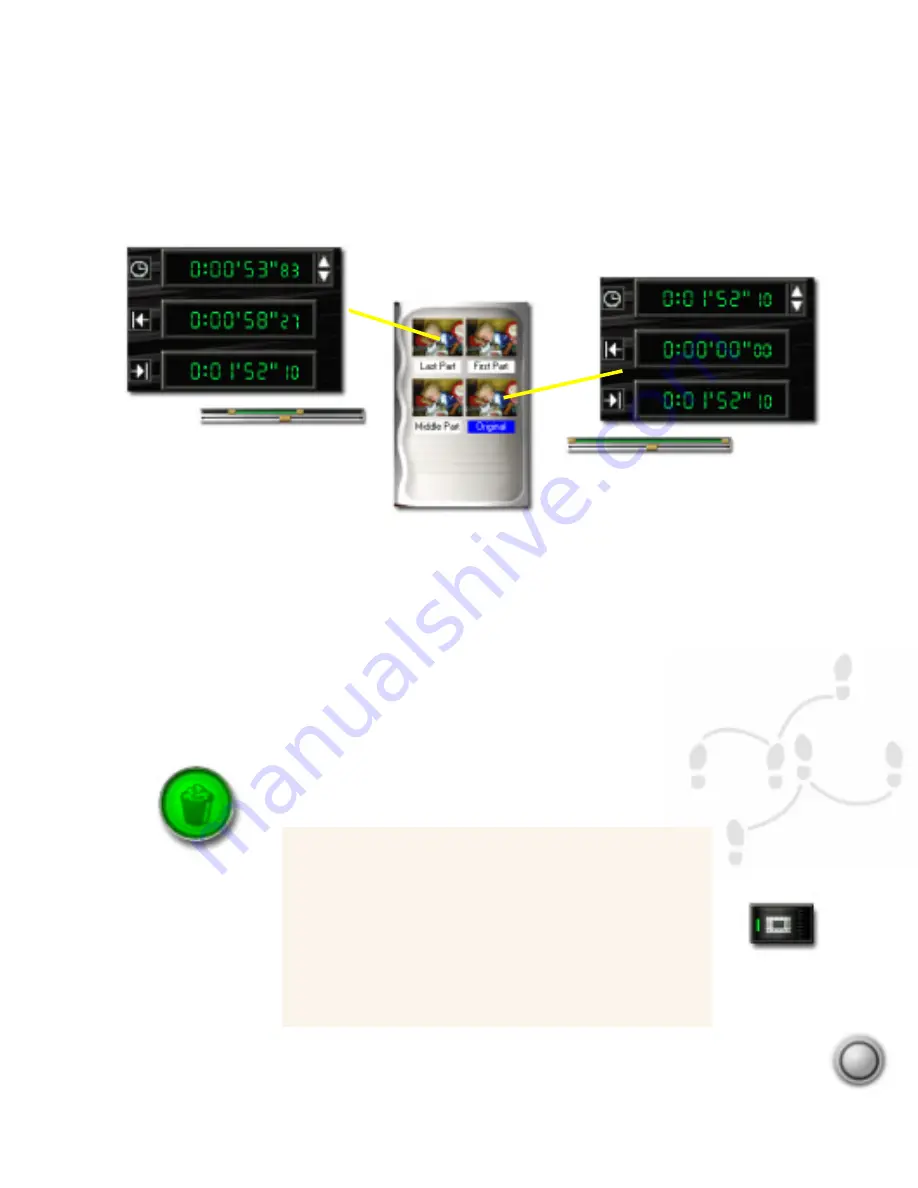
This Library contains four
versions of the same clip.
Selected clips are
highlighted in blue.
Breaking a clip into multiple files
1. Select a clip from the Library or Timeline.
2. Grab and drag a Trim handle to set the trim position.
3. Click the Trim to video file button.
4. You now have two different physical video files on
your hard disk, the original file (SOURCE.AVI), and a
trimmed copy (SOURCE-1.AVI) .
Trash can.
Trim to video
file button.
This clip is a trimmed version
of the original video file saved
on the hard disk. You can see
at a glance that it has indeed
been trimmed by selecting the
clip and looking at the Options
panel or the Trim bar. You
should definitely rename the
clip in the Library because the
thumbnail will not change.
When the original clip is re-
inserted into the Library, the
Mark in point is zero and the
Mark out point is the last
frame. The duration is the
entire clip. The Trim bar
clearly shows that the clip has
not been trimmed.


