background image

4

Delice UL

When the dispenser is turned on, both the mixing
and the heating are turned on and on the display
the set temperature is shown. The set temperatu-
re value blinks until when the product has rea-
ched the desired temperature.

When the dispenser is turned OFF all the current

settings are saved into memory to be effective at

the following power on.

6 OPERATION HELPFUL HINTS

hot chocolate: preparation following the traditio-

nal artisan method, mix the cocoa with milk or wa-

ter well in a pan before pouring it into the bowl.

Follow the instructions of the manufacturer if

using packaged instantaneous products. It is pos-

sible to mix these directly in the container.

Activate the dispenser turning the switch to posi-

tion 1. Turn the thermostat knob to 90°C to obtain

the cooking temperature of the product. When the

hot chocolate is ready lower the temperature to

the value required for dispensing turning the ther-
mostat knob. 

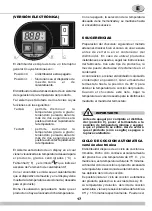
AUTOMATING COOKING CYCLE 

electronic version

By pressing together key A and B the dispenser

performs an Automatic Cooking Cycle. This me-

ans that the product is heated up to 95 °C and

maintained at this temperature for 15 minutes.

After the expiration of the Automatic Cooking

Cycle the product is maintained at the desired

temperature set before the cycle.

The temperature and the length of the Automatic

Cooking Cycle are factory preset. To reset them

turn the dispenser off and then turn it on keeping

key A pressed. On the display the Cooking Tem-

perature is shown and it is possible to decease or

increase it using keys A or B and to confirm it

pressing both keys together. Then the length of

the Cooking Cycle is shown and it is possible to

decease or increase it using keys A or B and to

confirm it pressing both keys together.

7 CLEANING AND SANITIZING 

PROCEDURES

Cleaning and sanitizing are essential to maintain

perfect taste and maximum efficiency from your

dispenser. The procedures described below are

general and can vary due to the sanitary

regulations of the local health authorized. 

The product must be taken out of the dispenser

before it is disassembled for cleaning. 

7. 1 DISASSEMBLY

1

Empty the bowl and remove the lid 

2

Remove the mixer from the central shaft 

3

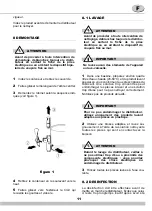
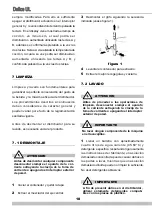
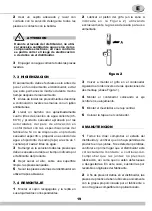
Dismantle the faucet following the sequence

shown (see fig. 1).

figure 1

4

Remove the container, lifting it upwards. 

5

Remove the drip-tray and empty it. lavaggio

.

IMPORTANT

Before switching off the dispenser comple-

tely (switch at position 0), bring the thermo-

stat to the lowest temperature and wait for

the product to cool down. This stops the

product (if not agitated) from sticking to the

hot plate.

ATTENTION

Before proceeding to disassemble any

component always disconnect the unit

from the electricity removing the plug or

switching off the 2 pole wall breaker. 

Содержание DELICE 5L UL

Страница 1: ...OPERATOR S MANUAL CARNET D INSTRUCTIONS MANUAL DE INSTRUCCIONES Delice 5L UL...

Страница 2: ...you want to make a fixed connection to the network connect the cord to a bipolar wall breaker with a contact gap of at least 3mm not use extension cords to connect the unit electrically 5 The dispense...

Страница 3: ...the right side to adjust the temperature of the product ELECTRONIC VERSION The dispenser is equipped with a general switch whose functions are The dispenser is also equipped with an electronic device...

Страница 4: ...cle The temperature and the length of the Automatic Cooking Cycle are factory preset To reset them turn the dispenser off and then turn it on keeping key A pressed On the display the Cooking Tem perat...

Страница 5: ...4 ASSEMBLY 1 Put the drip tray and grill in place 2 Lubricate the faucet piston in the area A shown in fig 2 using food grade approved lubri cant figure 2 3 Reassemble the faucet assembly on the con...

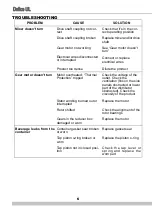
Страница 6: ...rheated Thermal Protection tripped Check the voltage of the outlet Check the ventilation fins on the side panels obstructed or lower part of the distributor obstructed Check the viscosity of the produ...

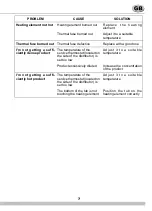
Страница 7: ...rvice thermostat located on the side of the distributor is set too low Adjust it to a suitable temperature Product excessively diluted Increase the concentration of the product I m not getting a suffi...

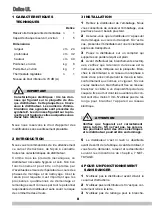
Страница 8: ...omprenant la mise la terre conform ment aux normes en vigueur Si vous voulez r aliser un branchement fixe au r seau branchez le c ble un dispositif bipolaire de coupure fix au mur dont les ouvertures...

Страница 9: ...nctionner couvercle ferm afin d viter une ventuelle con tamination du produit 6 Le distributeur doit fonctionner sans interrup tion Le chauffage s arr tera automatiquement lorsque le produit sera pr t...

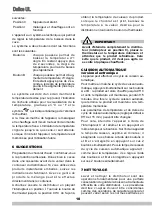
Страница 10: ...est alors chauff jusqu 95 C et cette temp rature est maintenue pendant 15 minutes Une fois le cycle de cuisson automati que termin le produit est maintenu la tem p rature m moris e Les param tres de t...

Страница 11: ...es qui sont en contact avec la boisson 3 Rincez toutes les pi ces lav es l eau cou rante 8 2 DESINFECTION La d sinfection doit tre effectu e avant de mettre en marche le distributeur Evitez que celui...

Страница 12: ...ille les gouttes et la grille en place 2 Lubrifiez le piston robinet dans la zone A indiqu e sur la figure 2 uniquement avec la graisse usage alimentaire figure 2 3 R assemblez le robinet sur le conte...

Страница 13: ...ducteur ne tourne pas Le moteur est surchauff intervention du protecteur thermique Contr ler le voltage de la prise de courant Contr ler la ventilation ailettes des panneaux lat raux obstru es ou part...

Страница 14: ...dense Le thermostat de service plac sur le c t du distributeur est r gl sur une temp rature trop basse Le r gler la bonne temp rature Le produit est trop dilu Augmenter la concentration du produit Je...

Страница 15: ...a en la placa Conectar el distribuidor en una red monofase ayud ndose de una toma a tierra en conformidad con las normas vigentes Si se quisiera realizar una conexi n fija a la red conectar el cable a...

Страница 16: ...OS MANDOS 5 El distribuidor debe funcionar siempre con la tapa montada para evitar que el producto se contamine 6 El distribuidor debe funcionar ininterrumpidamente el calentamiento se parar autom tic...

Страница 17: ...el termostato hasta la posici n de 90 C para obtener la temperatura de cocci n del producto Cuando el chocolate est listo bajar la temperatura al valor deseado para la distribuci n mediante el mando d...

Страница 18: ...r la tapa 2 Extraer el mezclador del eje central 3 Desmontar el grifo siguiendo la secuencia indicada v ase figura 1 figura 1 4 Levantar el contenedor para extraerlo 5 Extraer el caj n recogegotas y v...

Страница 19: ...asivos 7 4 REMONTAJE 1 Montar el caj n recogegotas y la rejilla en sus alojamientos correspondientes 2 Lubricar el pist n del grifo en la zona A indicada en la Figura 2 utilizando exclusivamente la gr...

Страница 20: ...do intervenci n del Protec tor t rmico Comprobar el voltaje de la toma de corriente Comprobar la ventilaci n aletas de los paneles laterales o parte inferior del distribuidor obstruidas Comprobar la v...

Страница 21: ...o suficientemen te denso El termostato de servicio situado al lado del distribuidor est regulado a una temperatura demasiado baja Regularlo a la temperatura adecuada El producto est demasiado diluido...

Страница 22: ...27 Golden heating plate holde Support dor plaque chauffante Soporte para plancha calentadora oro 3 10554 44000 M4 Clip Clip M4 Clip M4 4 22800 26415 Thermostat bulb holder Support boule du thermostat...

Страница 23: ...ntenedor oro 22 22800 26414 Mixer M langeur Mezclador 23 22800 26412 Bowl shaft Arbre du r servoir Arbol del contenedor 24 22800 26419 Bowl shaft O ring OR de l arbre du r servoir OR para rbol central...

Страница 24: ...95 C Term stato 5 95 C 6 Gear motor Motor ducteur Motoreductor ELECTRONIC VERSION 1 Switch Interrupteur Interruptor 2 Termic fuse 3 Gear motor Motor ducteur Motoreductor 4 Resistance Resistance Resis...

Страница 25: ...25 NOTES NOTES NOTAS...

Страница 26: ...26 DELICE UL NOTES NOTES NOTAS...

Страница 27: ...27 NOTES NOTES NOTAS...

Страница 28: ...02449 00029 R3 6 15E13 Ugolini spa Via dei Pioppi 33 20090 Opera MI Tel 02 5300591 www ugolinispa com...

Отзывы: