


UGO BASILE - I
TALY
Page 29
Series 58000 Instruction Manual (Rev.1)
12.1
Electrical
To inspect and/or replace the fuses,
disconnect the mains cable first!
Insert a minia-
ture screwdriver in the slot indentation, see paragraph 4.3-Fuse Holder & Voltage Selec-
tor, and snap out the slide which houses the fuses.
For operation at 230-240 Volts, we recommend 315 mA timed fuses (type T315). Use
630 mA fuses (type T630) for operation at 115 Volts.
Having extracted the fuse slide, the Voltage selector becomes accessible. The same miniature
screwdriver will help you to pry out the cross jumper on which the operation voltage is engraved.
Place the jumper upside down if you have to shift from 115 to 230V or vice versa.
Snap in the fuse slide: the mechanical “
click
” ensures that it is locked. Check the voltage
flag visible in the window, before applying electrical power.
12.2
Replacing a Leaky Pressure Cuff Membrane
Take out the leaky membrane. Fit the fresh membrane into the cuff tube and fold back its edges.
When you have completed the job, ensure that the membrane is not twisted, as this may produce
wrinkles.
Use the Perspex O-Ring fitter provided to affix the two O-Rings. Roll up the O-Rings along the
cone, until they reach the cylindrical section: insert the conical side of the fitter into the cuff and
transfer the O-Rings over the folds of the membrane until they are seated into the ring grooves,
see Figure 5 “Tail Cuff”.
12.3
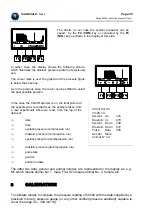
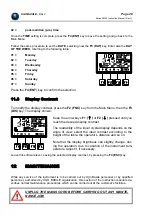
Replacing the Paper Roll
When the printer is out of paper, the display shows the fol-
lowing warning message.
Insert a fresh roll, paying attention to its orientation; Figure
11 “Paper Roll” is self-explanatory on what concerns the
replacement.
See paragraph 13.4-Accessories and Consumables, for
catalogue number of paper rolls.