6
OVERVIEW
The direct measurement of CO
2
is achieved using UEi’s own EOS technology sensor. CO
2
is set to zero in fresh air automatically after
the initial 60 second countdown.
If “ZERO CO
2
” is indicated, ensure the unit is in
outside fresh air
before selecting the “Purge” option.
It is very important that re-zeroing is done in
outside fresh air
as indoor CO
2
levels are affected by human breath.
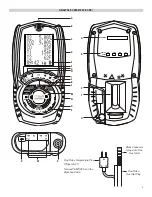
The analyzer has a protective rubber boot with magnets for hands-free operation and is supplied with a probe with an integral
temperature sensor.
A low flow detection system warns of a low flow and switches the pump off, this also helps prevent water condensate ingress from
overfilled water traps.
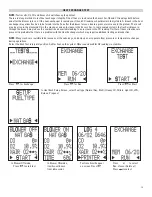
A large 6 line display provides the user with relevant information based on current activity including instrument status via the new
intelligent Status Bar. All data can be printed via an optional infrared printer.
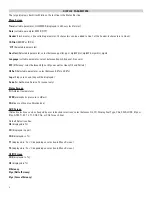
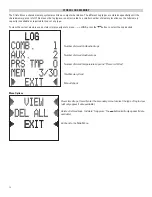
The C161 uses a new data storage system allowing up to 30 logs of any combination of Combustion, AUX or Temperature tests, rather
than be restricted to an allowance of particular logs.
10 characters can be added to Line 1 of the header, 6 characters to Line 2 of Header of the printouts.
PRE TEST CHECKLIST
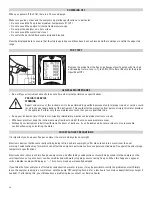
SETTING INLET TEMPERATURE
ANALYZER CONNECTIONS
• Turn on and zero the analyzer without the flue probe connected to use ambient temperature.
• Connect flue probe thermocouple to T1 during zero countdown use for inlet ducted system.
• Connect a thermocouple to T2 to measure second temp source.
• Clean particle filter
• Water trap and probe line are empty of water
• Power on and zero
• All hose and thermocouple connections are properly secured
• Flue gas probe is sampling ambient FRESH air
• Water trap is fitted correctly to the instrument
• Flue temperature plug is connected
• Ensure water trap plug is inserted correctly
WARNING!
Turning the pump off while the probe is in the flue will leave toxic gases
inside the analyzer. Once data has been printed or copied, it is advisable
to purge the unit with fresh air as soon as possible. To do this remove the
probe from the flue and turn ON pump. Always allow the readings to return
to zero (20.9% for O
2
) prior to shutting the unit off. The meter will not switch
off until the CO reading is below 20 ppm.
WARNING!
The probe will be hot from flue gases. Remove the probe from the flue and
allow it to cool naturally. Do not immerse the probe in water, as this will be
drawn into the analyzer and damage the pump and sensors.
NOTE:
Take care when
inserting the temperature
probes as the pins are
polarized. Insert with the
smaller pin (+) to the right.
T2
T1

