background image

6

7

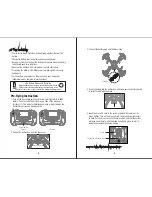
3. Plug the camera cable to the camera port and plug the camera gimbal
    cable to the camera gimbal port.

Camera Port

Camera Gimbal Port

1. Charging Instruction for Battery

Flying Preparation

Drone Battery

Transmitter Battery

2. Battery Charging Instruction

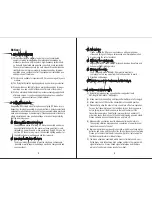
* When charging the drone battery, the USB indicator light is red and
   turns to green when fully charged.
* When charging the transmitter battery, the USB indicator light is red
   and turns to green when fully charged.
* The charging time of the drone battery is about 150 minutes, while the
   charging time of the transmitter battery is about 70 minutes.
* If the transmitter battery is low when flying, the transmitter will beep
   constantly to remind you to land the drone imediately to replace the
   battery, or the drone may out of control.
* If the drone battery is low when flying, the drone body lights flash and
   the transmitter will beep constantly to remind you to land the drone as
   soon as possible, or the drone may crash suddenly for low battery.
* Never put the battery with metal product to avoid short circle.
* Stop using the battery if the battery swell up, damaged or seriously
   heating etc.
* Put the battery and charger on the ground and keep away from
   inflammable when charging to avoid accident.

OFF

ON

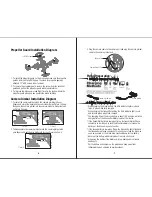
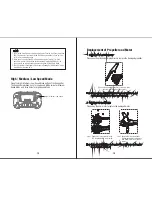
Propeller Guard Installation Diagram

1.7*6PB Screws

Camera Gimbal Installation Diagram

1. To install the propeller guard, to the drone and make sure the propeller
    guard’s pillar can fully fill the gap. Then lock the propeller guard by
    attached 1.7*6PB screws (short screws). 
2. To remove the propeller guard, remove the screw from the propeller
    guard and pull out the propeller guard with moderate force. 
3. To improve the drone power and flight time, fly the drone without the
    propeller guard when you can operate the drone skillfully.

1. To install the camera gimbal, pinch the camera gimbal with your
    fingers and aim at the buckle on the camera holder as Picture 1 shown, 
    then push the camera gimbal into the camera holder in moderate force
    as Picture 2 shown.

2. To disassemble the camera gimbal, pinch the camera gimbal with
    your fingers and pull it out in moderate force as Picture 3 shown.

Picture 1

Pictuer 3

Picture 2

Camera Gimbal

Camera Holder

Camera Gimbal

Camera Holder

Содержание U842-2

Страница 1: ...Flying Preparation 7 Pre flying Instruction 8 Operation Instruction of Camera 10 To Record Video 11 To Take Picture 12 To Adjust the Screen Brightness 12 To View Stored Video and Picture 13 To Delete...

Страница 2: ...caused by improper operation as we could not control the procedure of installation use and operation of this drone 3 Safe operation Please operate the RC drone in accordance with your physical status...

Страница 3: ...a Rotate Down the Camera Rigiht Stick Forward Backward Left Right Flying Stick Altitude Hold Mode Left Right Rotation Trimmer Forward Backward Left Right Flying Trimmer SD Card Slot Power Switch and I...

Страница 4: ...tery with metal product to avoid short circle Stop using the battery if the battery swell up damaged or seriously heating etc Put the battery and charger on the ground and keep away from inflammable w...

Страница 5: ...re flying Instruction 1 Turn on the transmitter switch and the indicator light starts to flash rapidly Push the Left Stick all the way up then all the way down Picture 1 2 The indicator light flashes...

Страница 6: ...s paired camera automatically Next time you need not to pair again If you want to pair the transmitter with other camera Restart the transmitter and repeat step 1 and step 2 Notice Do not move the Lef...

Страница 7: ...hen press DEL button and the screen will appear Choose YES by UP or DOWN button and then press OK button to delete the file Or choose NO and then press OK to return DEL XXXXXX YES NO To View Stored Vi...

Страница 8: ...drone to the left and push the Right Stick to the right to fly to the right 4 To fly Forward and Backward Push the Right Stick up to fly the drone forward and pull the Right Stick down to fly the dron...

Страница 9: ...lights flashes which indicates the heading hold mode is ready To turn off Heading Hold Mode press the heading hold mode button again and the drone LED lights turns solid which indicates the heading ho...

Страница 10: ...eller A and CW Motor for Propeller B or the drone can not fly High Medium Low Speed Mode Press the High Medium Low Speed Mode button of the transmitter The transmitter will beep once for Low Speed Mod...

Страница 11: ...ata from my computer mobile disk Or you can insert the SD Card to the LCD transmitter to view the photo and video Spare Parts For convenience the spare parts are listed for you to choose which can be...

Страница 12: ...Misoperation 3 Operate the drone step by step in accordance with the user manual 4 The electronic component is damaged for frequent crash 4 To buy spare parts from local seller and replace damaged par...

Отзывы: