background image

8

9

3. Tips for Battery 

LiPo Battery Disposal & Recycling

Wasted batteries must not be placed with household trash.

Please contact local environmental or waste agency or the

supplier of your model or your nearest LiPo battery recycling center.

* Power off the drone first when finished flying and then take out the
   battery.
* Charge the battery after the battery surface cooling down.
* Keep away from heat and put the battery in dry place when the battery
   is not being used for a long time.
* Never put the battery with metal product to avoid short circle.
* Stop using the battery if the battery swell up, damaged or seriously
   heating etc.
* Put the battery and charger on the ground and keep away from
   inflammable when charging to avoid accident.

Pre-flying Instruction

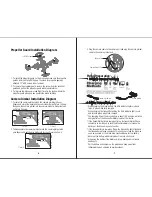
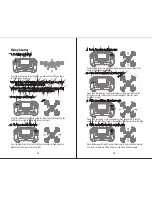
1. Turn on the transmitter switch and the indicator light starts to flash
    rapidly. Push the Left Stick all the way up, then all the way down 
    (Picture 1-2). The indicator light flashes slowly, which indicates the
    transmitter enters code pairing search.

Picture 1

Picture 2

Power Switch 

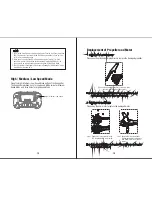
3. Connect the battery plug and the drone plug.

2. Pull out the battery box from the drone rear. 

Press and pull out

Power on

5. Insert the micro SD card to the card slot behind the camera of the
    drone bottom. Turn on the drone switch. The drone body lights start
    to flash. Put the drone on the horizontal position, and the transmitter
    will beep about 3s later and the drone body lights get solid, which
    indicates successful frequency pairing.  

Note: To insert the SD card as shown above.

OFF

ON

2. Turn on

1. Insert the SD card to the slot

4. Push the battery into the battery box and make sure the battery buckle
    is perfect match with the drone.

Содержание U842-2

Страница 1: ...Flying Preparation 7 Pre flying Instruction 8 Operation Instruction of Camera 10 To Record Video 11 To Take Picture 12 To Adjust the Screen Brightness 12 To View Stored Video and Picture 13 To Delete...

Страница 2: ...caused by improper operation as we could not control the procedure of installation use and operation of this drone 3 Safe operation Please operate the RC drone in accordance with your physical status...

Страница 3: ...a Rotate Down the Camera Rigiht Stick Forward Backward Left Right Flying Stick Altitude Hold Mode Left Right Rotation Trimmer Forward Backward Left Right Flying Trimmer SD Card Slot Power Switch and I...

Страница 4: ...tery with metal product to avoid short circle Stop using the battery if the battery swell up damaged or seriously heating etc Put the battery and charger on the ground and keep away from inflammable w...

Страница 5: ...re flying Instruction 1 Turn on the transmitter switch and the indicator light starts to flash rapidly Push the Left Stick all the way up then all the way down Picture 1 2 The indicator light flashes...

Страница 6: ...s paired camera automatically Next time you need not to pair again If you want to pair the transmitter with other camera Restart the transmitter and repeat step 1 and step 2 Notice Do not move the Lef...

Страница 7: ...hen press DEL button and the screen will appear Choose YES by UP or DOWN button and then press OK button to delete the file Or choose NO and then press OK to return DEL XXXXXX YES NO To View Stored Vi...

Страница 8: ...drone to the left and push the Right Stick to the right to fly to the right 4 To fly Forward and Backward Push the Right Stick up to fly the drone forward and pull the Right Stick down to fly the dron...

Страница 9: ...lights flashes which indicates the heading hold mode is ready To turn off Heading Hold Mode press the heading hold mode button again and the drone LED lights turns solid which indicates the heading ho...

Страница 10: ...eller A and CW Motor for Propeller B or the drone can not fly High Medium Low Speed Mode Press the High Medium Low Speed Mode button of the transmitter The transmitter will beep once for Low Speed Mod...

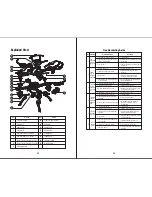
Страница 11: ...ata from my computer mobile disk Or you can insert the SD Card to the LCD transmitter to view the photo and video Spare Parts For convenience the spare parts are listed for you to choose which can be...

Страница 12: ...Misoperation 3 Operate the drone step by step in accordance with the user manual 4 The electronic component is damaged for frequent crash 4 To buy spare parts from local seller and replace damaged par...

Отзывы: