background image


Page 1 of 7 

Saturn Titan-X 225mm Assembly Manual


PB3D Creations | Created 10-1-2016 


With everyone getting their hands on their 

Titan-X 225

 we figured an assembly log is much 

needed. This read will take you through the steps of assembling the full frame with all 

3D 

Accessories.


*Please note, this is not a build log for electronics setup and layout but we will recommend where 
components are best placed within the design. 


PARTS LIST 

Hardware 


Aluminum


4X – 35mm Aluminum Standoffs 


4X – 10mm Aluminum Screws 

Stainless Steel


4X – M3 Stainless Steel Nuts 


4X – M3 Stainless Steel Nyloc Nuts 


4X – 14mm Stainless Steel Screws 


8X – 12mm Stainless Steel Screws 


2X – M2 Steel Camera Screws (Pre-Placed in FPV Mount) 

Nylon (Separate Packaging)


4X – 6mm Nylon Female to Male Spacers 


4X – M3 Nylon Nuts 


4X – M3 Nylon Spacers 

3D Accessories 


Locking FPV Camera Mount 


RX / VTX Antenna Flexible Mount 


Glue-on Edge protection / Feet 

**If you are missing any of the hardware or 3D Prints listed above please contact us and we will be 
sure to send out the necessary parts. 3D Accessories such as recording camera mounts, and FPV 
Protection are sold separately.


Содержание Titan-X 225

Страница 1: ...m Aluminum Standoffs 4X 10mm Aluminum Screws Stainless Steel 4X M3 Stainless Steel Nuts 4X M3 Stainless Steel Nyloc Nuts 4X 14mm Stainless Steel Screws 8X 12mm Stainless Steel Screws 2X M2 Steel Camer...

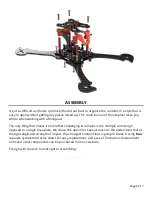
Страница 2: ...ing that makes it look rather challenging complex is the multiple arm design opposed to a single base plate We chose this option for several reasons We understand that at the right angle and strength...

Страница 3: ...a strict orientation in mind STEP 2 Next run a pair of scissors along either side of the sealed hardware package This will allow you easy access to the pieces at the given time STEP 3 Find the M3 12mm...

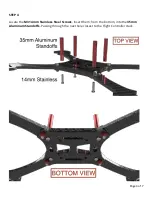
Страница 4: ...Page 4 of 7 STEP 4 Locate the M3 14mm Stainless Steel Screws Insert them from the bottom into the 35mm Aluminum Standoffs Passing through the next hole closest to the Flight Controller stack...

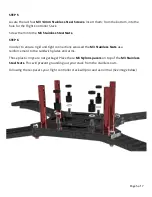
Страница 5: ...6 In order to ensure rigid and tight connections we used the M3 Stainless Nuts as a reinforcement to the sandwich plates and arms Those plastic rings are not garbage Place these M3 Nylon spacers on t...

Страница 6: ...p to the standoff to keep the prints from sliding down the standoffs The FPV Camera mount has two M2 Black Steel Screws included These will already be placed in the mount but if they are not see the i...

Страница 7: ...like an elegant immaculate creation when you are done Sit back relax and grab a beer because you just assembled your first definitely not your last Saturn Multi Rotors Titan X 225 Now take some pictur...

Отзывы: