


Window Mounting
1
Remove Chassis
1. Pull down front panel and remove filter.
(See Fig.1).
2. Lift front upwards and place to one side.
3. Locate the four front screws and remove.
These screws will be needed to re-install
in the front later. (See Fig.2).
6. Remove shipping screws from top of unit and
also on the side by the base if installed.
7. Hold the cabinet while pulling on the base
handle, and carefully remove the unit.
8. Add two foam inserts to holes in top of cabinet
where shipping screws were removed from.
9. Your unit may come with internal packaging.
This packaging must be removed prior to
installing the air conditioner back into the
cabinet.(see Fig.5).
4. Pry away front from cabinet sides as shown in
Fig.3.
5. Gently lift front off unit and place to one side
(see Fig.4).
2
Install Top Angle and
Side Bracket
1. Attach foam gasket to top angle
above holes as shown in Fig.6.
2. Install top angle and side retainers
to cabinet as shown in Fig.6.
3
Assemble Window Filler Panels
1. Place cabinet on floor, a stable bench,
or a table.
2. Slide I section of window filler panel
into side retainer on the side of the
cabinet (see Fig.7). Do both sides.
,,
,,
Plastic
Frame
Window Filler
Panel
Side Retainer
Fig.7
Fig.6
5 1
6
lon
g
hex
-he
ad
/
12
Содержание MWK-15CRN1-BJ7
Страница 1: ...87795011 MWK 15CRN1 BJ7 USER MANUAL 1 866 206 0888 3 years ans warranty garantie...
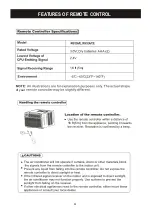
Страница 22: ...FEATURES OF REMOTE CONTROL 16 ft 5m 16 ft 5m of your 21...
Страница 23: ...22...
Страница 24: ...23...
Страница 25: ...24...
Страница 26: ...25 change is...
Страница 27: ...26 LED LED LED is displayed is displayed in in...
Страница 28: ...27 LED LED LED LED LED LED LED LED LED LED...


