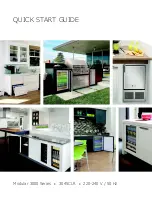
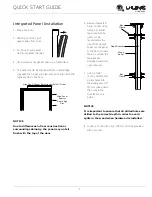
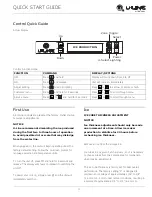
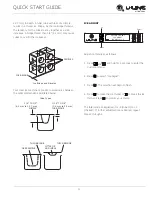
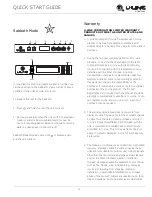
background image

QUICK START GUIDE

Modular 3000 Series


3045CLR


220-240 V / 50 Hz

Содержание Modular 3045CLR

Страница 1: ...QUICK START GUIDE Modular 3000 Series 3045CLR 220 240 V 50 Hz...

Страница 2: ...TION Looking for additional information on your product User Guides Quick Reference Guides CAD Drawings Compliance Documentation and Product Warranty information are all available for reference and do...

Страница 3: ...1 Model List 2 Safety and Warning 3 Environmental Requirements 4 Electrical 4 Water Hookup 6 Drain 8 Door Swing 8 General Installation 9 Integrated Panel Installation 11 Control Quick Guide 11 First U...

Страница 4: ...or more information Visit u line com to view detailed User Guides for all U Line products Clear Ice Machines U 3045CLRINT 00B U 3045CLRINT 40B Unit shown with wood panel not included with unit Visit h...

Страница 5: ...hout this guide This appliance is not intended for use by persons including children with reduced physical sensory or mental capabilities or lack of experience or knowledge unless they have been given...

Страница 6: ...enuine U Line replacement parts Imitation parts can damage the unit affect its operation or performance and may void the warranty This appliance is intended to be used in household and similar applica...

Страница 7: ...for your unit because it could be prone to nuisance tripping However be sure to consult your local codes Water Hookup PREPARE PLUMBING The water valve uses a standard 1 4 6 35 mm compression fitting U...

Страница 8: ...edges could be sharp 1 Turn off water supply and disconnect electrical supply to product prior to attempting installation 2 Remove the grille access panel in the front and the back panel 3 Locate wate...

Страница 9: ...ker storage bin and or potentially flowing onto the floor which may result in personal injury or property damage NOTICE Drain can NOT be located directly below the unit Unit has a solid base that will...

Страница 10: ...gravity drain you may have ordered a pre installed U Line P60 drain pump If you need to install a P60 drain pump into your unit see DRAIN PUMP section in the User Manual See below for typical install...

Страница 11: ...utout opening adjust the rear legs to achieve a total unit rear height of 1 8 3 mm less than the opening s rear height Shorten the unit height in the front by adjusting the front legs This allows the...

Страница 12: ...e integrated panel to door using clamps A robust tape may also be used U Line recommends the use of bar clamps to secure the panel to the door If using tape be certain the tape will not damage panel f...

Страница 13: ...ush against the bottom of the channel 11 Remove clamps from door NOTICE If panel requires additional adjustment after removing clamps slightly loosen each screw and adjust panel as necessary Tighten s...

Страница 14: ...nt at a time Allow ice maker production to stabilize for 24 hours before rechecking ice thickness Remove all ice from the storage bin Ice cubes in any given batch will vary so it is necessary to choos...

Страница 15: ...ce thickness as follows 1 Press and hold for 5 seconds to enter the Customer Menu 2 Press to select Ice Adjust 3 Press The selection will begin to flash 4 Press to make the ice thicker or to make the...

Страница 16: ...abor costs not specifically covered by this warranty shall be the responsibility of the purchaser This warranty extends only to the original purchaser of the U Line product The Product Registration Ca...

Страница 17: ...U Line may require that defective parts be returned at your expense to the importer or directly to U Line located in Milwaukee Wisconsin USA for inspection Any action by you for breach of warranty mus...

Отзывы: