PAGE 2 OF 6
1114 IH-4729
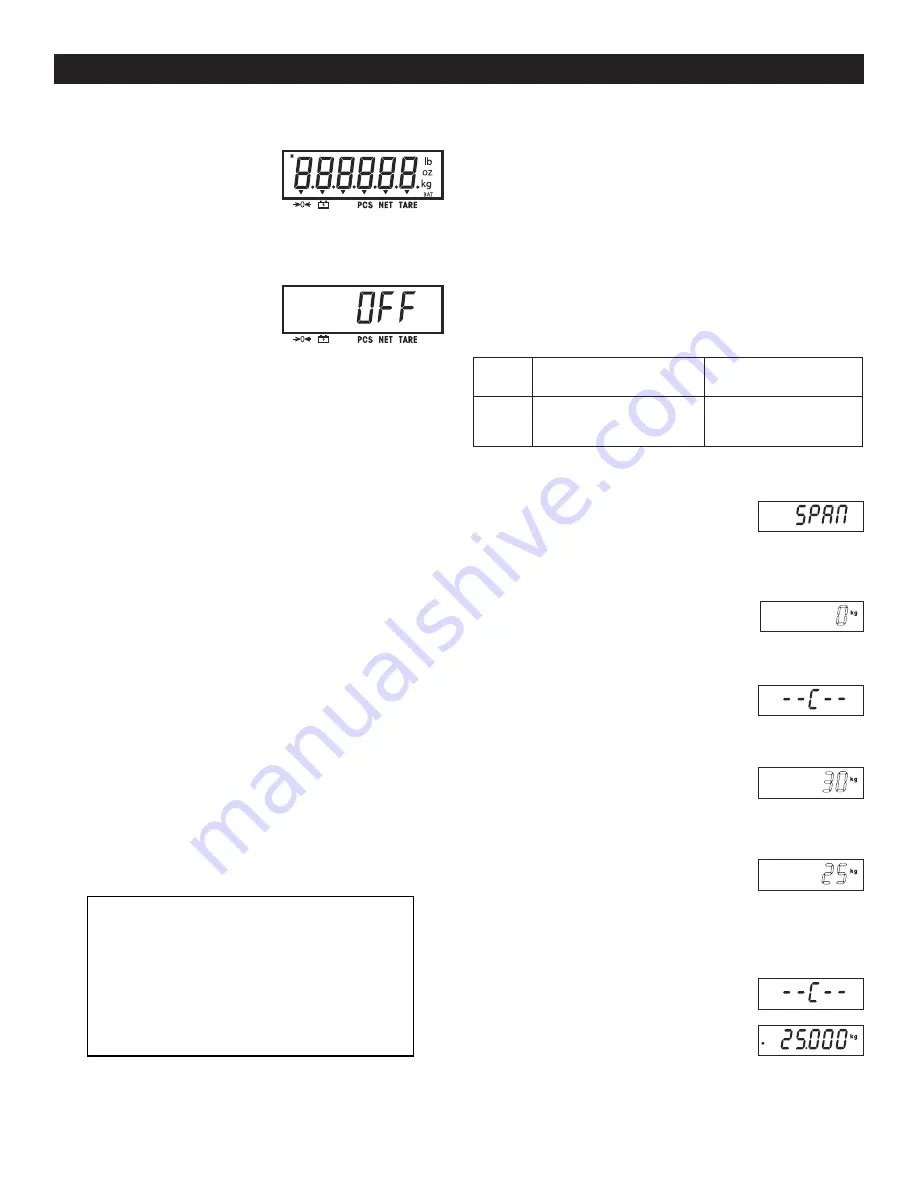
TURNING INDICATOR ON/OFF
1. To turn the Indicator on,
press and hold the
ON/ZERO OFF
button for
2 seconds. The Indicator
performs a display test, momentarily displays
the software version and then enters the active
weighing mode.
2. To turn the Indicator off,
press and hold the
ON/ZERO OFF
button until
OFF is displayed.
MENU NAVIGATION
TO ENTER THE MENU MODE
1. Press and hold the
TARE MENU
button until Menu
appears on the display. The first upper level
menu appears on the display. Summary of button
navigation functions in menu mode:
YES
Allows entry into the displayed menu.
Accepts the displayed setting and
advances to the next menu item.
NO
Skips by the displayed menu. Rejects
the displayed setting or menu item and
advances to the next available item.
BACK
Moves backwards through the upper
and middle level menus. Backs out of a
list of selectable items to the previous
middle level menu.
EXIT
Exits from menu directly to the active
weighing mode.
CALIBRATION MENU
Two calibration processes are available:
Span Calibration and Linearity Calibration. (See Figure 1)
1. Make sure that appropriate calibration masses are
available before beginning calibration.
2. Make sure that the scale base is level and stable
during the entire calibration process.
3. Calibration is unavailable with LFT set to
ON
.
4. Allow the Indicator to warm up for approximately
5 minutes after stabilizing to room temperature.
5. To abort calibration, press the
EXIT
button anytime
during the calibration process.
SPAN CALIBRATION
1. Span calibration uses two points to
adjust the scale. The first point is the
zero value where there is no weight
on the scale. The second point is the span value
where a calibration mass is placed on the scale.
2. When SPAN is displayed, press the
YES
button to access the Span
Calibration menu item. The display
flashes 0.
3. With no weight on the scale, press
the
YES
button to establish the zero
point. The display shows --C-- while
the zero point is established.
4. The display flashes the span
calibration point. Place the
specified weight on the scale and
press the
YES
button.
5. To choose a different span point,
repeatedly press the
NO
button to
increment the selections or press
the
BACK
button to decrement the selections. When
the desired value is displayed, place the specified
weight on the scale and press the
YES
button.
6. The display shows --C-- while
the span point is established.
7. If span calibration was successful,
the scale exits to the active
weighing mode and displays the
actual weight value.
OPERATION
Span
Perform
Perform
Set 00... Set 19... Set 31
Linearity
Geographic
Adjustment
End Calibration Exit CALIBRATE menu
Figure 1
CALIBRATION VALUES
MODEL
#
SPAN CALIBRATION
POINTS (kg.)
LINEARITY CALIBRATION
POINTS (kg.)
H-4729
5, 10, 15, 20, 25, 30, 40, 50,
60, 75, 100, 120, 150, 200,
250, 300, 400, 500
250, 500


