Simret 4000 Instructions, Issue 10, Jan 2011
© 1994-2011, Turnkey Instruments Ltd. Page 6 of 17
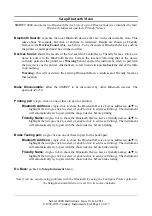
Start Menu
The top line shows the % of memory used, the present time and a battery condition indicator. The
latter shows LOW if recharge is needed right away and CHG while being recharged. The
instrument will turn itself off if the battery gets too low. If the battery goes completely flat you will
have to reset the clock but the stored results will be preserved.
Test Brakes
: single-click
to proceed straight to brake testing. Bluetooth will attempt to
pair with the
Pedal Pad
More… :
single-click
to proceed to the
Main Menu.
While this menu is visible the SIMRET 4000 can be discovered by other Bluetooth Devices and can
thus be connected for downloading to a Bluetooth enabled Windows PC. The screen will briefly
show a “Making Discoverable” message.
Main Menu
Double-click anywhere to make discoverable if Bluetooth is on. The passcode is 1234.
Examiner Identity
: single-click
to show a list of up to eight examiners names,
▲▼
to highlight
then
single-click
to select or
double-click
to edit (see
Editing
).
Plant Identity
: single-click
to show a list of up to 99 plant or vehicle identities.
▲▼
to highlight
then
single-click
to select or
double-click
to edit (see
Editing
).
Site Conditions
: single-click
to show a list of up to 16 site conditions or user notes,
▲▼
to
highlight then click again to select or
double-click
to edit.
Measure GRADIENT
: single-click
to measure the slope gradient. The instrument continuously
measures and displays the slope gradient in percent. A negative number means a downward
gradient. If a very accurate measurement is required, first trim the instrument zeros (see
Trim
Zeros
in the
Setup Instrument
menu)
.
The cross slope and temperature are shown at the
bottom of the display. Click again to return to the main menu. The maximum slope is limited
to 25% ( 1 in 4).
BRAKE TESTING:
single-click
to arm the instrument for the next brake test. The display shows
the examiner, vehicle name, trailer (optional) and site conditions for the test together with the
test reference number. Highlight and
single-click
to change any of these (see
Editing
). When
ready,
single-click
Proceed
.
Click again to confirm the vehicle is stationary and you are ready to proceed with the test. The
instrument should be properly located in the vehicle and the vehicle should be on a gradient
representative of the test course.
All the subsequent calculations of deceleration, speed and distance will be referenced to the
gradient measured at this point (i.e. the gradient at arming). Alternatively, if measure slope at
stop is selected (see
Change Settings
menu), all calculations will be reference to the gradient
measured at stop when the vehicle has come to rest.


