4
BARBECUE ASSEMBLY
INSTRUCTIONS
•
Remove the pallet and any plastic film
protecting or covering any parts of the
Barbecue and Cabinet Trolley before
assembly.
• Cut away any packaging or cable ties that
may be holding components in place.
• Check you have all the correct components
as listed below.
Tools required for assembly – 17mm,10mm
spanner and a Phillips head screwdriver.
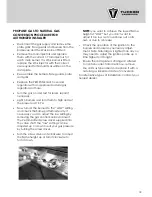
1. If you have chosen a Roasting Hood you
will need to unhinge and remove the Doors
completely from either side of the Cabinet
to allow the removal of the Roasting Hood.
NOTE:
The Roasting Hoods are packaged inside
the Cabinet Trolley for transport, they cannot be
removed unless the Doors of the Cabinet Trolley
are removed first.
•
Barbecue body
•
Large Flare Guards
•
Small Flare Guards
•
Plate and grill
•
Grease tray
•
Hose and regulator
•
Cabinet Trolley
•
Control Valve adjustment screwdriver
•
Check that you have the correct gas type
Barbecue i.e. L.P.GAS (red sticker) NAT GAS
(black sticker). The Gas Type Label is located
on the righthand side of the Barbecue Body.
•
GTR BBQs can be installed with either a Flat
Hinged weather cover/ Lid or a Roasting
Hood.
•
Make sure to read any separate instructions
on Assembly, Installation and Operation of
the Roasting Hood and / or Wok Burner if
they are to be fitted to the BBQ.
•
If you have a Flat Hinged Weather Cover/
Lid, attach the Lid onto the back of the BBQ
with the Phillips head bolts provided.
BARBECUE PARTS LIST
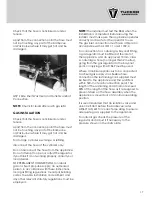
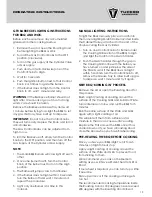
2. To remove the Cabinet Trolley Doors simply
push in the spring catches on the back of
each Hinge. This will allow the release of
the hinge from the Hinge Plates that are
attached to the side walls of the Cabinet
Trolley.


