background image

2

R333EV

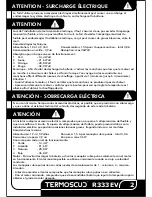
ATTENZIONE - SOVRACCARICO ELETTRICO

Aggiungendo troppi accessori elettrici è possibile sovraccaricare il sistema elettrico del veicolo. 
Se si utilizzano vari accessori elettrici contemporaneamente, consumando più elettricità di quanta 
venga prodotta dal veicolo, si scaricherà la batteria e si produrranno danni al sistema elettrico.

Nell’istallare qualsiasi accessorio elettrico, accertarsi di non superare il massimo amperaggio del


fusibile n

é

 modificare il circuito. Superare il massimo amperaggio del fusibile può portare ad avarie


dell’impianto elettrico che potrebbero comportare gravi lesioni se non la morte.
Le caratteristiche tecniche:
Alimentazione: 12-14,5 volt                      Consumo: 1,5A per ogni coprimanopol

a

 totale 3,0A


Consumo a riposo: 3,9uA                          Assorbimento: max 36Watt
Assorbimento per ogni livello di funzionamento:
1       Verde  

- 14,4 Watt

2       Giallo  

- 21,6 Watt

3       Arancione  

- 28,8 Watt

4       Rosso  

- 36,0 Watt

Note - Per evitare di scaricare la batteria, i coprimanopole sono progettati per funzionare solo con il 
motore in funzione. Il massimo del calore viene fornito quando si viaggia a velocità costante.
I coprimanopole hanno diversi livelli di riscaldamento da 1 (minimo) a 4 (massimo).

!

WARNING - ELECTRICAL OVERLOAD

!

ATTENZIONE

!

Attenzione a:
- Verificare prima di accendere il motore che i coprimanopole non scaldino
- Controllare a motore avviato che il pulsante che regola la temperatura sia acceso per ottenere il
   riscaldamento desiderato.

If you are using several electrical accessories you risk overloading and damaging the bike's electrical 
system, draining the battery.

When installing any electrical accessory, check that you do not exceed the maximum rated ampere 
capacity or alter the circuitry. Exceeding the maximum amperage may cause damage to the electrical 
system that could result in serious injury or death.
Technical specifications:
Power: 12-14.5 Volt  


Power consumption: 1.5 A per hand grip cover - total: 3.0 A

Power consumption in standby mode: 3.9 uA  


Absorption: max 36 Watt

Absorption per mode of operation: 
1      Green  

- 14.4 Watt

2      Yellow  

- 21.6 Watt

3      Orange  

- 28.8 Watt

4      Red  

- 36.0 Watt

Note - To avoid draining the battery, turn on the hand grips only when the engine is running. 
Maximum warmth is ensured when you travel at a constant speed. 
The hand grip covers supply different levels of heating: from 1 – minimum – to 4 

 maximum.


Check:
- Before starting the engine, that the hand grip covers are not in heat mode.
- When the engine starts, that the temperature control is turned to the desired level.

WARNING

!

Содержание Termoscud R333EV

Страница 1: ...ISTRUZIONI DI MONTAGGIO INSTRUCTION MANUAL I GB R333EV...

Страница 2: ...pu determinare un cambiamento nell aerodinamica del vostro mezzo necessario tenerne conto e adeguare la velocit e la propria condotta di guida soprattutto in caso di vento forte Conservare queste ist...

Страница 3: ...nto da 1 minimo a 4 massimo WARNING ELECTRICAL OVERLOAD ATTENZIONE Attenzione a Verificare prima di accendere il motore che i coprimanopole non scaldino Controllare a motore avviato che il pulsante ch...

Страница 4: ...o lunghi B MODALITA 3 x 2 x 2 x 2 x 2 A B C A B si consiglia in ogni caso di verificarne la compatibilit con il proprio mezzo su tucanourbano com KIT DI ASSEMBLAGGIO ASSEMBLY KIT GB R333EV universal h...

Страница 5: ...NSERIMENTO SUI COMANDI FIT ONTO CONTROLS Modalit Method 1 Per manubri con bilanciere con cilindro corto vite del bilanciere For hand grips with bar end weights with short barrel bar end screw I Infila...

Страница 6: ...er manubri con bilanciere con cilindro corto anello metallico For hand grips with bar end weights with short barrel metal ring Per manubri senza bilanciere con cilindro lungo anello metallico For hand...

Страница 7: ...il coprimanopole al proprio specchietto retrovisore To adjust the hand grip cover to rear view mirror Cut the neoprene glove and thread the rear view mirror stem through the hole Forare l inserto in n...

Страница 8: ...IO DELLE STECCHE AL MANUBRIO ATTACH ROD TO HAND GRIP 1 Piegare la stecca e farla aderire al manubrio 1 Fold the rod and secure to hand grip 2 Fissare la posizione con il Velcro 2 Fix it into position...

Страница 9: ...V step E FISSAGGIO DEL MANICOTTO IN NEOPRENE SECURE NEOPRENE GLOVE Chiudere il manicotto in modo da farlo ben aderire al manubrio Close the glove making sure that it is firmly attached to the hand gri...

Страница 10: ...raining the battery take the power supply connection from the main ignition switch Collegamento dei due cavi distinti Blu per il collegamento con il polo negativo della batteria Rosso per il collegame...

Страница 11: ...disattivato 5 possibile spegnere i coprimanopole direttamente con il telecomando attivando cos anche l antifurto Operation of the hand grip covers by others is prevented by a remote control security s...

Страница 12: ...ICUREZZA SAFETY WARNINGS ACCENSIONE con una lunga pressione del tasto funzione 3 sec la manopola Tucano Urbano attivata col livello pi basso di potenza di riscaldamento LED verde acceso SPEGNIMENTO co...

Страница 13: ...Tucano Urbano S r l Via 2 Giugno 60 B5 20068 Peschiera Borromeo Milano Italy...

Страница 14: ...R333 R333EV 1 2 FRONT TOP...

Страница 15: ...INSTRUCTIONS DE MONTAGE MANUAL DE INSTRUCCIONES F E R333EV...

Страница 16: ...pte et d ajuster la vitesse et votre mani re de conduire surtout en cas de vent fort Conserver les pr sentes instructions pour r f rence future Antes del montaje compruebe que las manoplas cubre pu os...

Страница 17: ...contr ler que le bouton poussoir qui r gle la temp rature est allum afin d obtenir le chauffage d sir ATENCI N SOBRECARGA EL CTRICA ATTENTION Si se usan al mismo tiempo varios accesorios el ctricos es...

Страница 18: ...ODALITE 3 x 2 x 2 x 2 x 2 A B C A B KIT DE MONTAGE KIT DE MONTAJE E Las manoplas cubre pu os para manillar R333 son universales pueden montarse en scooters y motos con barra usar cilindros de enganche...

Страница 19: ...step A Inserte el manguito de neopreno en los mandos del scooter moto E step B FIJACI N DEL CILINDRO DE ENGANCHE EN EL MANILLAR INSERTION SUR LES COMMANDES INSERCI N EN LOS MANDOS Modalit Modalidad 1...

Страница 20: ...Pour guidons avec stabilisateur avec cylindre court anneau metallique Para manillares con barra con cilindro corto anillo met lico Pour guidons sans stabilisateur avec cylindre long anneau metallique...

Страница 21: ...n e au r troviseur Para adaptar las manoplas cubre pu os al espejo retrovisor de su veh culo Corte las manoplas de neopreno de modo que pase el v stago del espejo retrovisor Pratiquer un trou dans l i...

Страница 22: ...DES TIGES AU VOLANT FIJACI N DE LAS VARILLAS AL MANILLAR 1 Plier la patte et la faire adh rer au volant 1 Doble la varilla y haga que se adhiera al manillar 2 Fixer la position avec le velcro 2 Fije l...

Страница 23: ...V step E FIXATION DU MANCHON EN NEOPRENE FIJACI N DE LA MANOPLA DE NEOPRENO Fermer le manchon de fa on ce qu il adh re correctement au guidon Cierre la manopla de modo que quede bien adherida al manil...

Страница 24: ...n de la fuente de alimentaci n en un cable que se controle con el encendido principal de la moto Branchement des deux c bles distincts Bleu pour le branchement avec le p le n gatif de la batterie Roug...

Страница 25: ...d teindre le manchon directement l aide de la t l commande ce qui activera galement l antivol El funcionamiento de las manoplas cubre pu os queda inhabilitado por un sistema antirrobo contro lado por...

Страница 26: ...ras piezas de las manoplas cubre pu os debe desconectar la fuente de alimentaci n y no utilizar la funci n de calentamiento No trate de modificar ni de arreglar las manoplas La reparaci n de piezas o...

Страница 27: ...Tucano Urbano S r l Via 2 Giugno 60 B5 20068 Peschiera Borromeo Milano Italy...

Страница 28: ...R333 R333EV 1 2 FRONT TOP...

Отзывы: