background image

1

E6 INTERACTIVE

SPORTS CAMERA

MANUAL (3.0)

CONTENTS

How the E6 Interactive Sports Camera Works 

1

Installing the E6 Interactive Sports Camera 

2


Vista Simulator   

2


Other Simulator Setups 

4


Mounting with a Light Track 

5


Mounting with a Universal Projector Mount 

7


Using an IR Booster 

8

Configuring E6 Interactive Sports Camera   

9


Front Floor Area  

10


Screen Image Boundary   

10


Back Floor Area   

10


Play Area 


11


Tee Position 

11


Configuration 

11


Test Setup 

13


Advanced Settings 

13

CONTACT CUSTOMER SUPPORT

Monday–Friday

9:00 am–5:00pm MST

Toll Free: 877-711-6691

Direct Line: 801-677-1123

https://trugolf.com/support

HOW THE E6 INTERACTIVE


SPORTS CAMERA WORKS

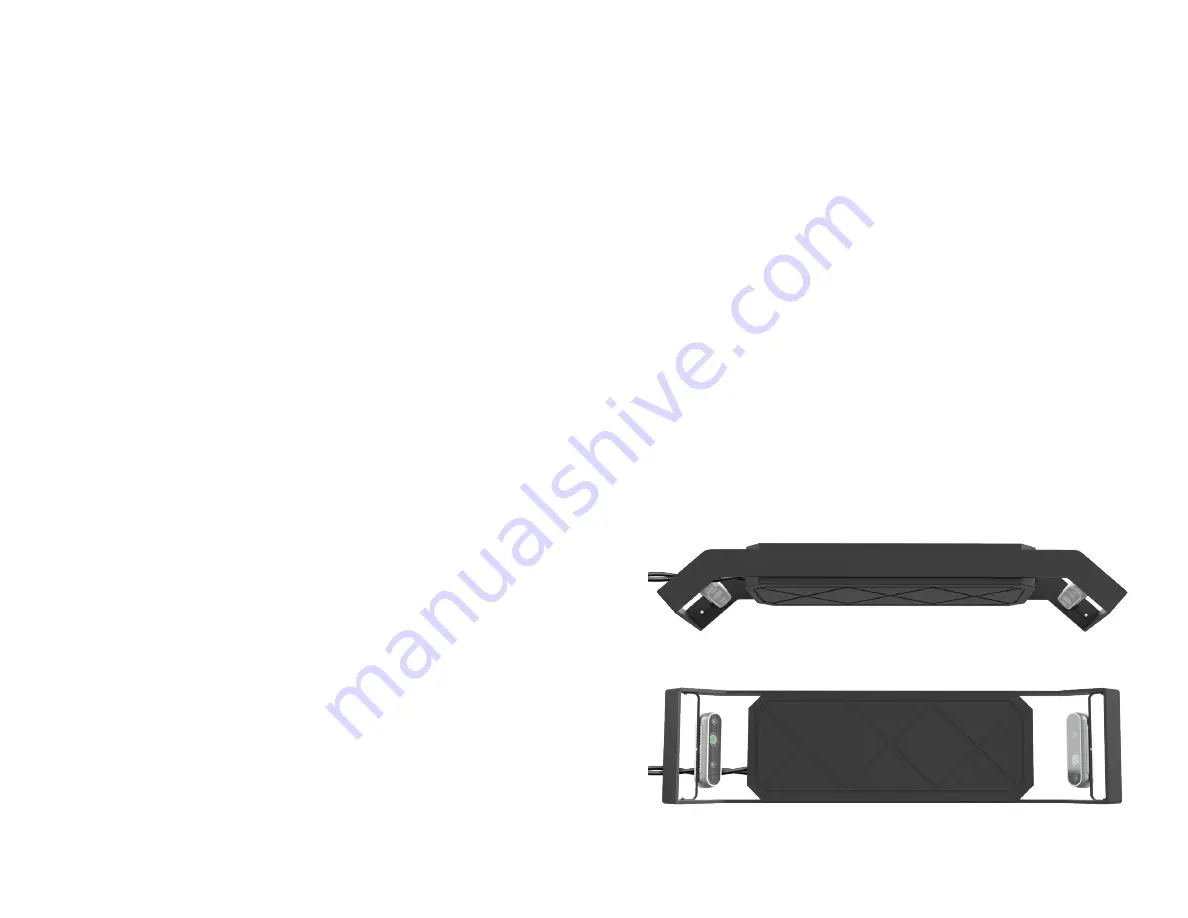
The E6 Interactive Sports Camera tracking system has the following 

components within the enclosure:

•  2 depth cameras


(one in the back end of the enclosure, pointed forward 

toward the screen, one in the front end, pointed back toward the player)

•  A 

microphone

 (for voice activation options)

When a ball is hit/kicked/thrown, the two cameras track the ball, determine 

the speed and direction, and then translate that information on-screen.

OTHER ITEMS INCLUDED WITH THE E6 ISC:

•  Light Track and Universal Projector Mount

•  30’ Extension cord

•  32’ USB 3.0 Fiber Optic Cable

•  Remote Power Switch 

(Optional)

•  IR Booster Light(s) w/ Power Adapters and Mounts 

(Optional)

•  Three-prong outlet Adapter

 (Optional)

Front Camera

Rear Camera

Содержание E6 Interactive Sports Camera

Страница 1: ...INTERACTIVE SPORTS CAMERA MANUAL 3 0...

Страница 2: ...1123 https trugolf com support HOW THE E6 INTERACTIVE SPORTS CAMERA WORKS The E6 Interactive Sports Camera tracking system has the following components within the enclosure 2 depth cameras one in the...

Страница 3: ...k from the power outlet before attempting any of the following 2 If you have a light already installed on the light track this will need to be removed first Simply twist the light 90 degrees and slide...

Страница 4: ...t from the screen TIP To ensure that this mark is properly aligned with the center of the screen either measure from a side wall or lay the extended tape measure on the floor from the screen to the ne...

Страница 5: ...screws If mounting into drywall use the self drilling drywall anchors 3 Attach the E6 Interactive Sports Camera enclosure to the universal projector mount using the washers and 4M screws IMPORTANT If...

Страница 6: ...mera INSTALLING AN IR BOOSTER LIGHT 1 The light must be in front on the screen side of the E6 ISC 2 Clamp attach the light to the ceiling or the E6 ISC enclosure IMPORTANT The IR Booster Light should...

Страница 7: ...elected area should all be at the same height in other words everything within the square should be level When finished click NEXT 9 On the PLAY AREA screen define the boundaries of the play area Clic...

Страница 8: ...ese should be used only if you have technical issues and are in contact with TruGolf tech support To exit Advanced Settings click the BASIC button at the bottom of the screen Tee to Screen Enter the d...

Страница 9: ...ait for the message to go away on its own and avoid using the computer or simulator during this time If the message remains on screen for more than 5 minutes you may need to force a restart of the Mul...

Страница 10: ...rom the tee position Baseball performs better if you move the tee position back 2 feet from the calibrated tee position This will not only help track the balls better but prevent practice swings or ba...

Страница 11: ...TRUGOLF TRUGOLF COM COM...

Отзывы: